Salesbricks uses Entri to make connecting your domain quick and easy. All you need is your DNS provider login information, and you can complete the setup without leaving the Salesbricks dashboard.
Entri supports most common DNS providers, so it's very likely your provider is compatible. However, if your provider isn’t detected, feel free to contact Salesbricks support for manual setup assistance.
See the full list of DNS providers that Entri supports.
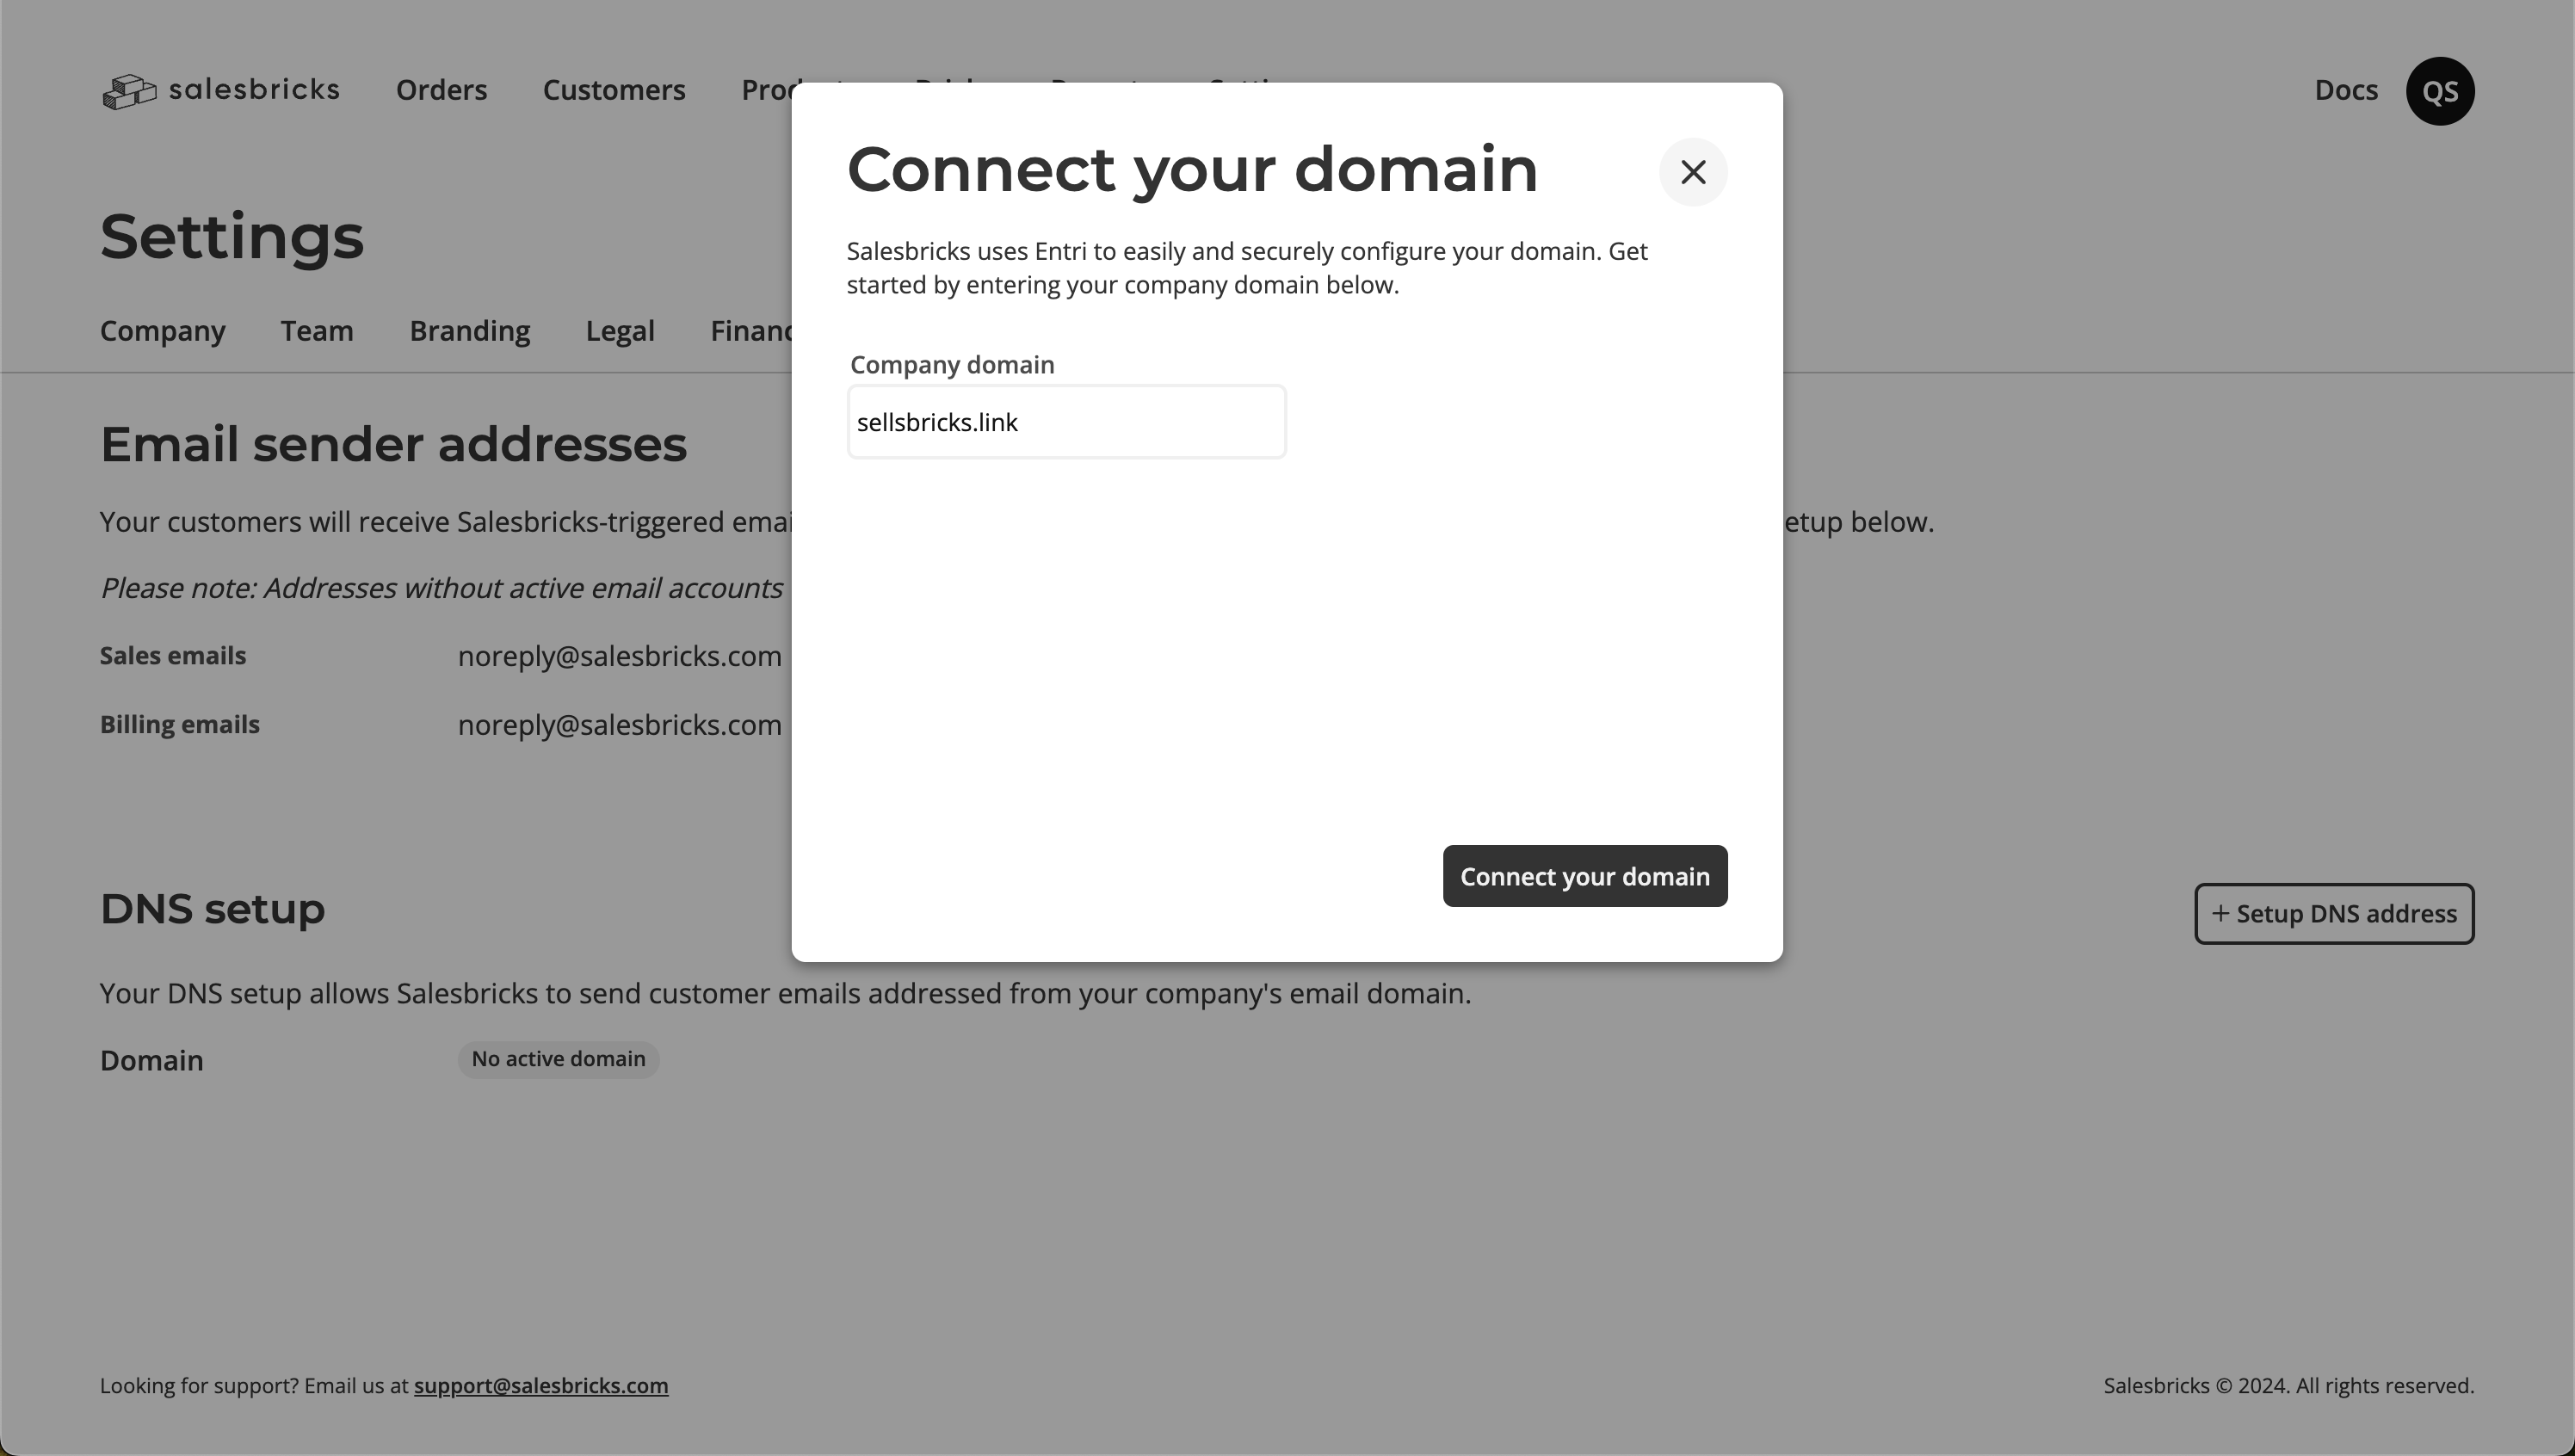
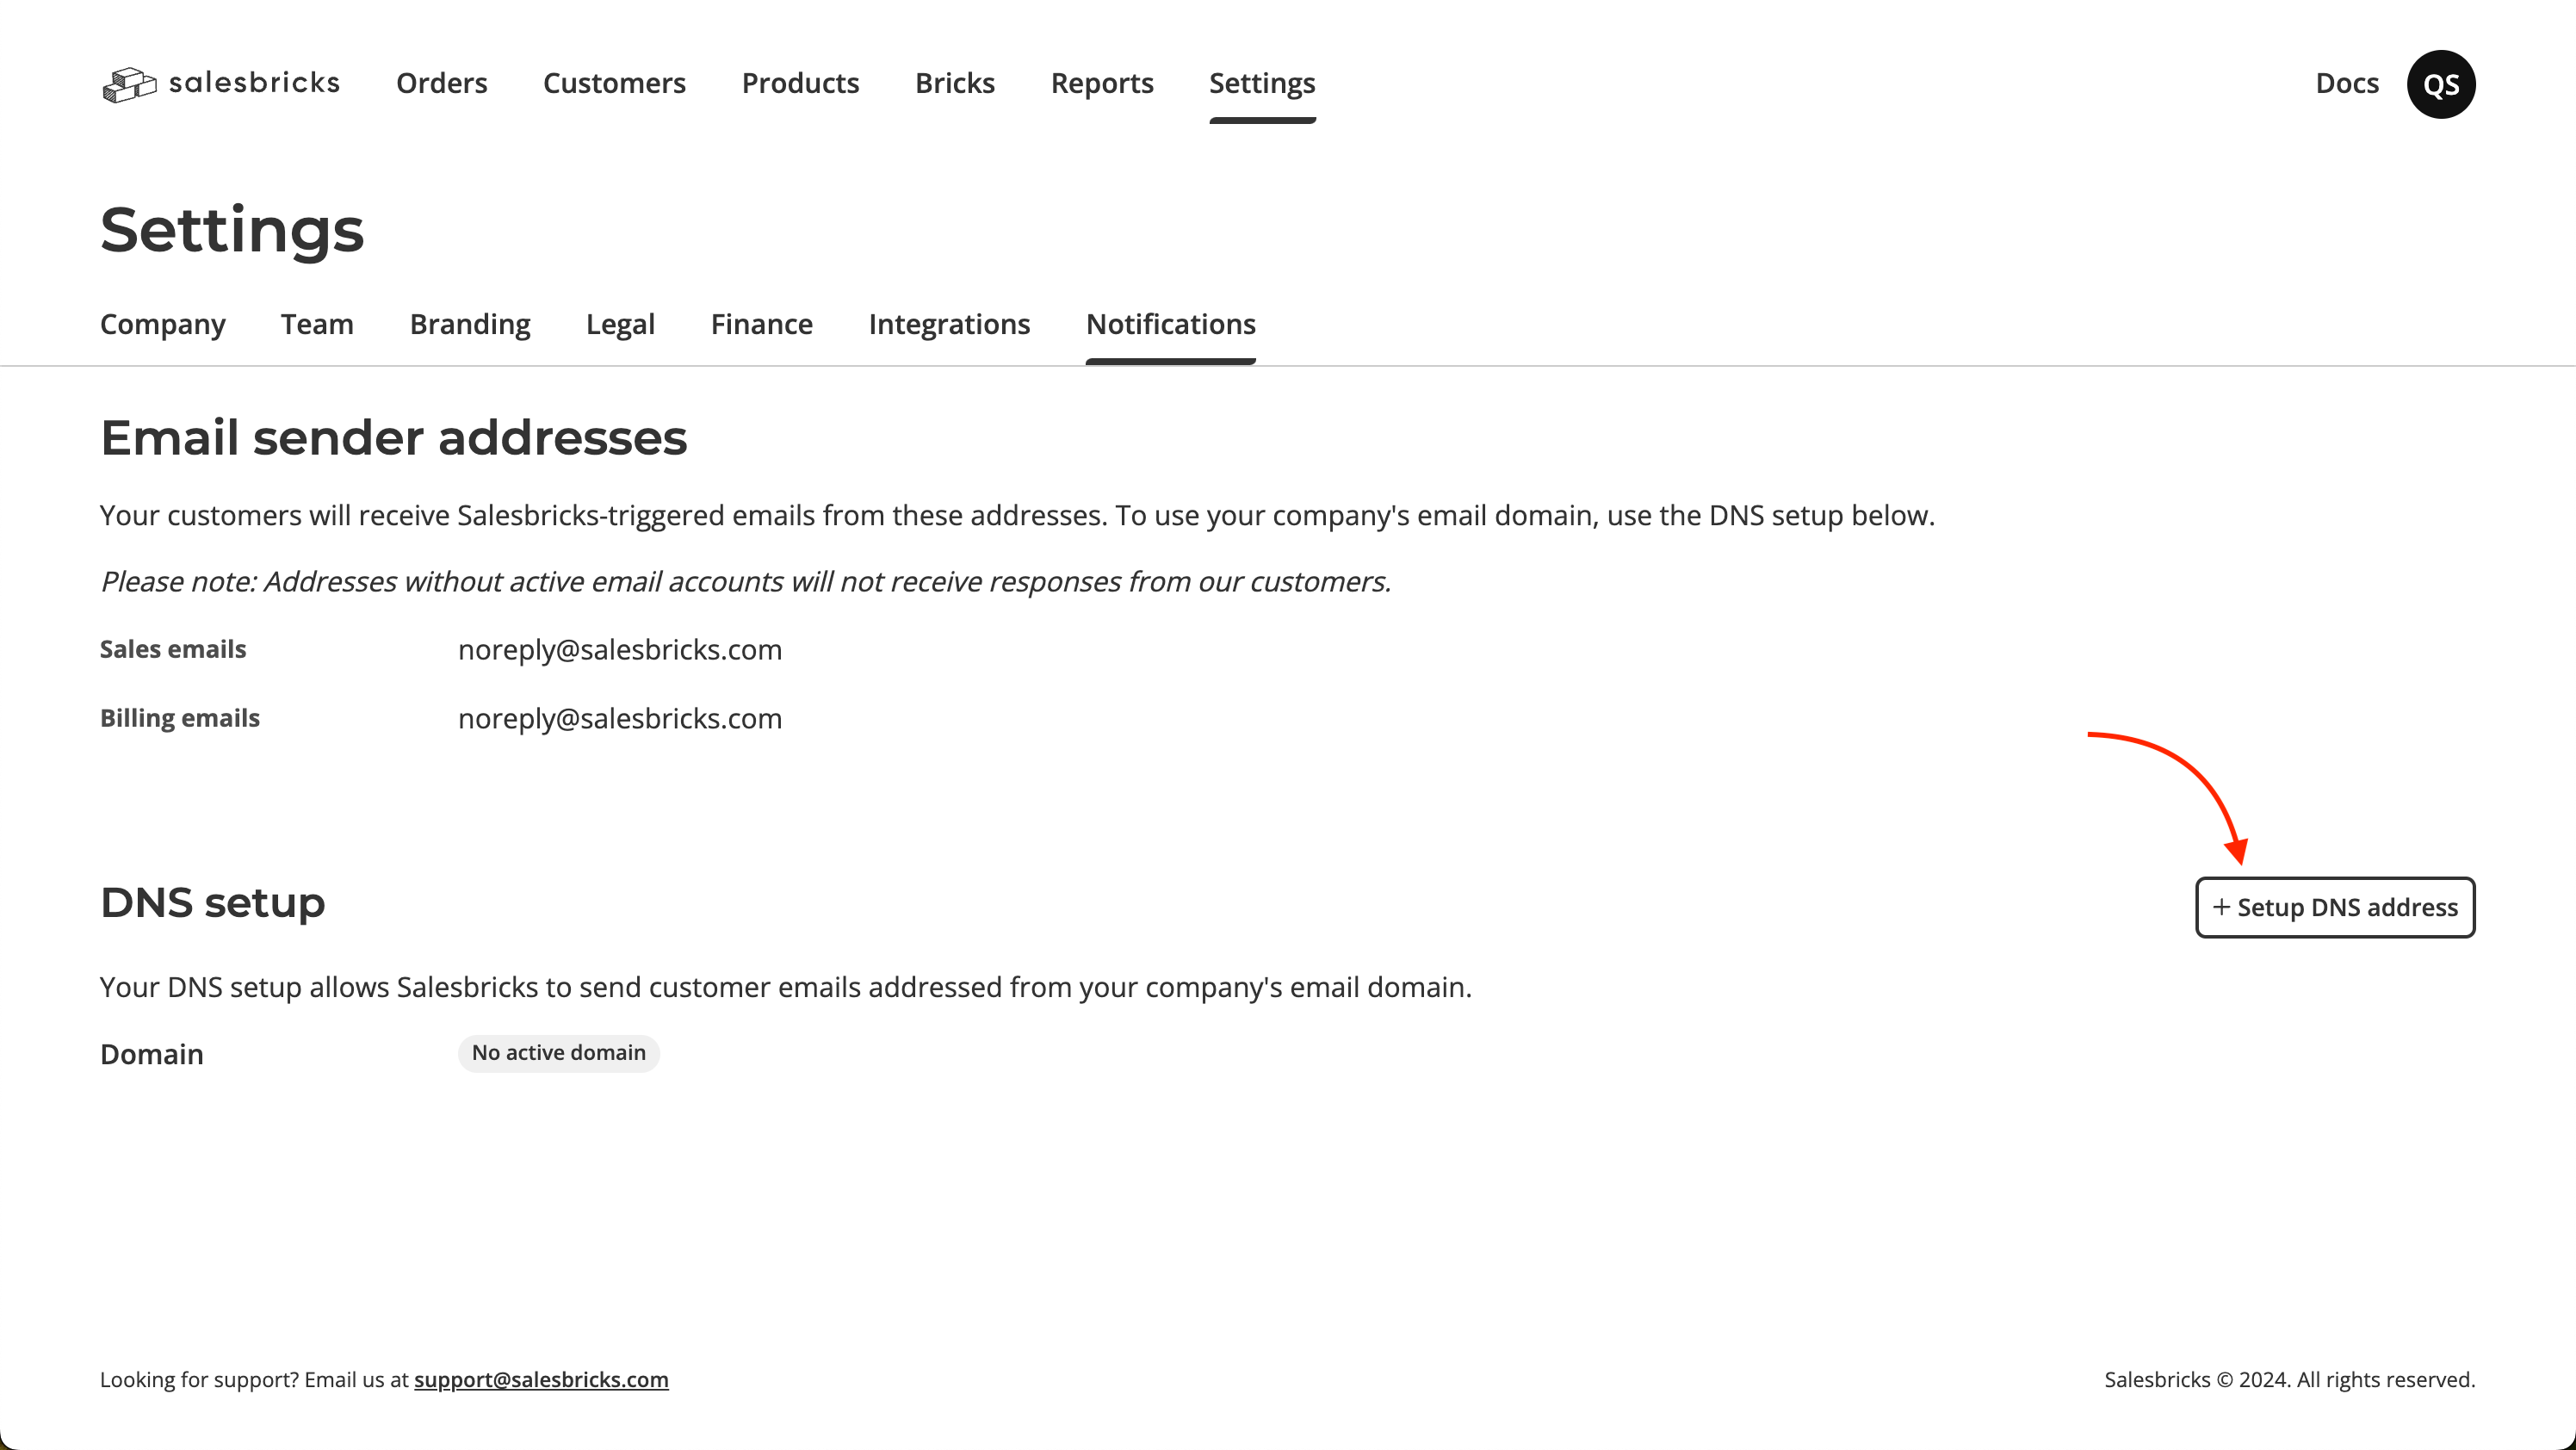 3. Enter your **domain** and click the **Connect your domain** button.
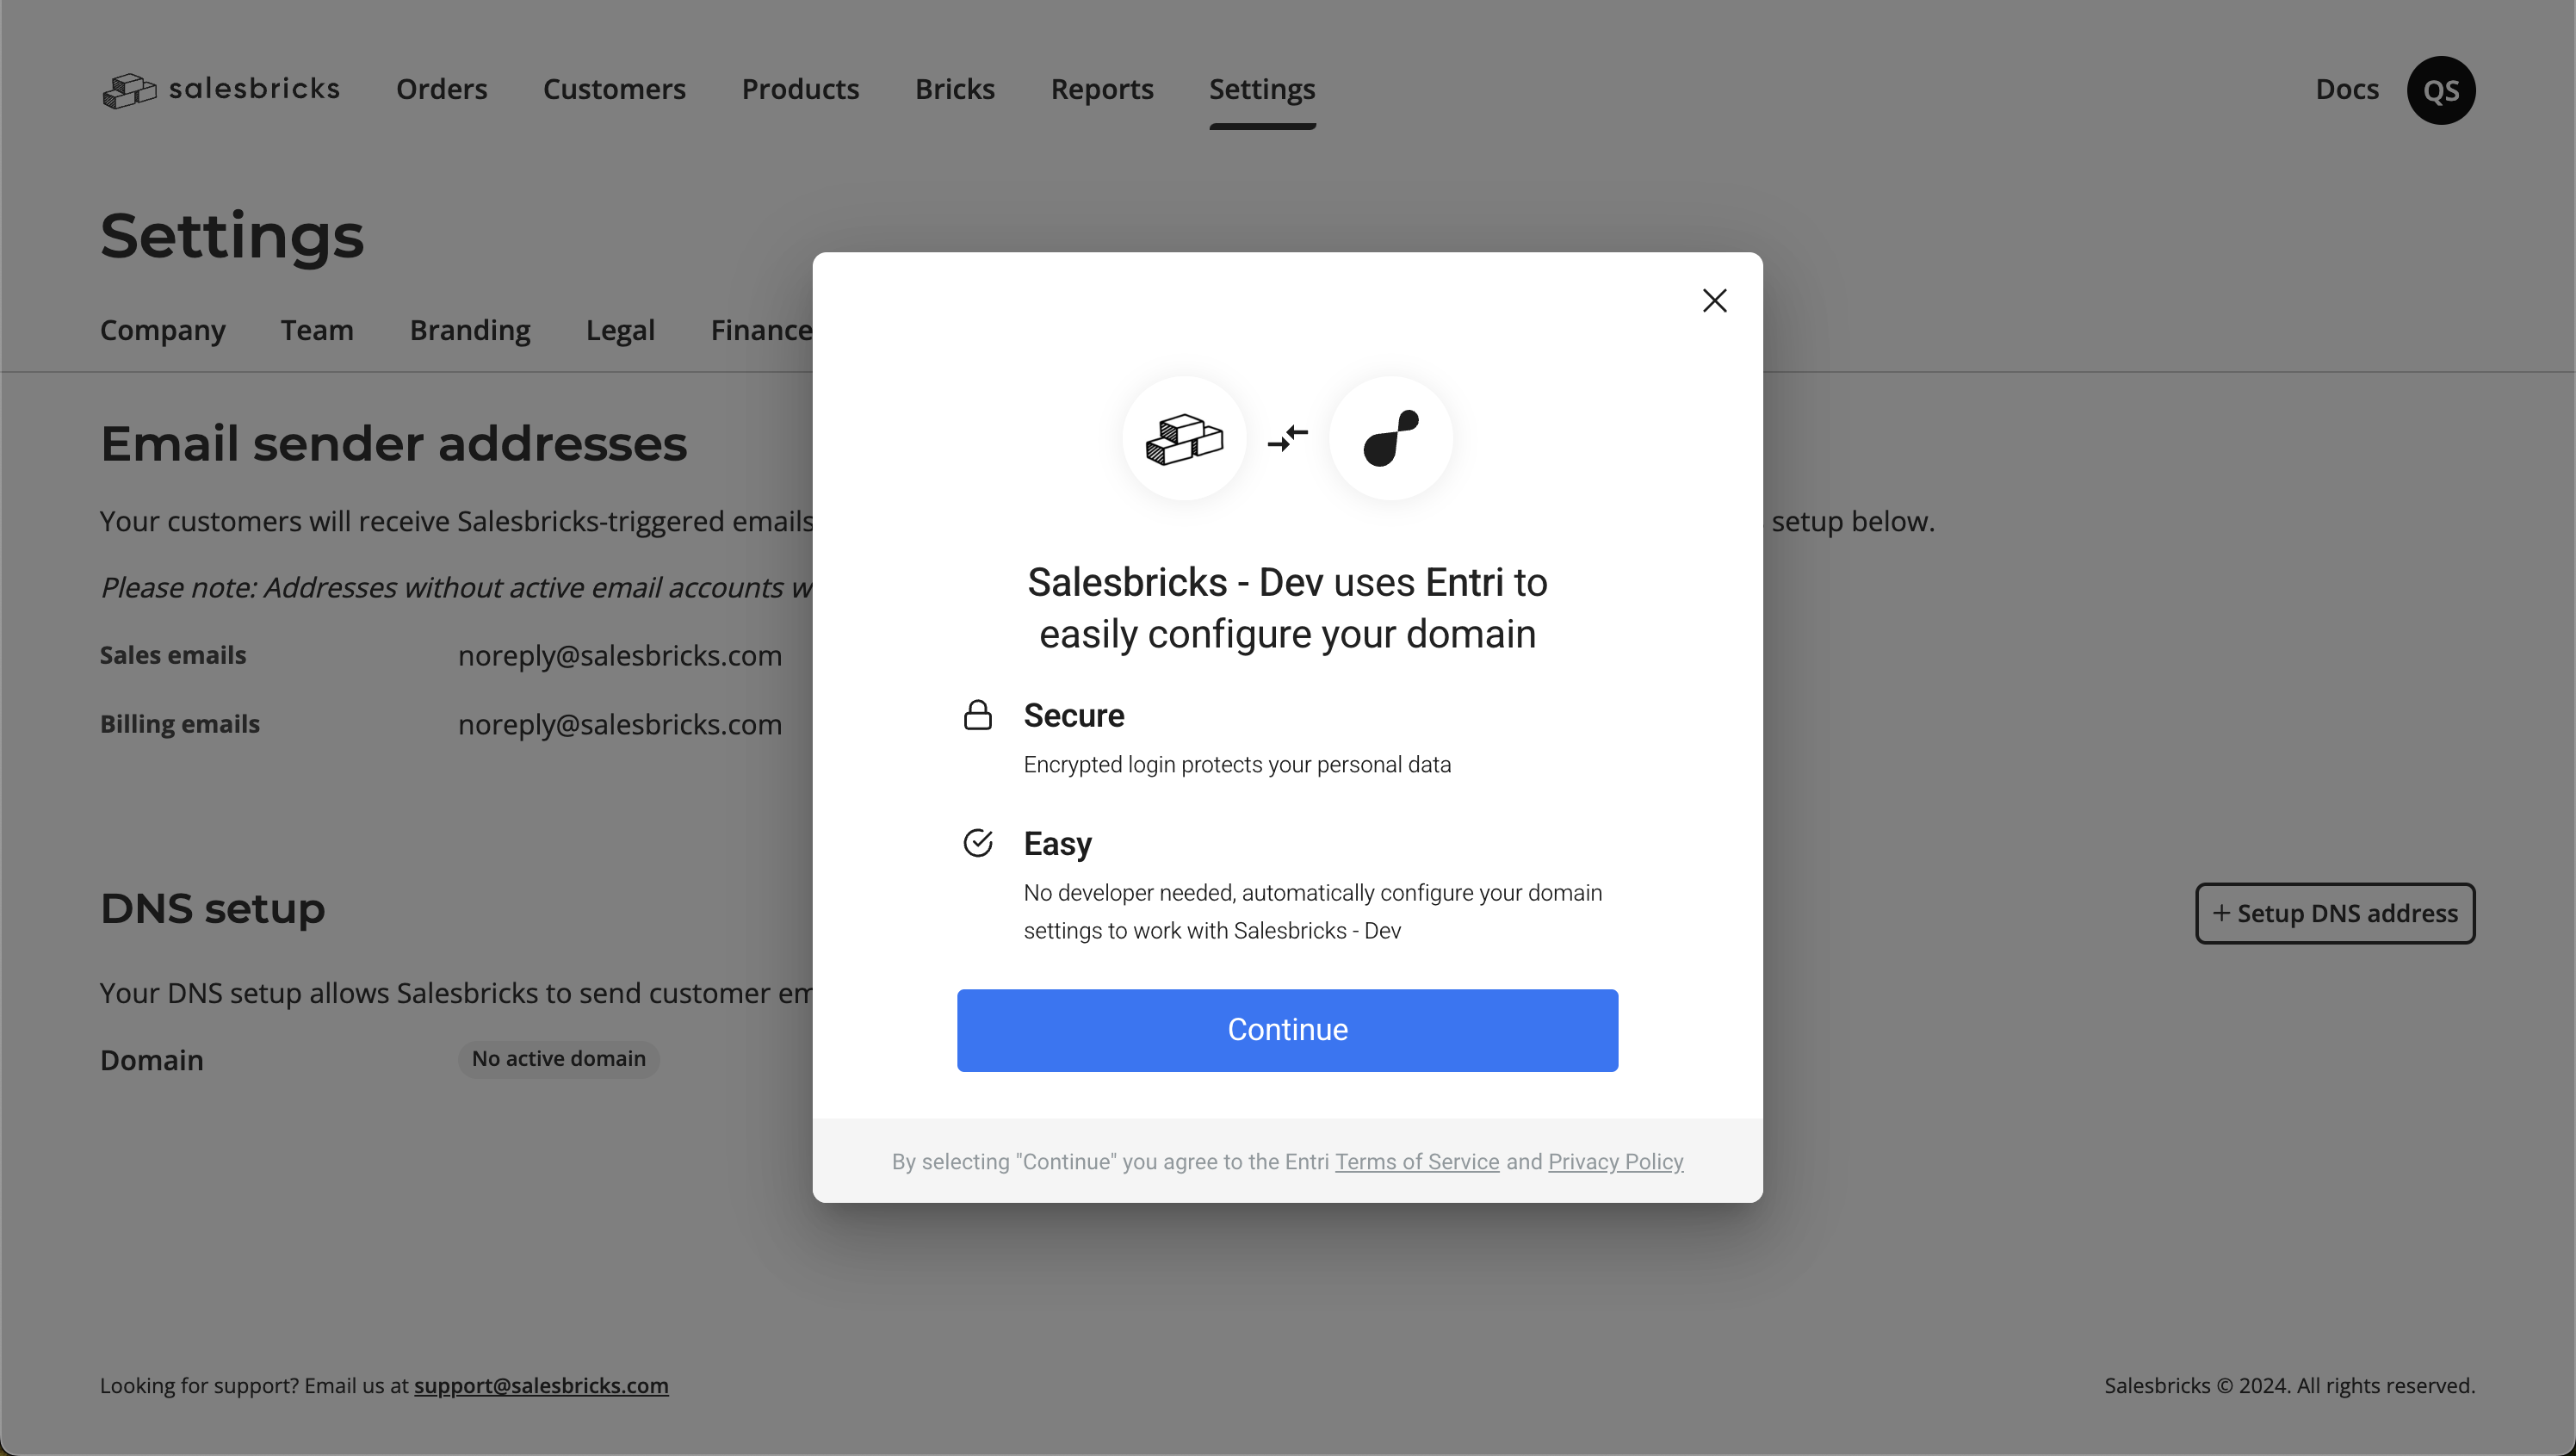
 4. You will be prompted to continue.
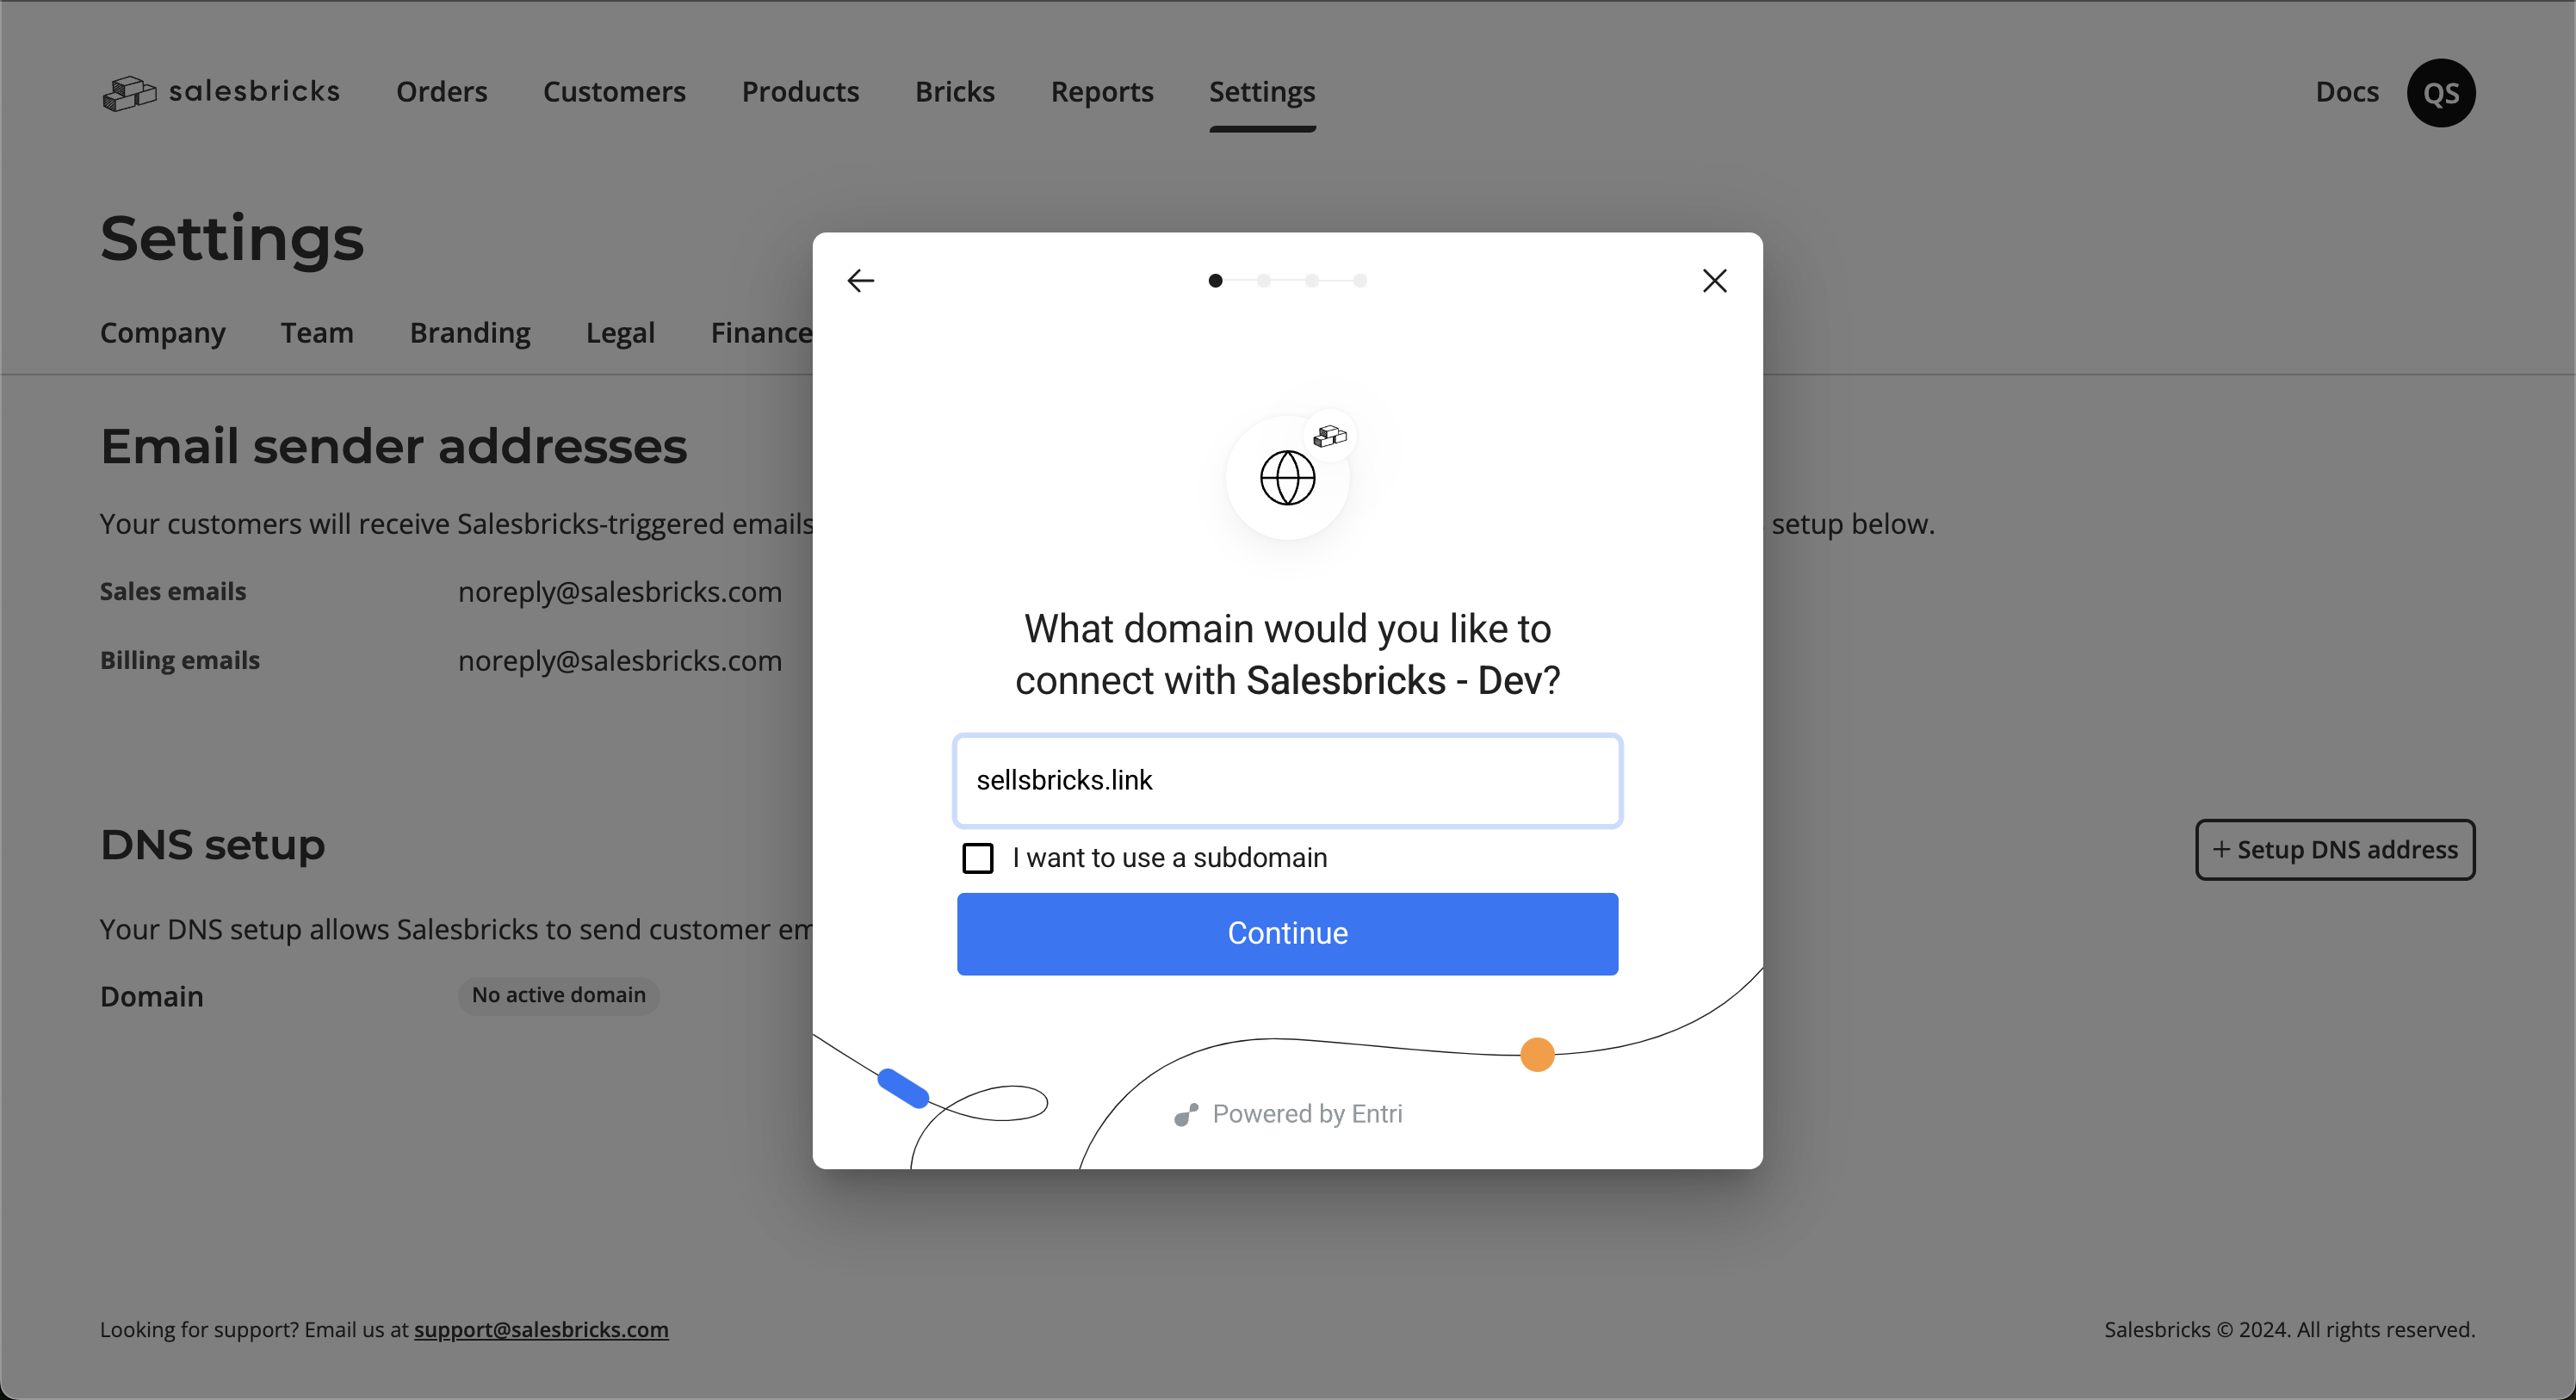
 5. Re-enter your **domain** and click the **Continue** button.
 6. Entri will try automatically detect your DNS provider. Otherwise, you will be asked to select your DNS provider to log in.
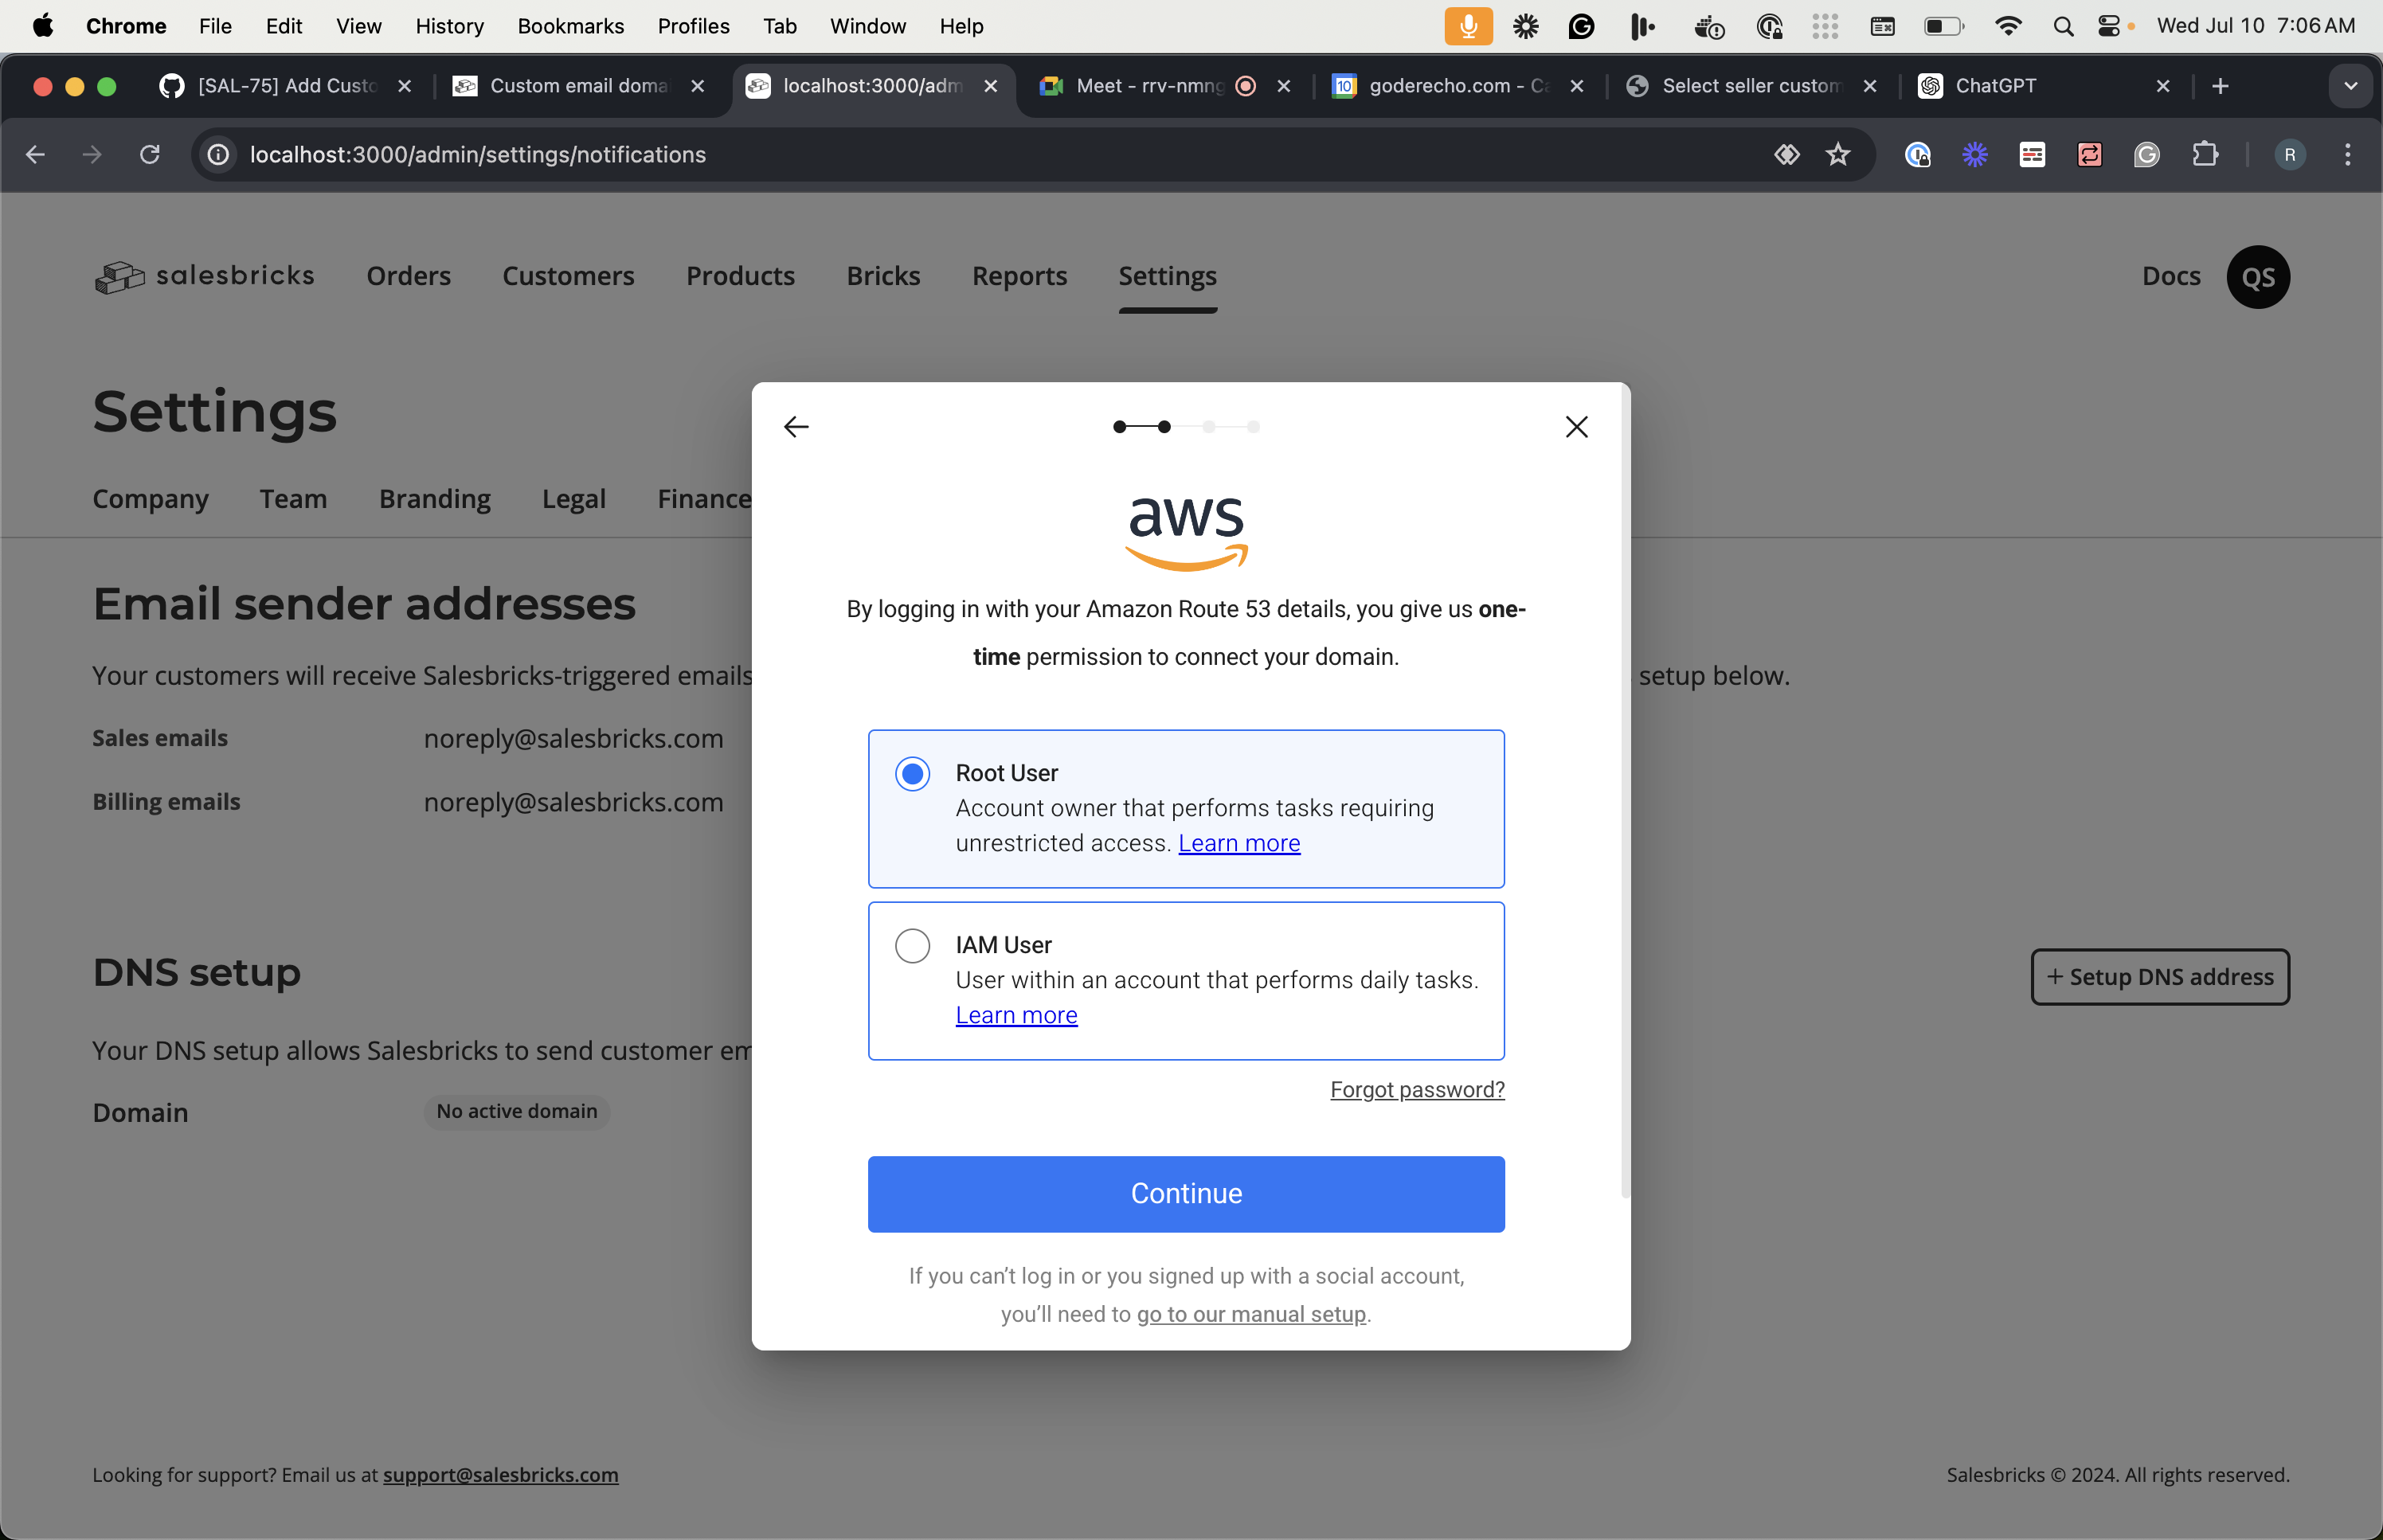
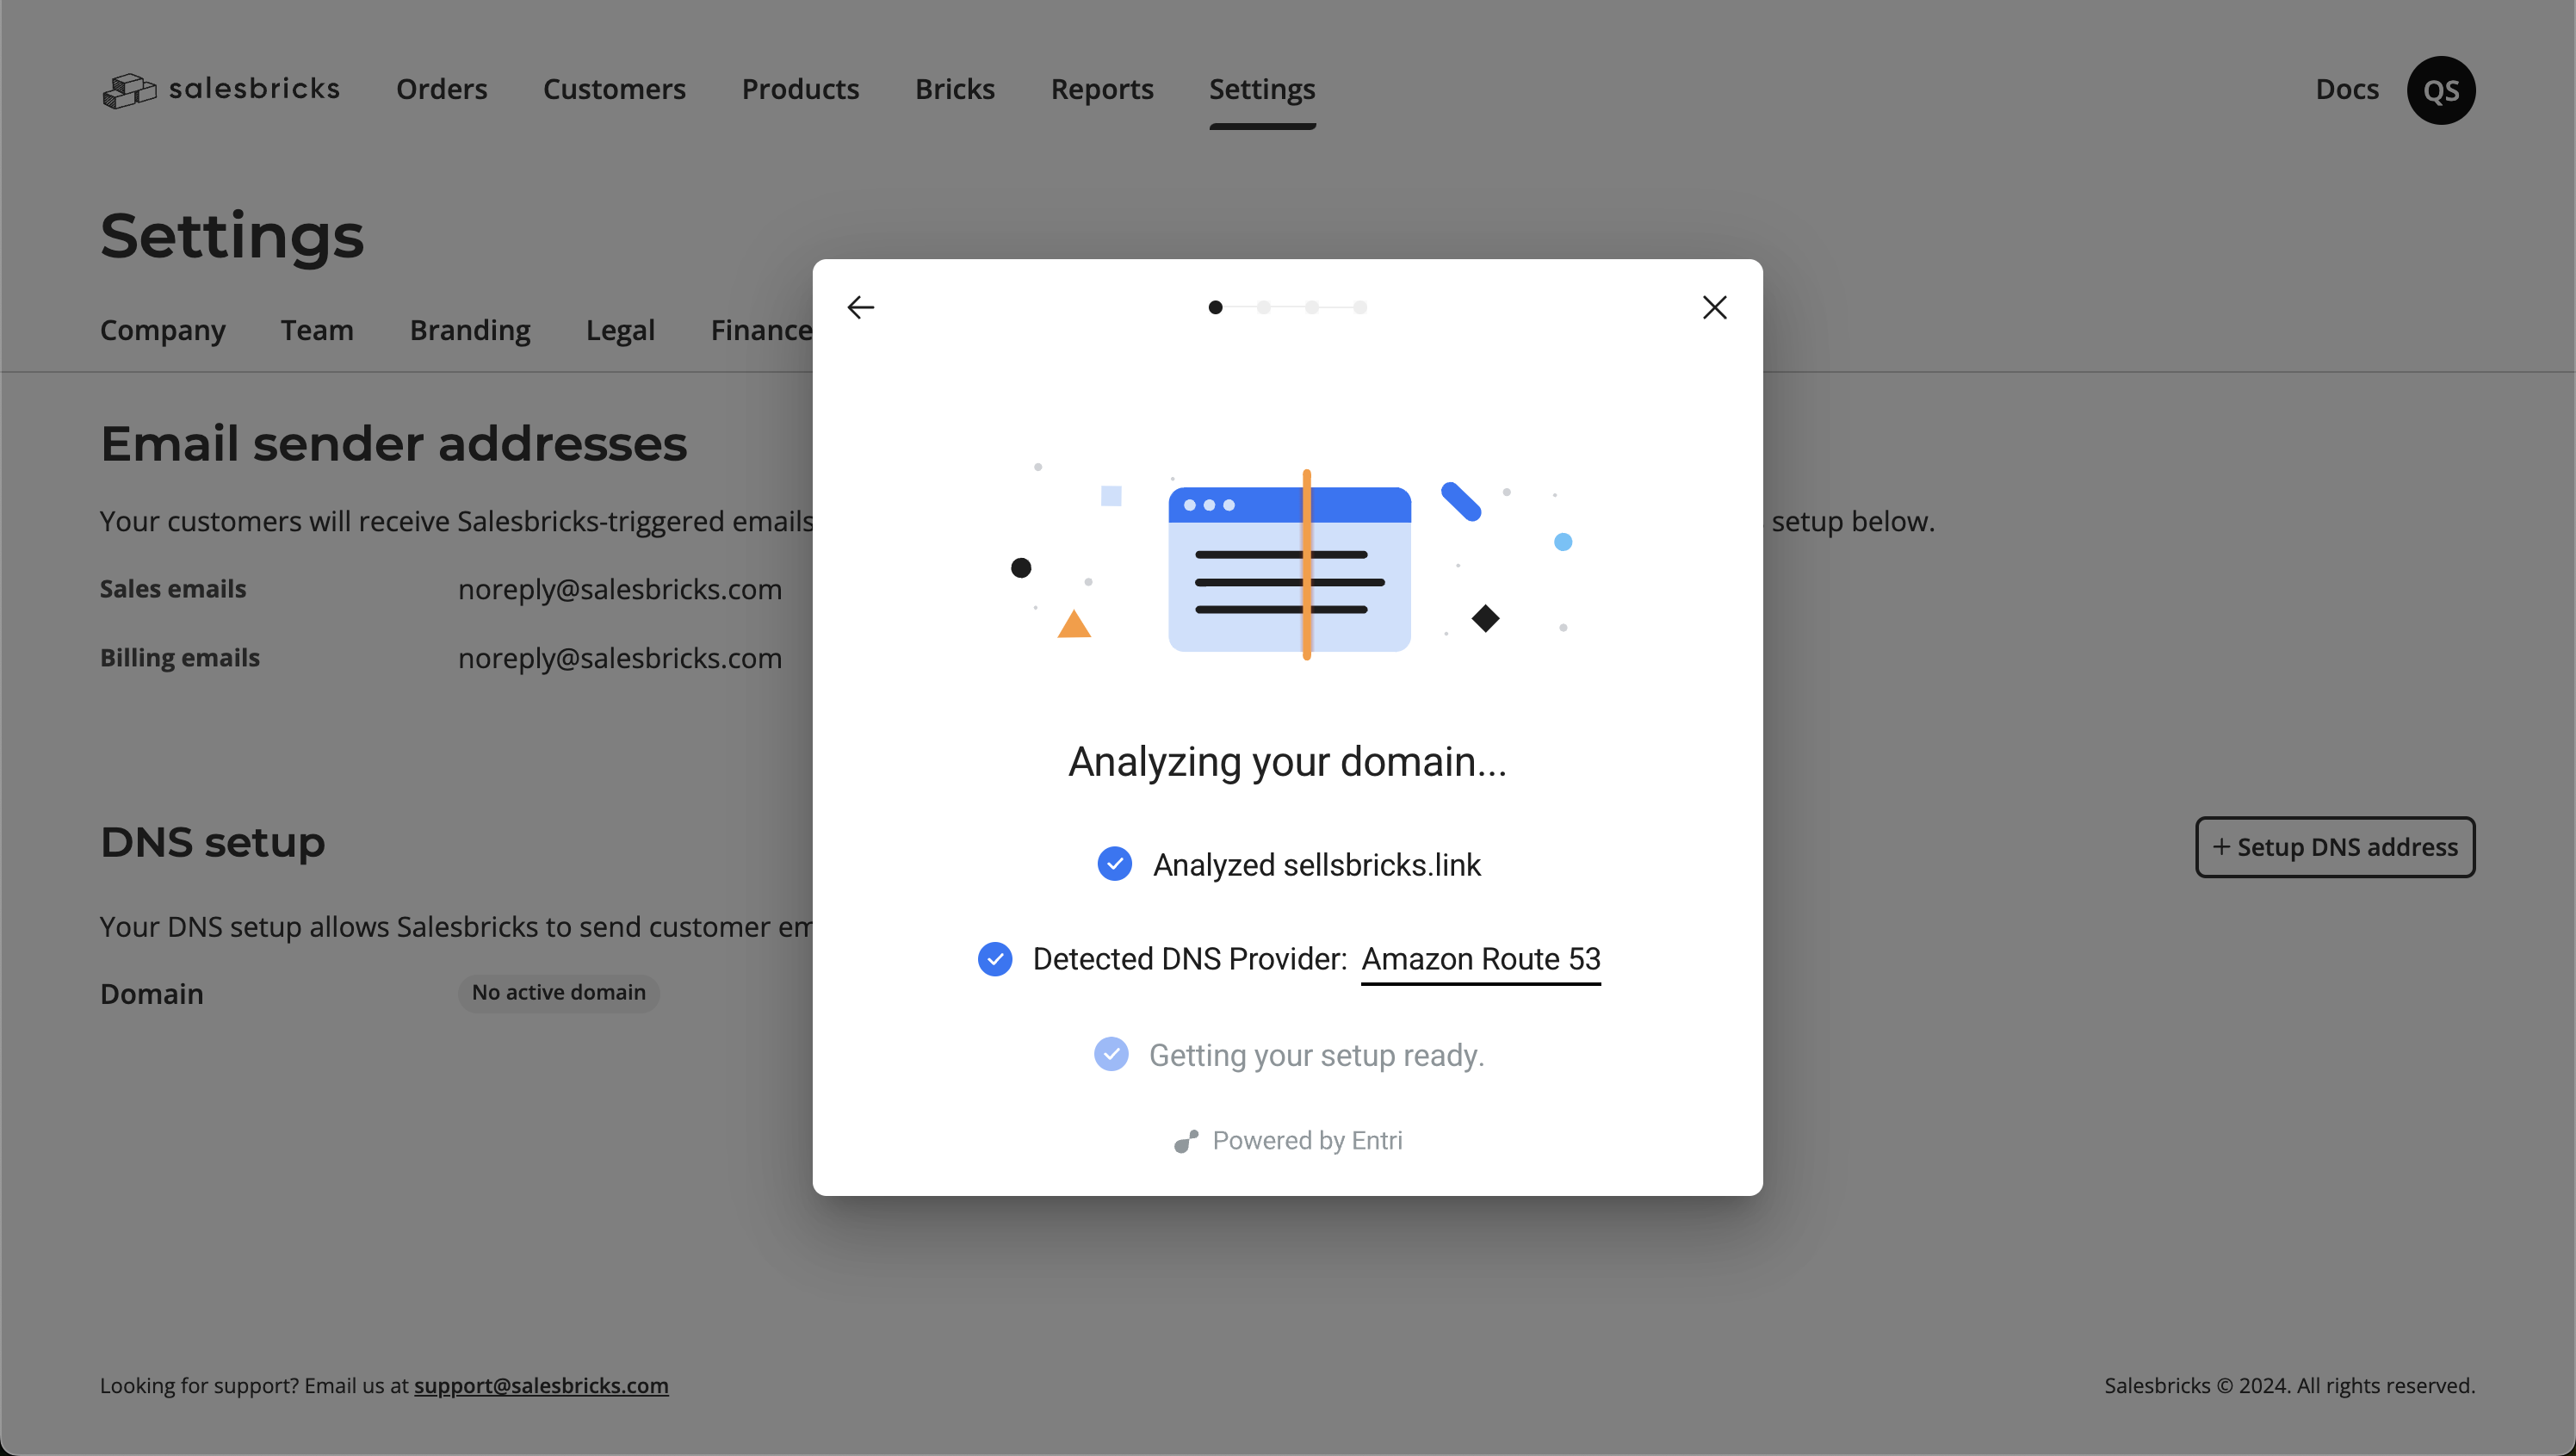 7. Log in to your provider to provide **one-time** permission to connect your domain.
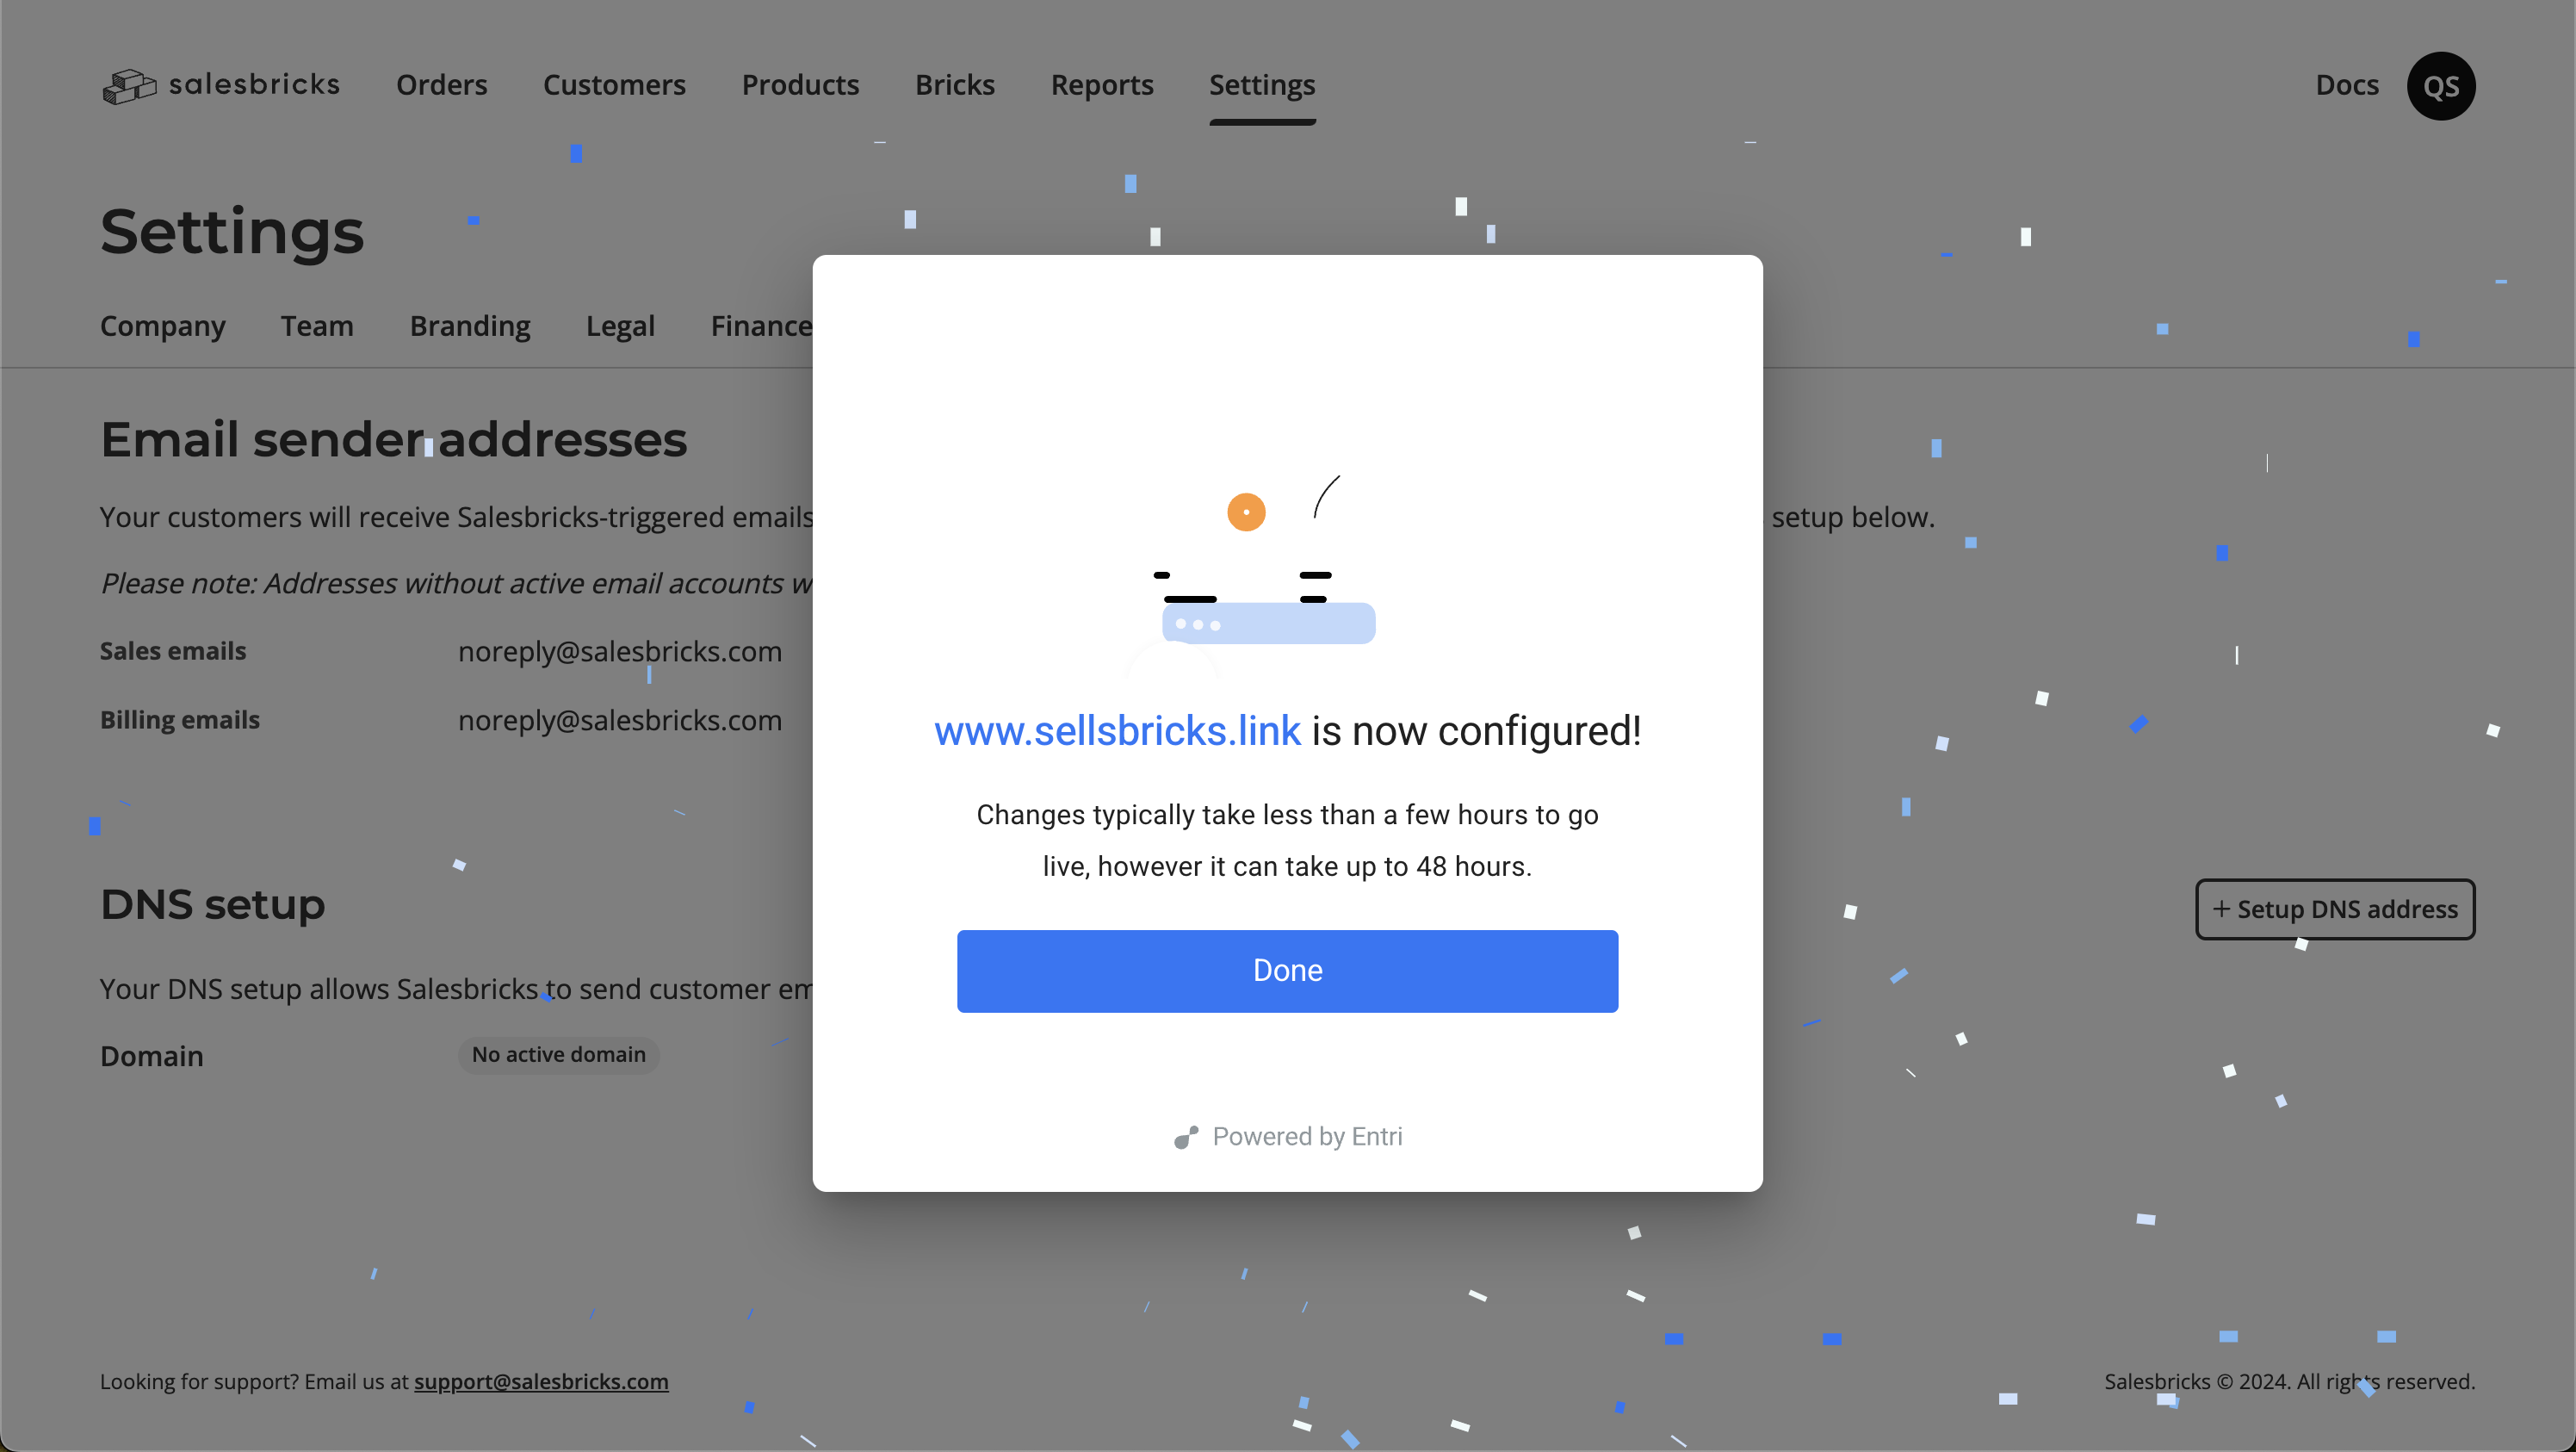
 8. Once done, the modal should close and you will see the status of your domain.
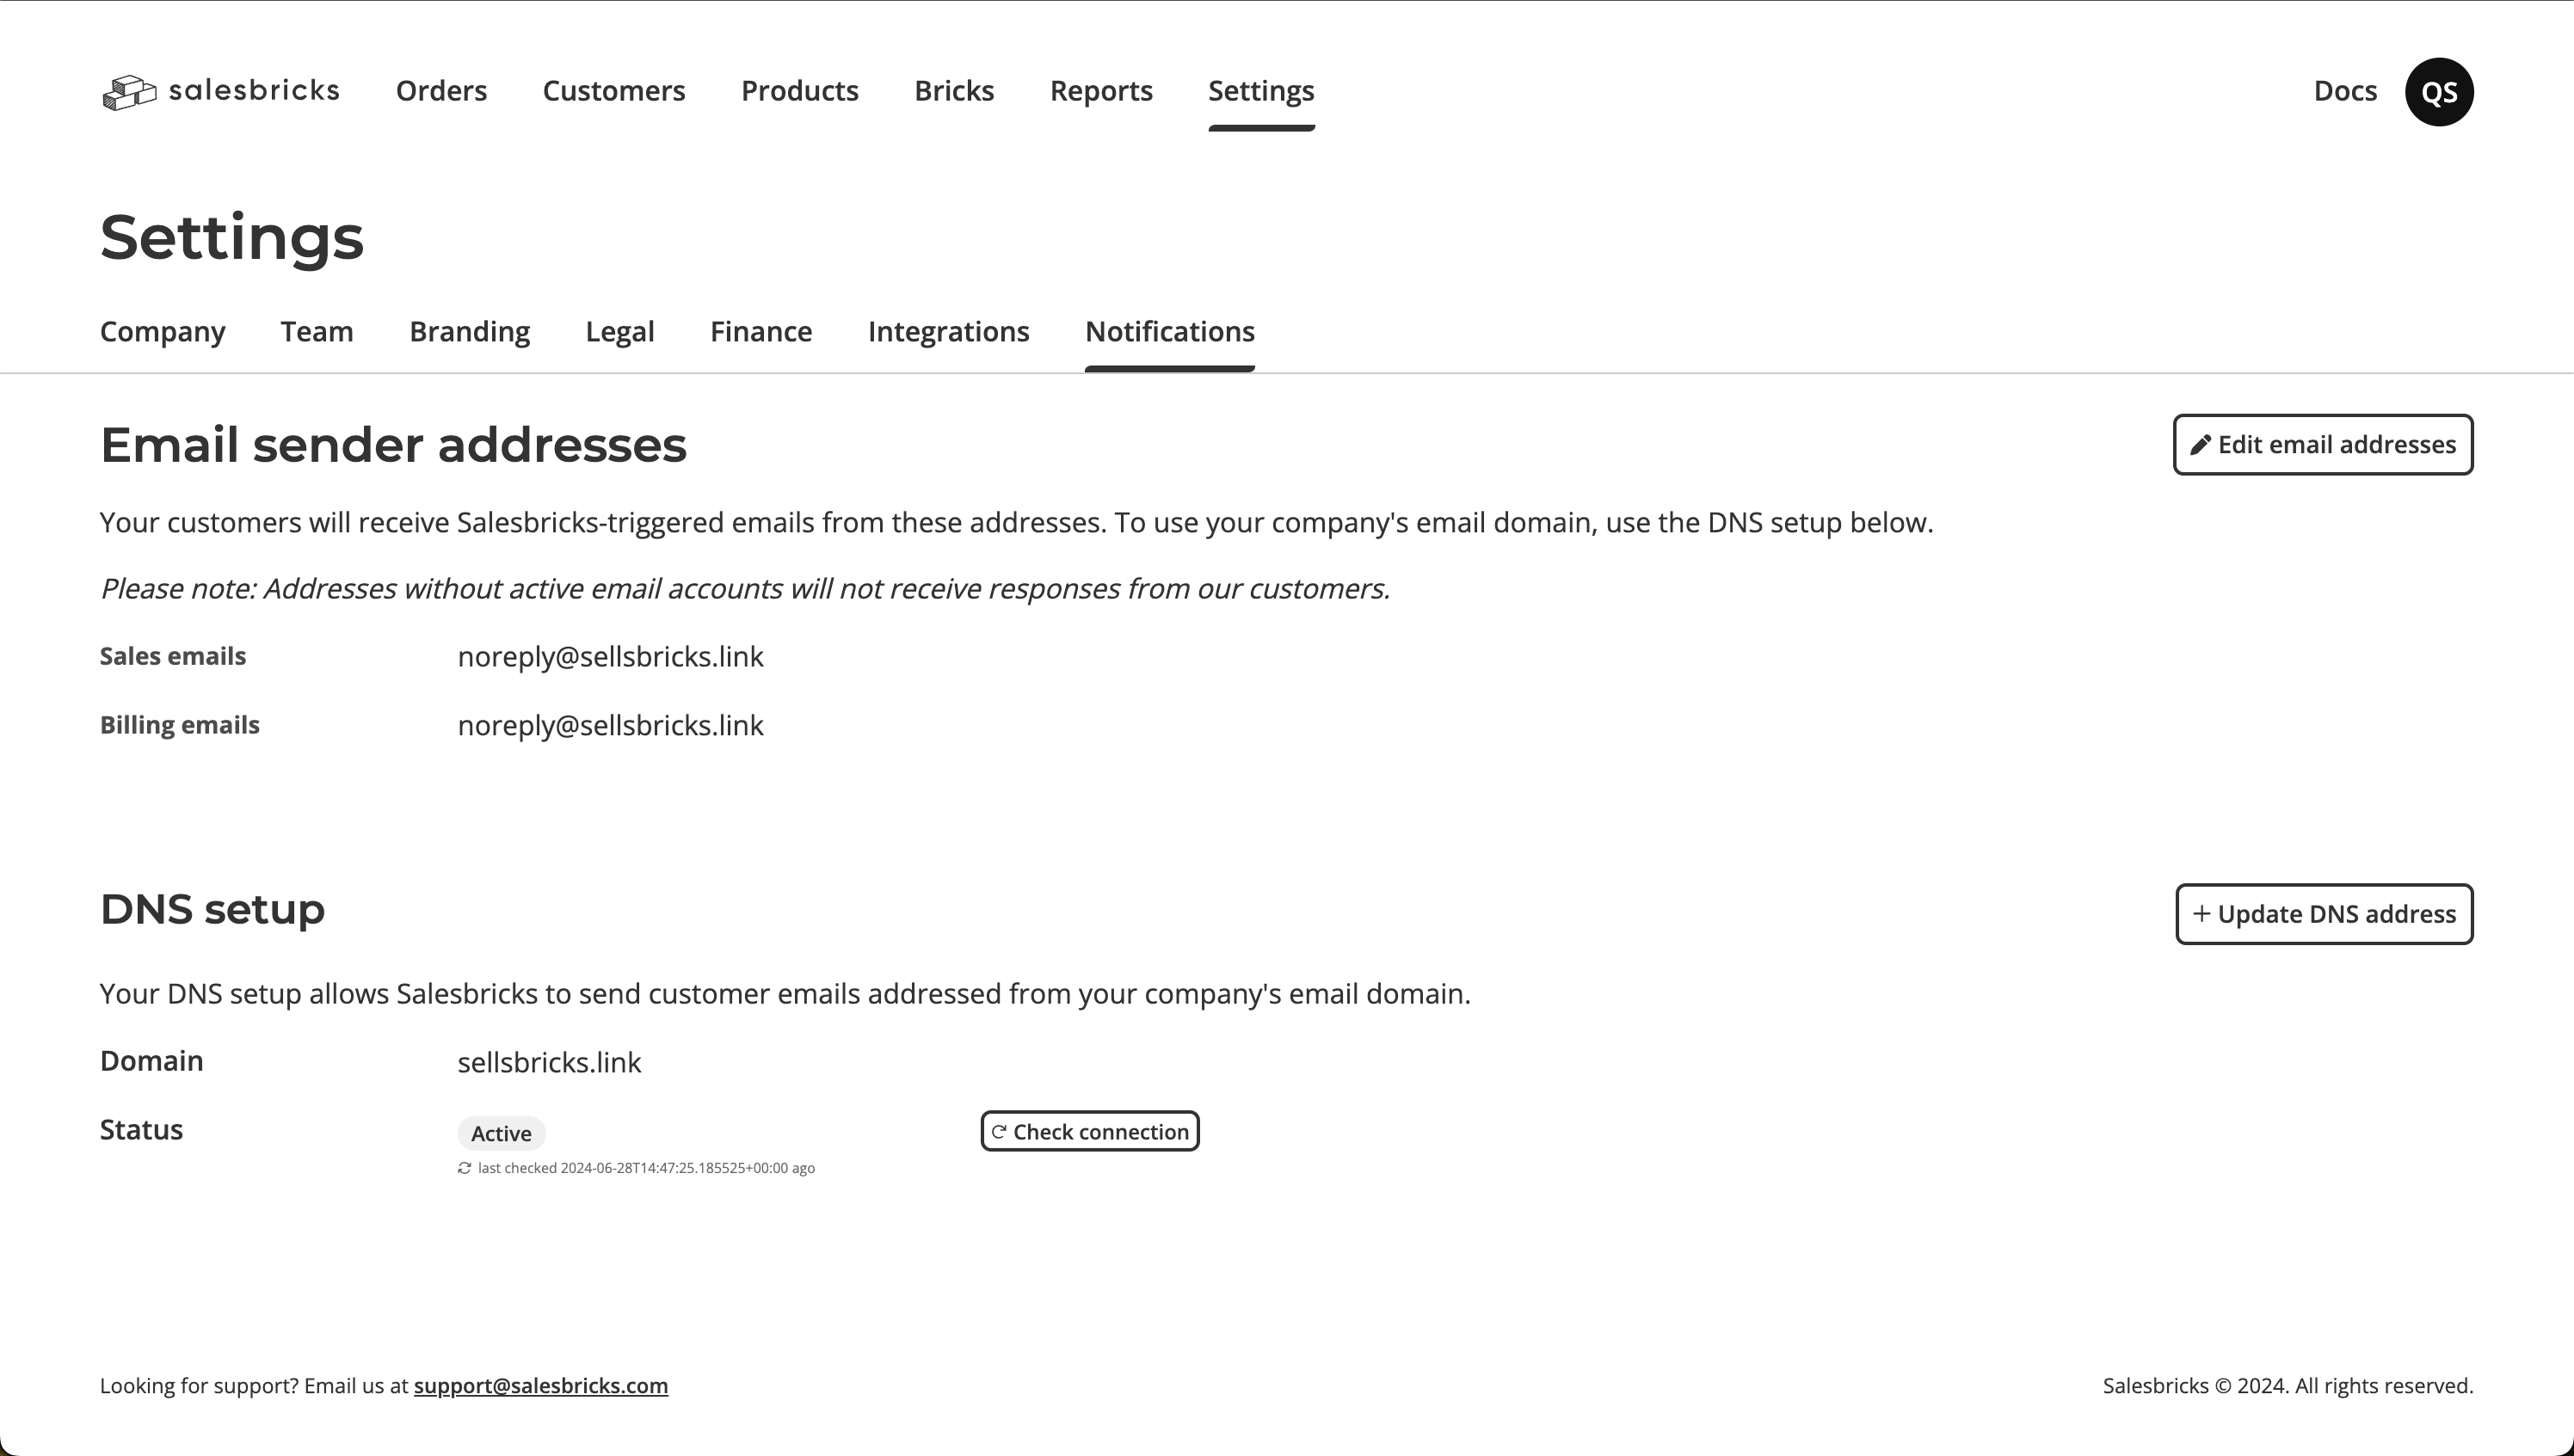
 ### DNS setup verification
To allow Salesbricks to send emails on your behalf, the following sample CNAME entries will be automatically added to your DNS records:
| Type | Host | Value | TTL |
| ----- | -------------------------- | --------------------------------------- | --- |
| CNAME | em1234.example.com | u123456.wl123.sendgrid.net | 300 |
| CNAME | s1.\_domainkey.example.com | s1.domainkey.u123456.wl123.sendgrid.net | 300 |
| CNAME | s2.\_domainkey.example.com | s2.domainkey.u123456.wl123.sendgrid.net | 300 |
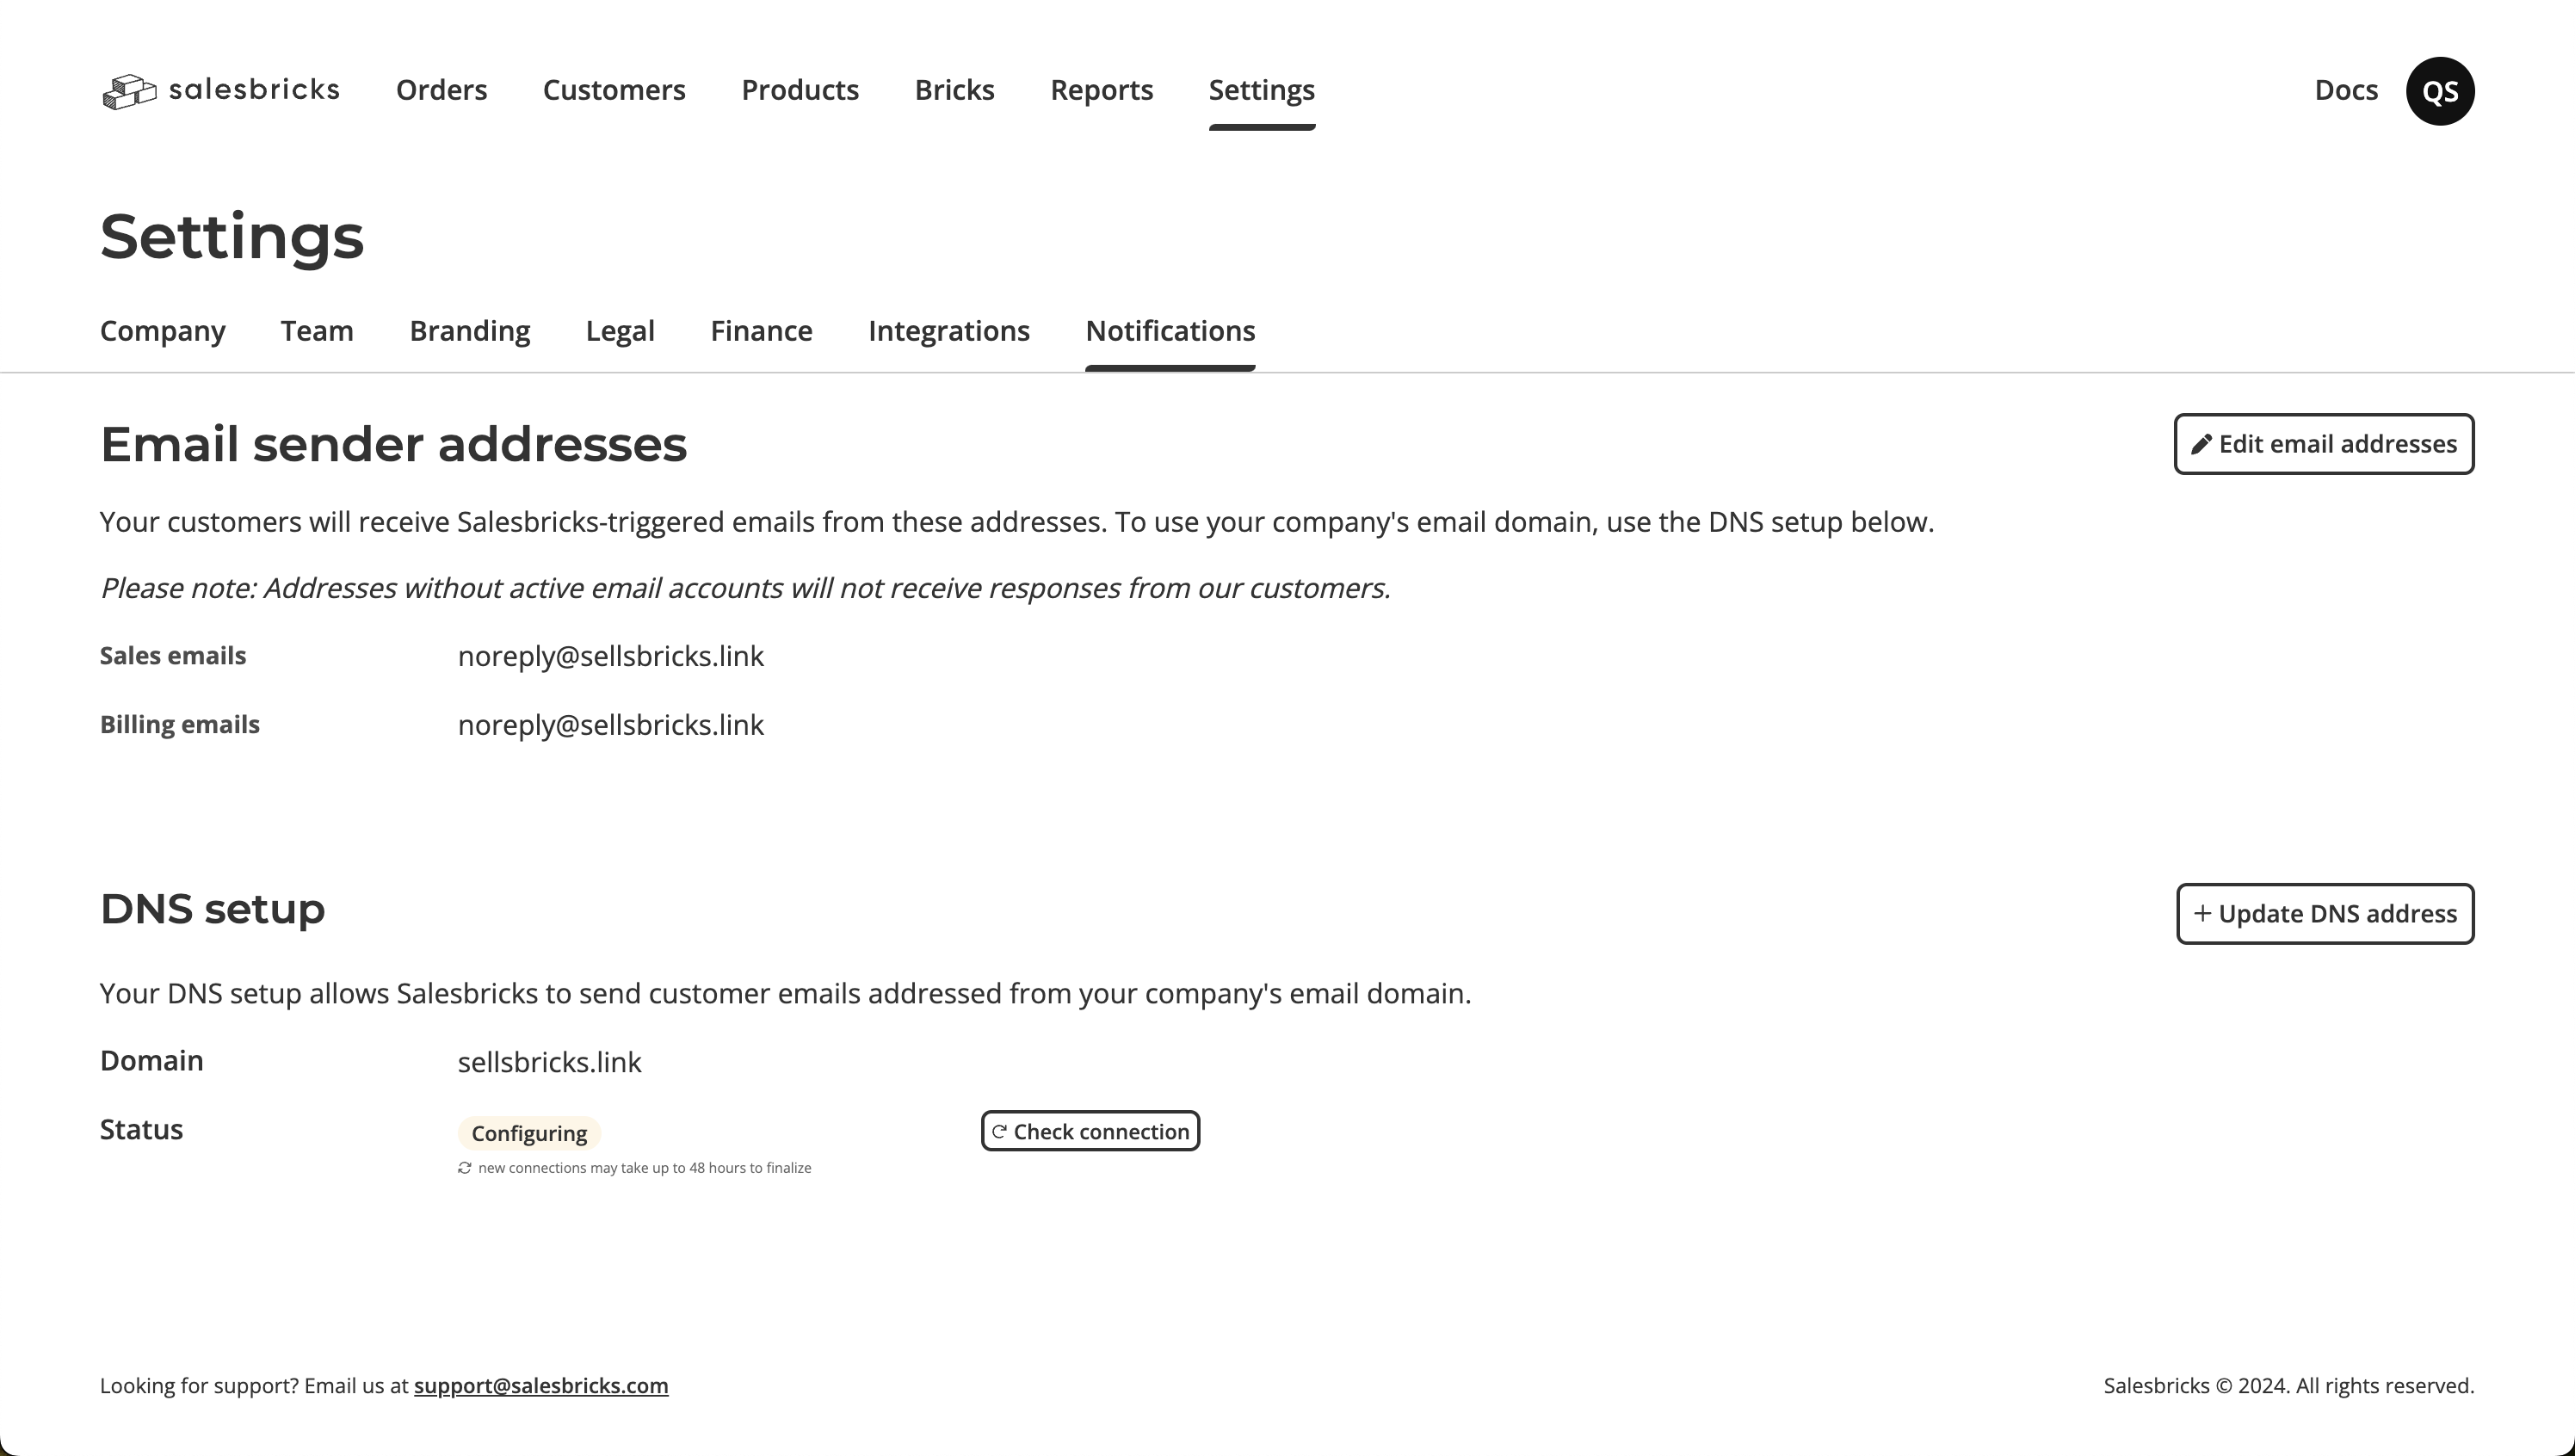
If the verification is not successful and your domain status is still not **Active**, try clicking the **Check Connection** button again.
### DNS setup verification
To allow Salesbricks to send emails on your behalf, the following sample CNAME entries will be automatically added to your DNS records:
| Type | Host | Value | TTL |
| ----- | -------------------------- | --------------------------------------- | --- |
| CNAME | em1234.example.com | u123456.wl123.sendgrid.net | 300 |
| CNAME | s1.\_domainkey.example.com | s1.domainkey.u123456.wl123.sendgrid.net | 300 |
| CNAME | s2.\_domainkey.example.com | s2.domainkey.u123456.wl123.sendgrid.net | 300 |
If the verification is not successful and your domain status is still not **Active**, try clicking the **Check Connection** button again.
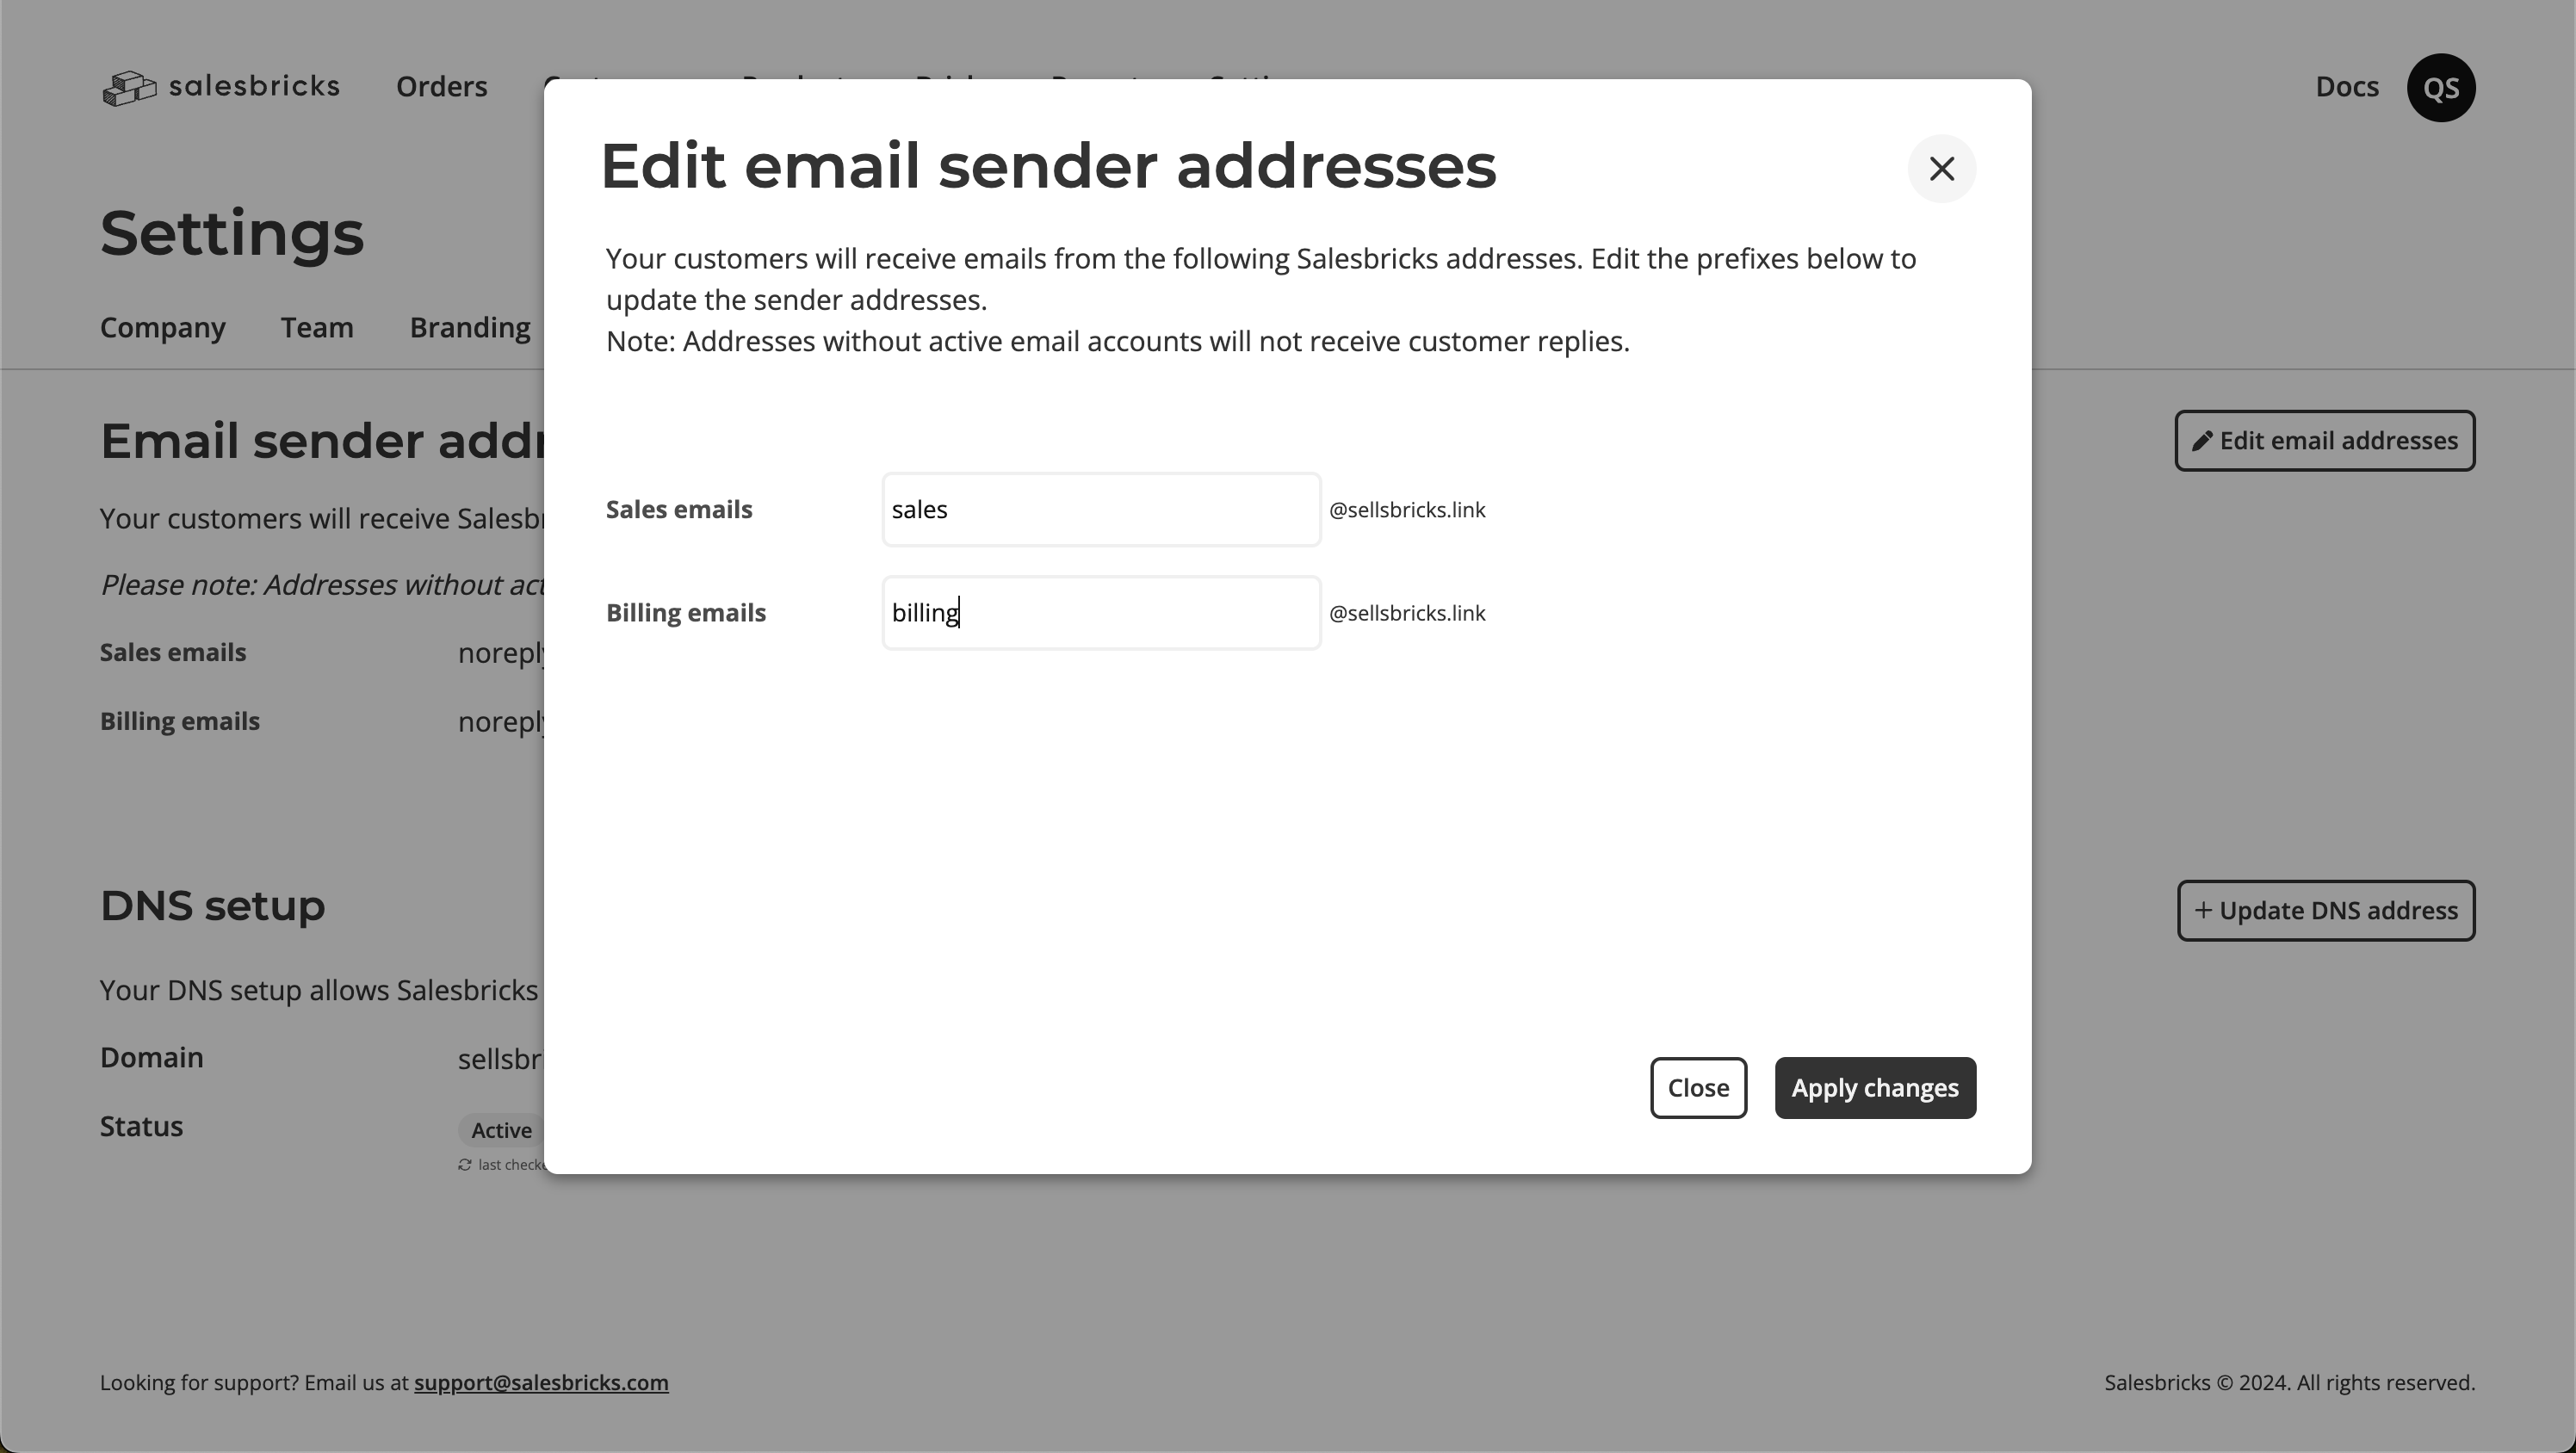
 3. Enter your preferred **sales** username.
4. Enter your preferred **billing** username.
5. Click the **Apply changes** button and close the modal.
3. Enter your preferred **sales** username.
4. Enter your preferred **billing** username.
5. Click the **Apply changes** button and close the modal.
 ## Customer emails
Now that you've set up both your domain and, optionally, the email sender address you want to use, everything should be seamless.
If Salesbricks detects an issue with your domain, you will see a banner notification when you log in to your dashboard. All customer emails will fallback to `noreply@salesbricks.com` until the issue is resolved, ensuring no notifications are missed.
In the [next section](/documentation/customer-email-notifications), you will find a comprehensive list of customer emails that Salesbricks sends on your behalf.
All emails under the Payment and Invoicing category will use the billing sender, while all emails under the Subscription Lifecycle will use the sales sender.
Emails sent to you and your team will continue to come from `noreply@salesbricks.com`.
| Email Sender | Email Category |
| ------------ | -------------------------------------------------------------------------------------------- |
| Billing | [Payment](/documentation/customer-email-notifications#payment) |
| Billing | [Invoicing](/documentation/customer-email-notifications#invoicing) |
| Sales | [Subscription Lifecycle](/documentation/customer-email-notifications#subscription-lifecycle) |
## FAQ
## Customer emails
Now that you've set up both your domain and, optionally, the email sender address you want to use, everything should be seamless.
If Salesbricks detects an issue with your domain, you will see a banner notification when you log in to your dashboard. All customer emails will fallback to `noreply@salesbricks.com` until the issue is resolved, ensuring no notifications are missed.
In the [next section](/documentation/customer-email-notifications), you will find a comprehensive list of customer emails that Salesbricks sends on your behalf.
All emails under the Payment and Invoicing category will use the billing sender, while all emails under the Subscription Lifecycle will use the sales sender.
Emails sent to you and your team will continue to come from `noreply@salesbricks.com`.
| Email Sender | Email Category |
| ------------ | -------------------------------------------------------------------------------------------- |
| Billing | [Payment](/documentation/customer-email-notifications#payment) |
| Billing | [Invoicing](/documentation/customer-email-notifications#invoicing) |
| Sales | [Subscription Lifecycle](/documentation/customer-email-notifications#subscription-lifecycle) |
## FAQ