> ## Documentation Index
> Fetch the complete documentation index at: https://docs.salesbricks.com/llms.txt
> Use this file to discover all available pages before exploring further.
# OIN Configuration Setup
> How to set up Okta Single Sign-On integration
## Supported features
* Single Sign-On (OpenID Connect, IdP-initiated only)
* Automatically creates user accounts in Salesbricks when Single Sign-On is initiated by a member of an organization with an active Okta integration
To enable this feature on your company's Salesbricks account, you will need to work with Salesbricks Support to activate your instance.
## Prerequisites
The Salesbricks app is available to download via the [Okta Integration Network](https://www.okta.com/integrations/salesbricks/).
To enable the Okta Single Sign-On integration, please reach out to Salesbricks Support.
## Setup
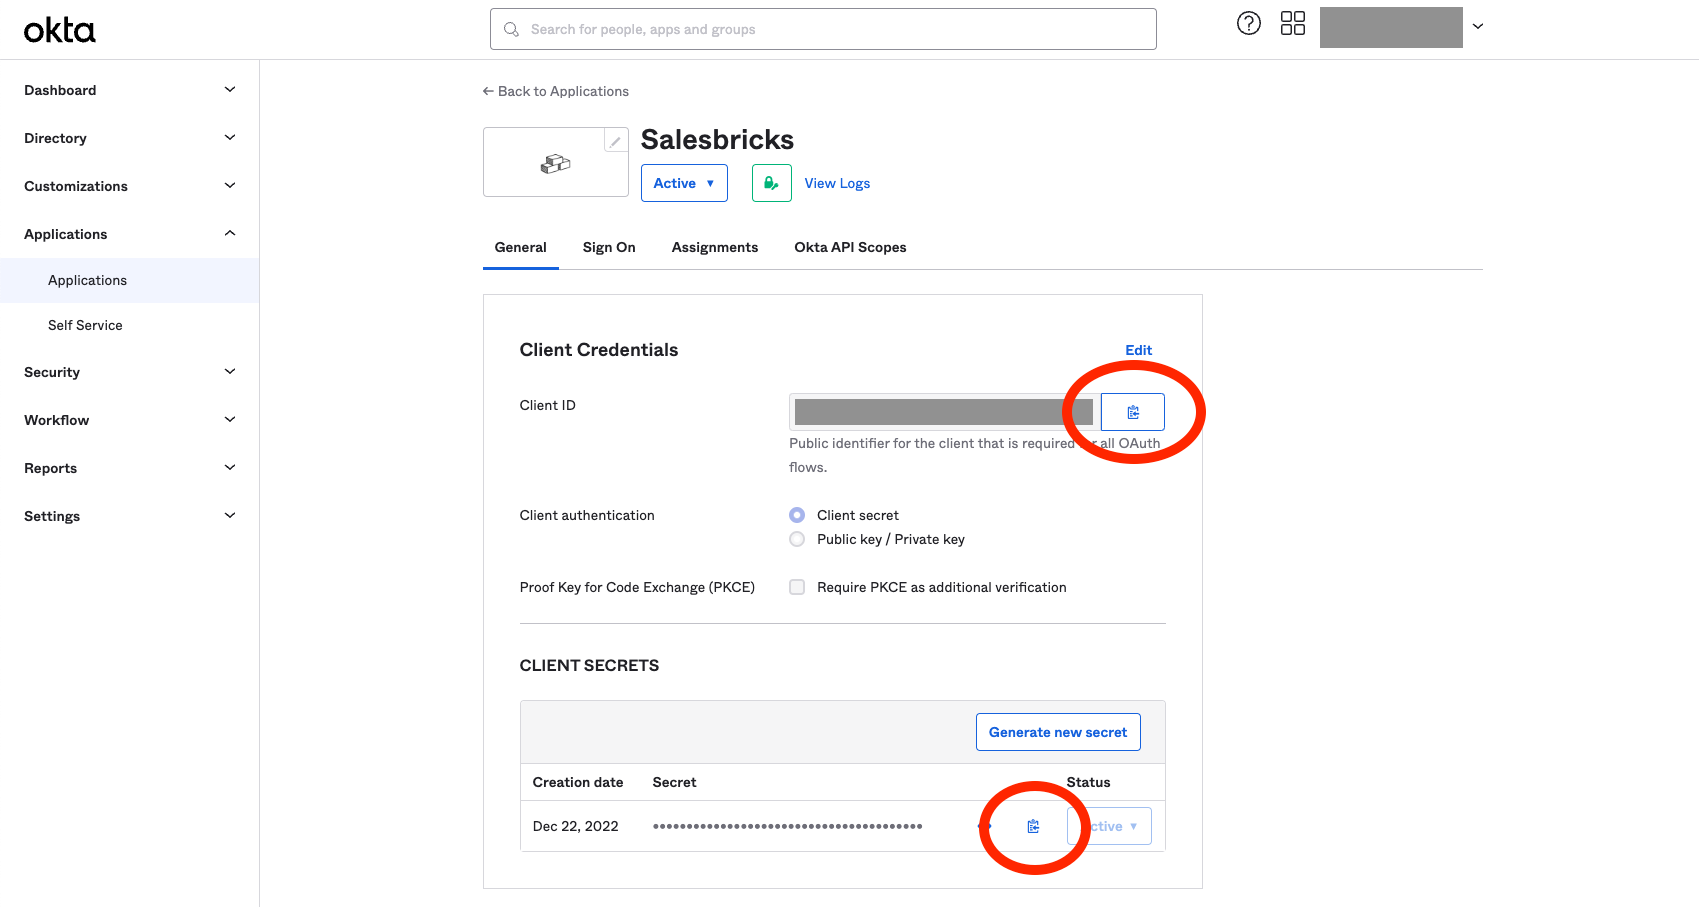
After installing the application, you will need to obtain some information to send to Salesbricks.
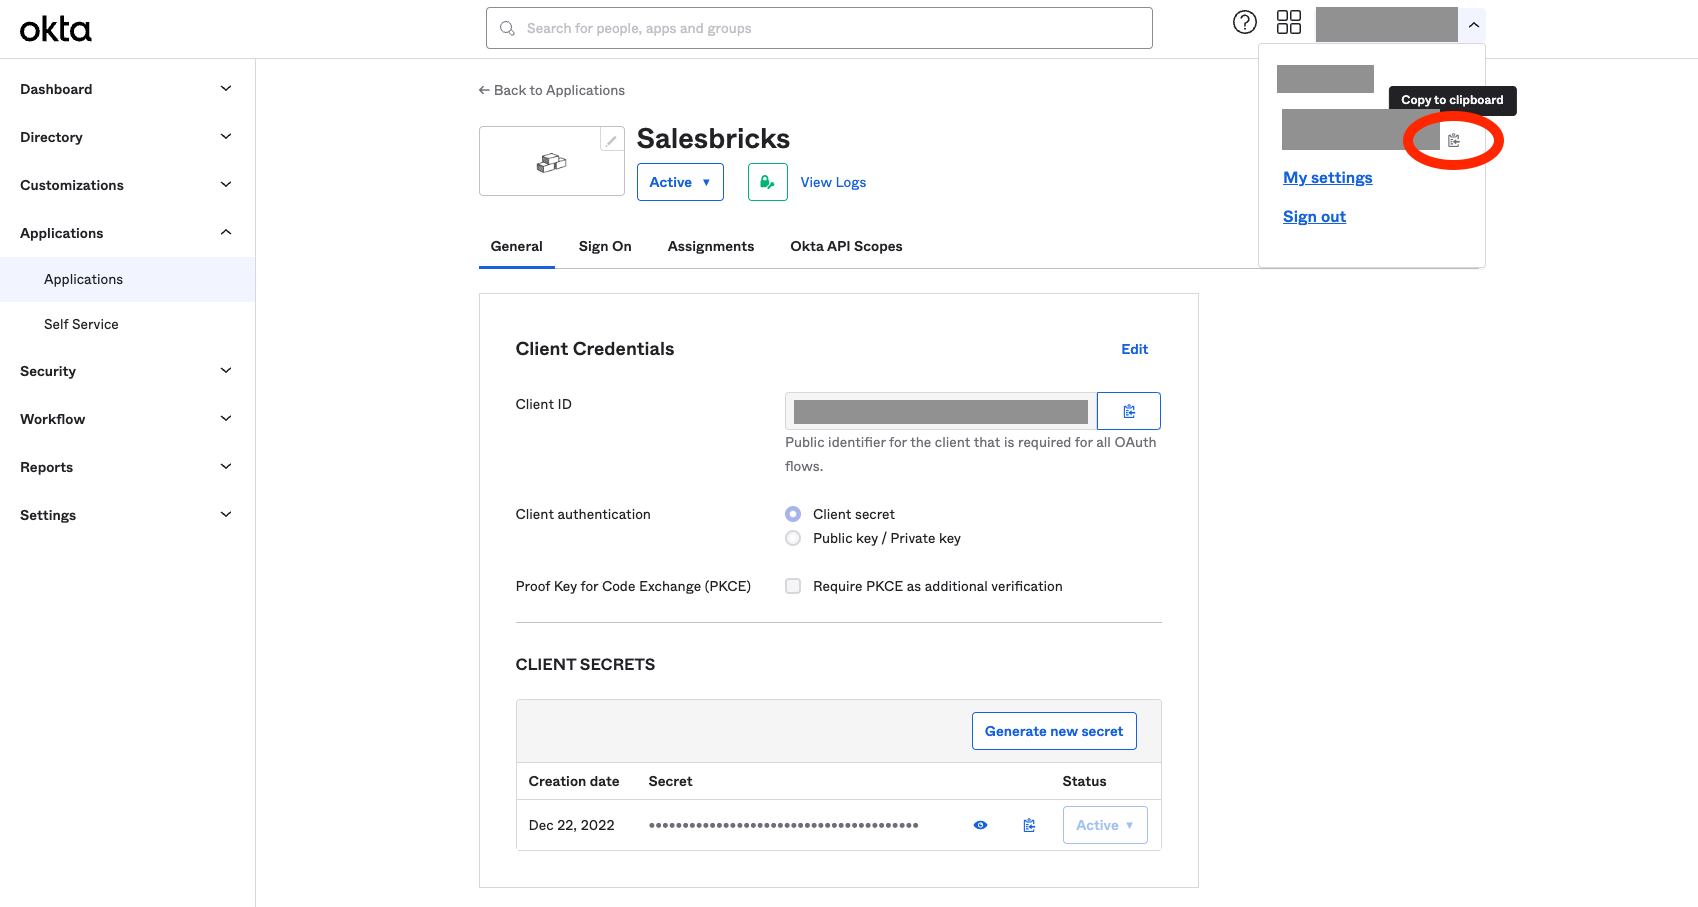
### Gather information from Okta
 ### Send the information to Salesbricks
Once you have all the required information below, email them to [support@salesbricks.com](mailto:support@salesbricks.com).
* Client ID
* Client Secret
* Issuer URL
Salesbricks Integration Support will handle your request and follow up with you once the integration is configured.
## Login
Once Salesbricks support notifies you that you are ready to log in to Salesbricks using Okta:
If you don't have a pre-existing user account, one will automatically be created from your Okta details.
### Send the information to Salesbricks
Once you have all the required information below, email them to [support@salesbricks.com](mailto:support@salesbricks.com).
* Client ID
* Client Secret
* Issuer URL
Salesbricks Integration Support will handle your request and follow up with you once the integration is configured.
## Login
Once Salesbricks support notifies you that you are ready to log in to Salesbricks using Okta:
If you don't have a pre-existing user account, one will automatically be created from your Okta details.
