> ## Documentation Index
> Fetch the complete documentation index at: https://docs.salesbricks.com/llms.txt
> Use this file to discover all available pages before exploring further.
# Managed Package
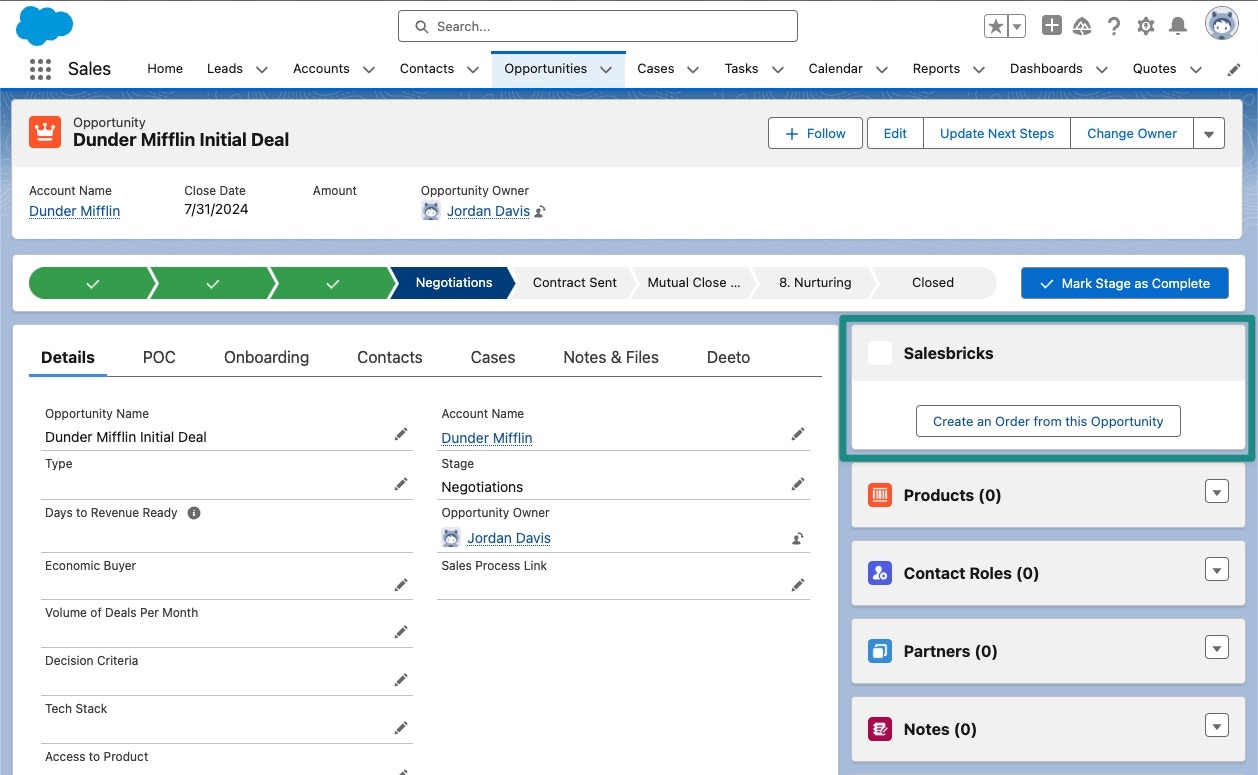
Our managed package enables sellers to click a button within Salesforce's opportunity layout which easily creates or links to an order in Salesbricks.
Before installing the managed package, you will need to [connect your Salesforce account to Salesbricks](/integrations/salesforce/overview).
 ## Setup
Follow the steps below to install the managed package in Salesforce:
**You will need to be a Salesforce administrator with access to install packages for all users.**
Click on the install link below associated with the desired Salesforce environment.
[https://test.salesforce.com/packaging/installPackage.apexp?p0=04t5f00000074sS](https://test.salesforce.com/packaging/installPackage.apexp?p0=04t5f00000074sS)
[https://login.salesforce.com/packaging/installPackage.apexp?p0=04t5f00000075fS\&isdtp=p1](https://login.salesforce.com/packaging/installPackage.apexp?p0=04t5f00000075fS\&isdtp=p1)
Select the option **Install for All Users**.
Next, we'll install the component in your Opportunity Layout.
In Salesforce, navigate to an opportunity.
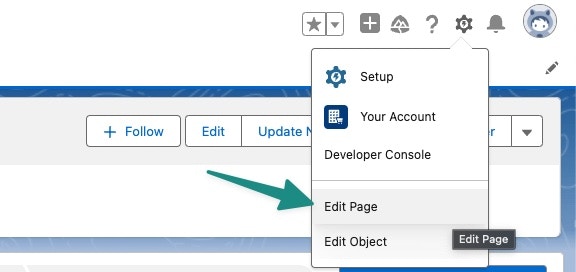
Click on the gear icon in the top left and select **Edit Page**.
## Setup
Follow the steps below to install the managed package in Salesforce:
**You will need to be a Salesforce administrator with access to install packages for all users.**
Click on the install link below associated with the desired Salesforce environment.
[https://test.salesforce.com/packaging/installPackage.apexp?p0=04t5f00000074sS](https://test.salesforce.com/packaging/installPackage.apexp?p0=04t5f00000074sS)
[https://login.salesforce.com/packaging/installPackage.apexp?p0=04t5f00000075fS\&isdtp=p1](https://login.salesforce.com/packaging/installPackage.apexp?p0=04t5f00000075fS\&isdtp=p1)
Select the option **Install for All Users**.
Next, we'll install the component in your Opportunity Layout.
In Salesforce, navigate to an opportunity.
Click on the gear icon in the top left and select **Edit Page**.
 In the search bar, type **order**. You should see an option called **order** under the **Custom - Managed** dropdown.
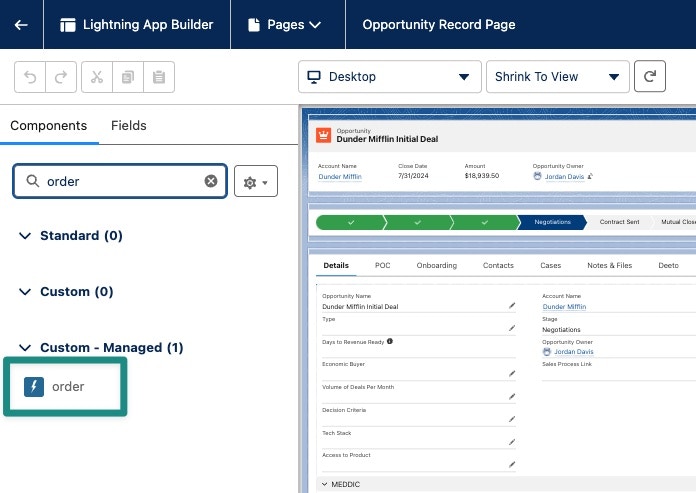 Drag this component to your desired location in the opportunity layout, and click **Save**.
The component should now be available for use within the opportunities in Salesforce.
Drag this component to your desired location in the opportunity layout, and click **Save**.
The component should now be available for use within the opportunities in Salesforce.