> ## Documentation Index
> Fetch the complete documentation index at: https://docs.salesbricks.com/llms.txt
> Use this file to discover all available pages before exploring further.
# Creating a Plan
export const ConsecutiveImageGap = () => <>
;
## What's a Plan?
A **Plan** is a specific offering or bundle of your software and/or services at a certain price point.
Plans can be set up with the following configurations:
* **Many** bricks (Platform, Seats, API call volume, and optional bricks like Implementation Services)
* **One** brick (User Licenses)
* **Zero** bricks (the Plan gives access to the platform)
Each Plan variation can be targeted toward a segment of your customers.
As your customers mature with your offerings (requiring additional licenses, features, etc.), it's extremely easy to upsell them to a higher Plan within Salesbricks.
## How to Create a Plan
[https://app.salesbricks.com/admin/products](https://app.salesbricks.com/admin/products)
Navigate to **Products** and click the Product you want to add the Plan to.
 Click **New plan**.
 Fill in your new Plan's **name**, **definition**, and **summary**.
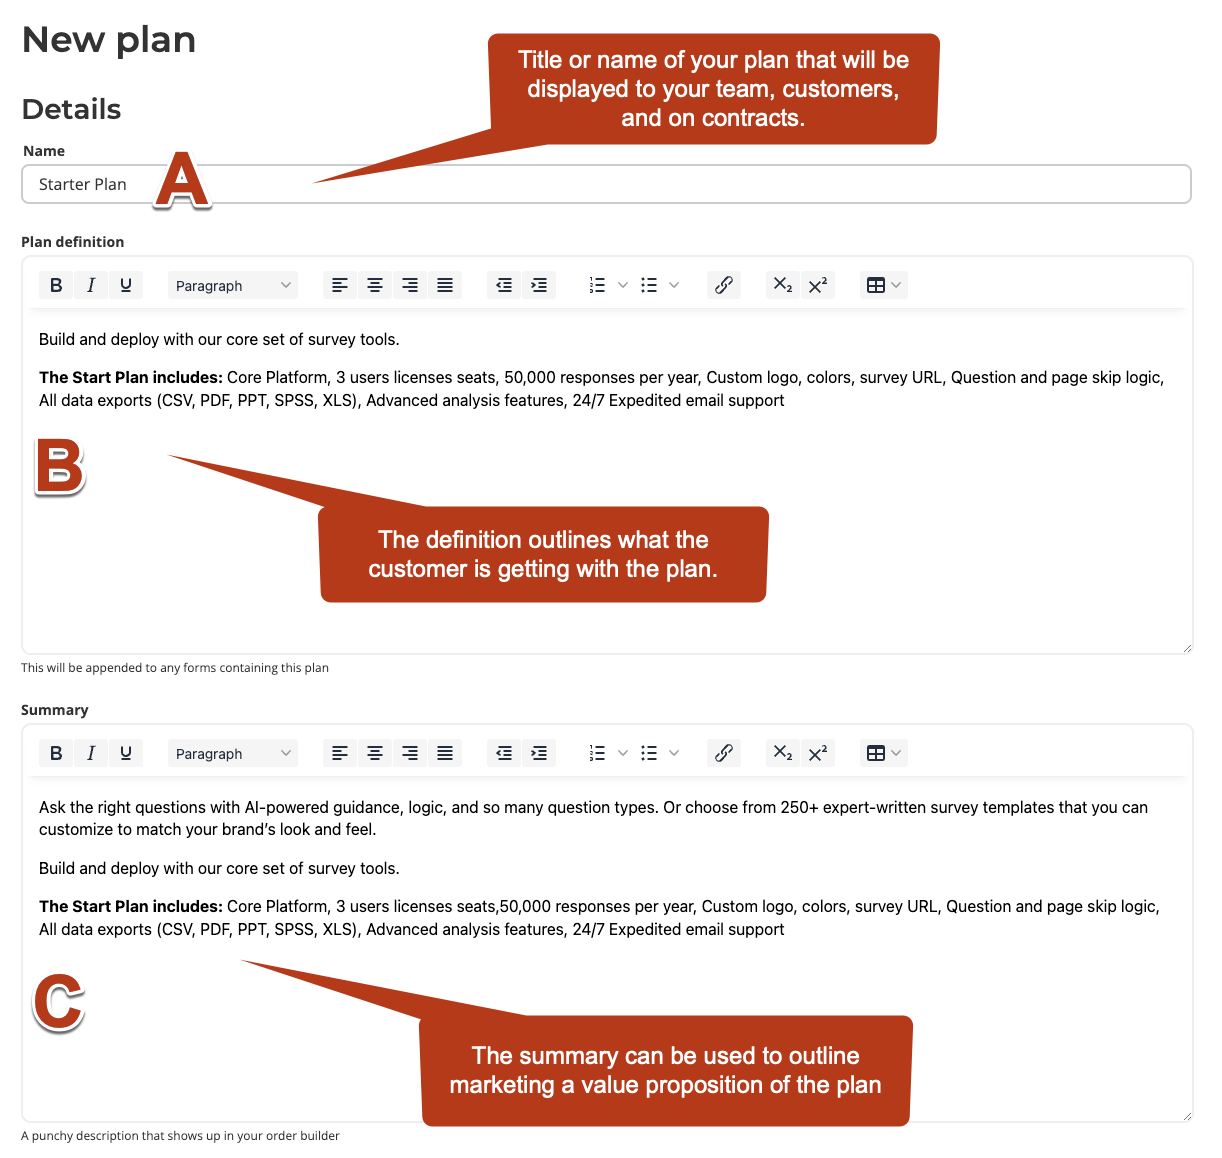 These fields are typically displayed in the following key areas of the platform:
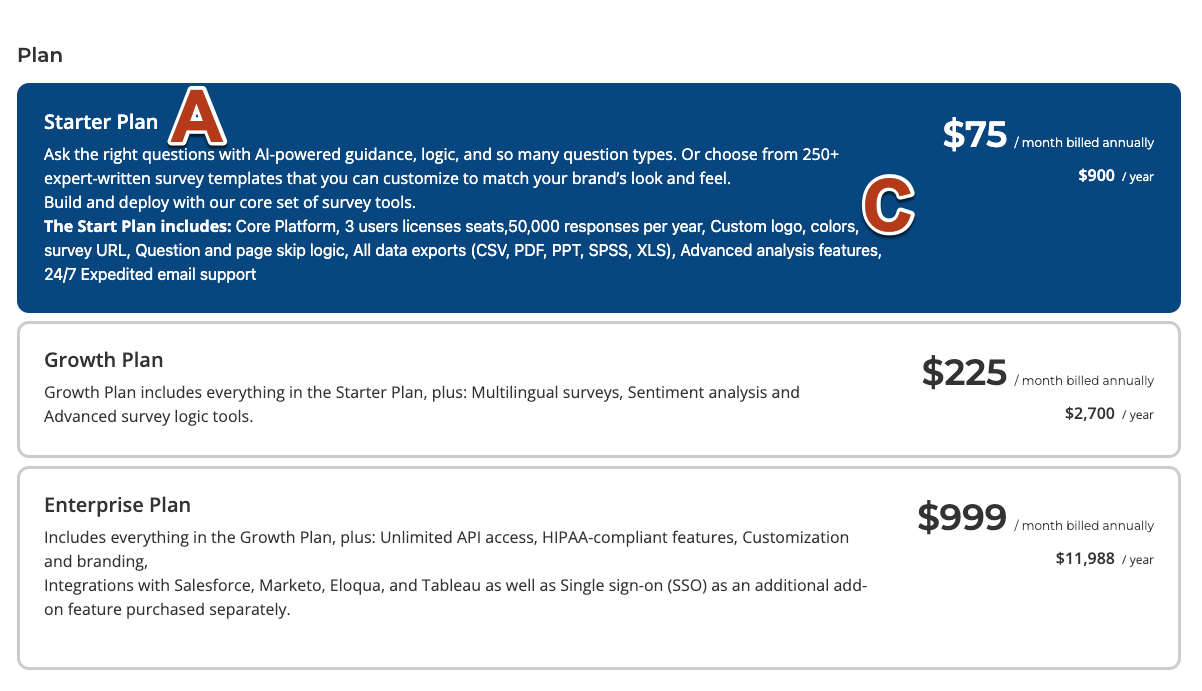
**Order builder:** visible to your sales team, and customer order checkout page if the plan is not marked private.
These fields are typically displayed in the following key areas of the platform:
**Order builder:** visible to your sales team, and customer order checkout page if the plan is not marked private.
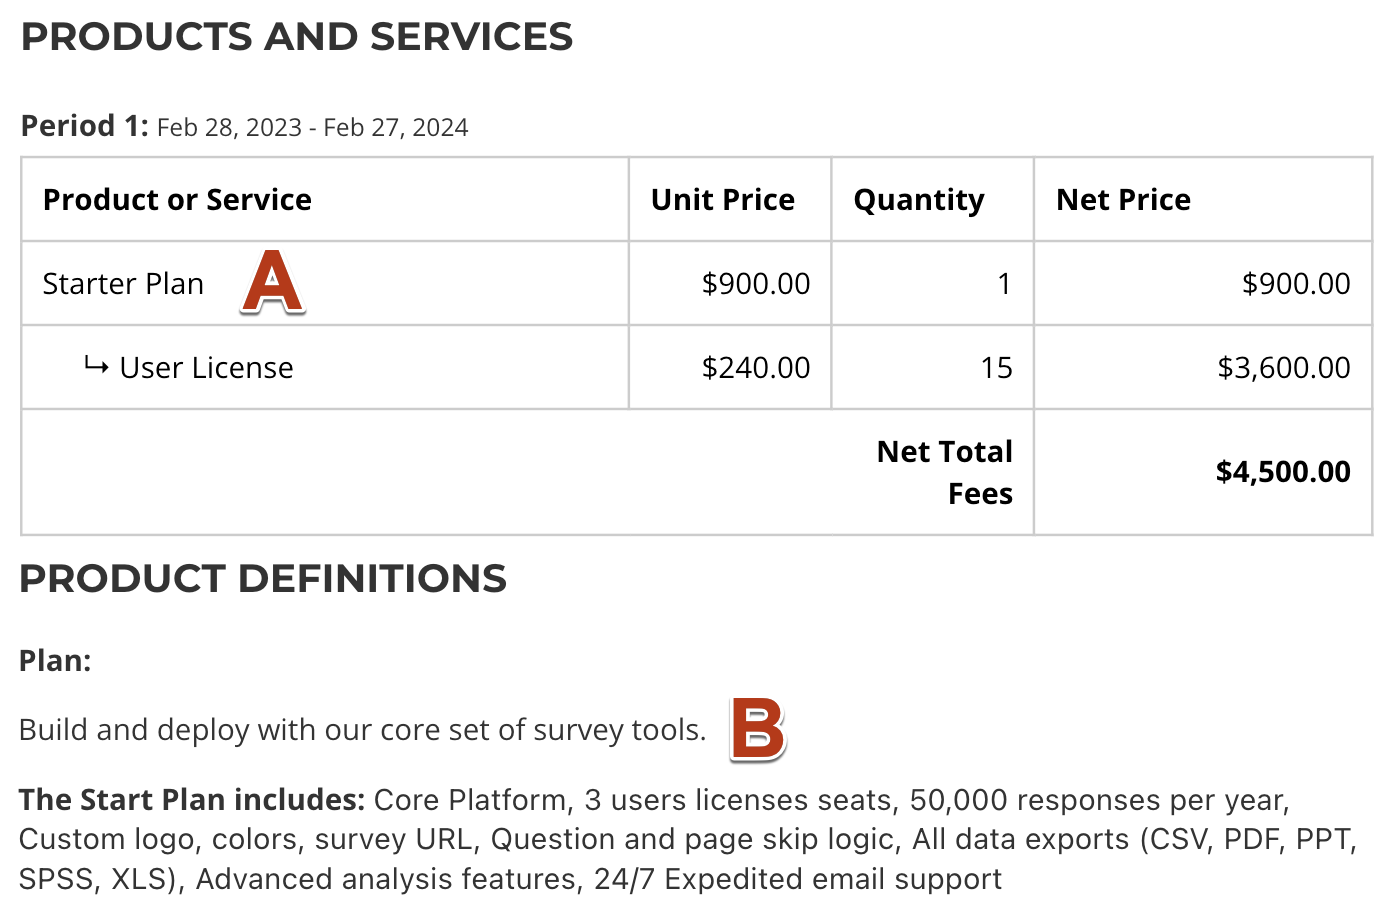
 **Order form:** seen in the customer contract.
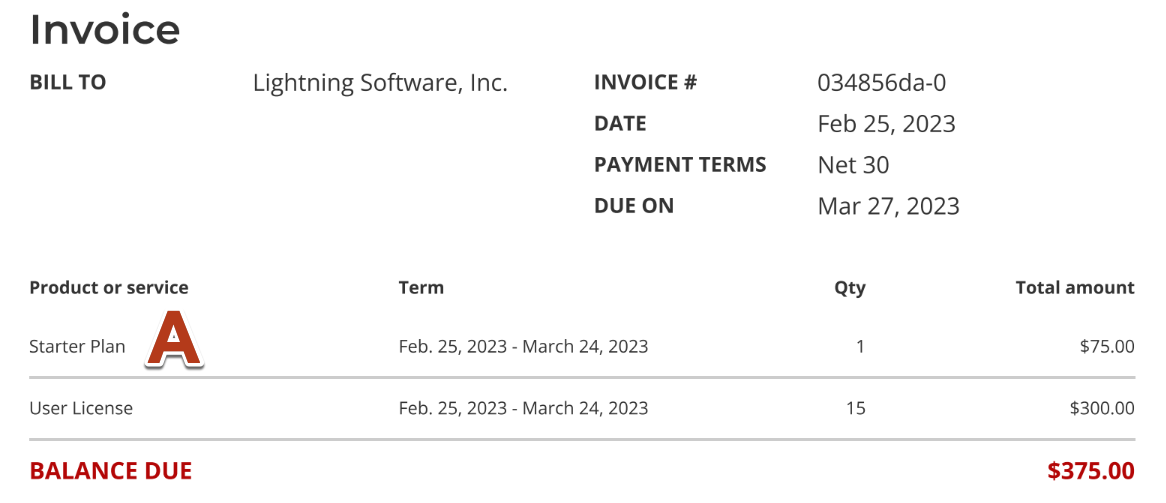
 **Invoice:** displayed if the customer checks out with an order form (no invoices are sent if paying electronically via Stripe at checkout).
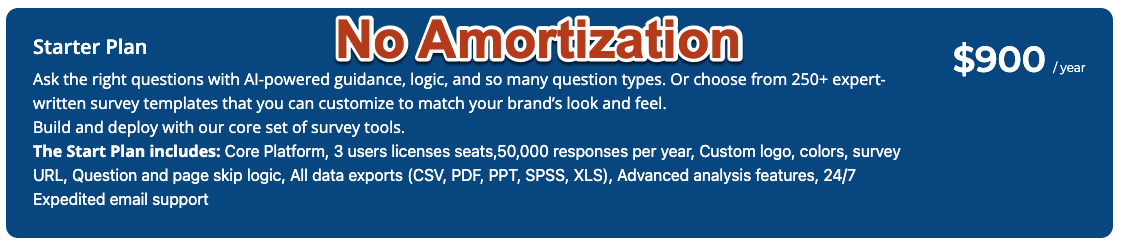
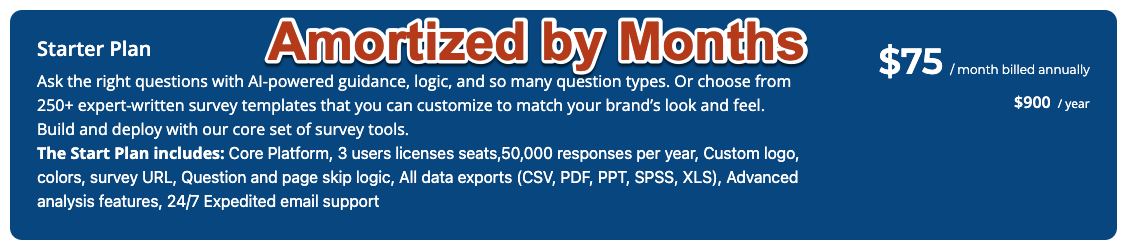
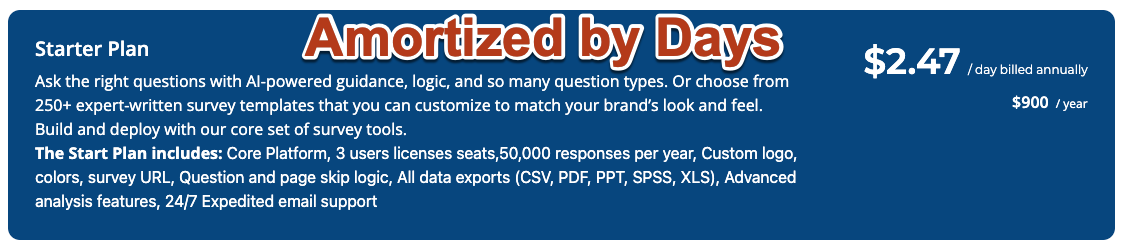
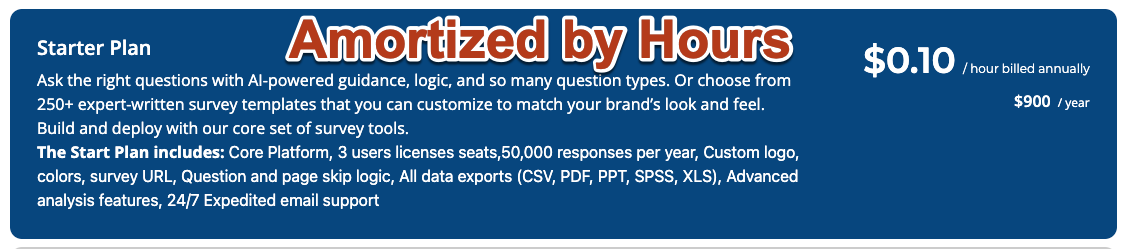
 Input the plan pricing options.
 **Example 1:** Displayed billing schedule amortized by
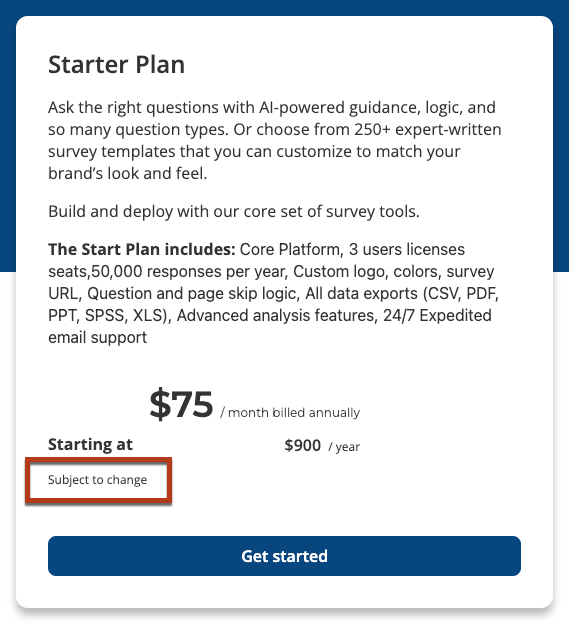
 **Example 2:** Postscript
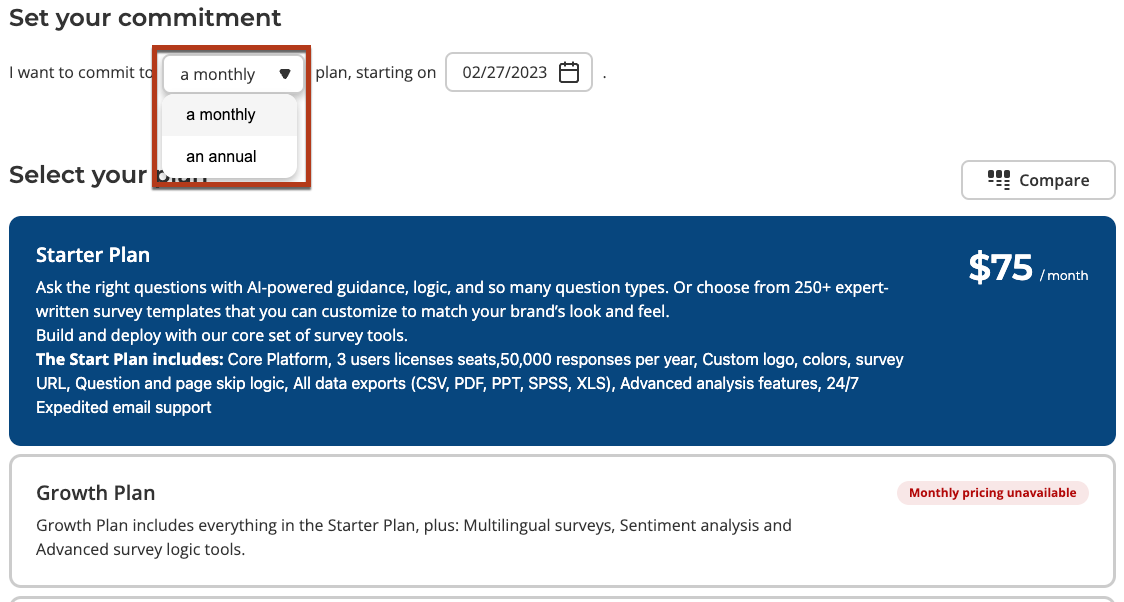
 **Example 3:** Allowed billing schedules
 ### Do I have to include a Brick on my Plan?
It is not required to add Bricks to a Plan.
However, if you are looking to include a quantity of units as part of the Plan (e.g. 5 user licenses included in the Plan price) and would like to charge per additional unit, you must include the unit Brick.
Add Bricks.
Click **Edit bricks**.
To add additional Bricks, click the **New brick** button. Check out the [Creating a Brick](/quickstart-guide/products-plans-bricks/creating-a-brick) guide for details on the Brick builder.
Select the bricks to be added to the plan by clicking on them.
### Do I have to include a Brick on my Plan?
It is not required to add Bricks to a Plan.
However, if you are looking to include a quantity of units as part of the Plan (e.g. 5 user licenses included in the Plan price) and would like to charge per additional unit, you must include the unit Brick.
Add Bricks.
Click **Edit bricks**.
To add additional Bricks, click the **New brick** button. Check out the [Creating a Brick](/quickstart-guide/products-plans-bricks/creating-a-brick) guide for details on the Brick builder.
Select the bricks to be added to the plan by clicking on them.
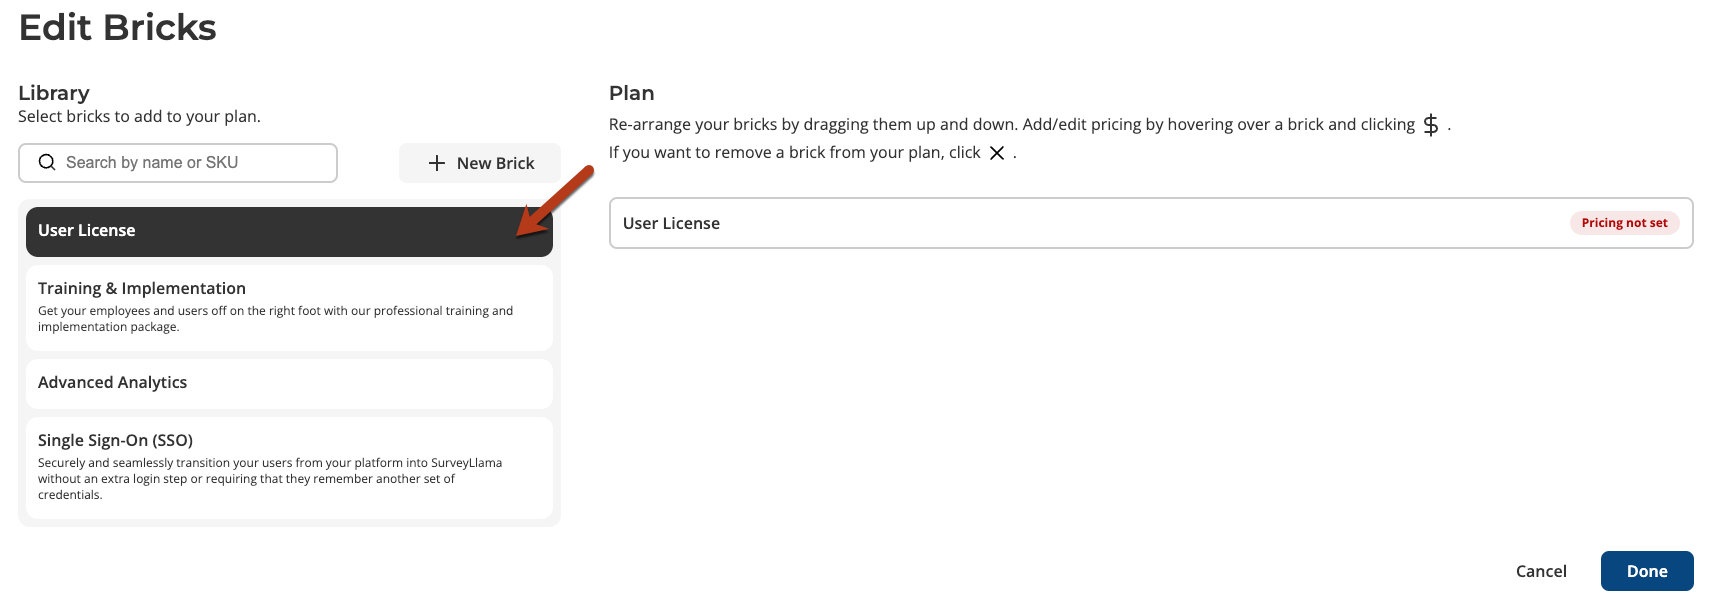 Hover over the **Pricing not set** and click on the dollar sign.
 Configure your Brick pricing and packaging.
See the section on [Pricing Structures](/quickstart-guide/products-plans-bricks/creating-a-plan#pricing-structures) for guidance on structuring the pricing.
Configure your Brick pricing and packaging.
See the section on [Pricing Structures](/quickstart-guide/products-plans-bricks/creating-a-plan#pricing-structures) for guidance on structuring the pricing.
 Once you've added all the Bricks to your Plan and configured pricing for each, click **Done**.
Decide if the plan should be private, and click **Publish**.
Marking a Plan as private excludes it from any self-serve views and makes it available exclusively through your sales-led Orders.
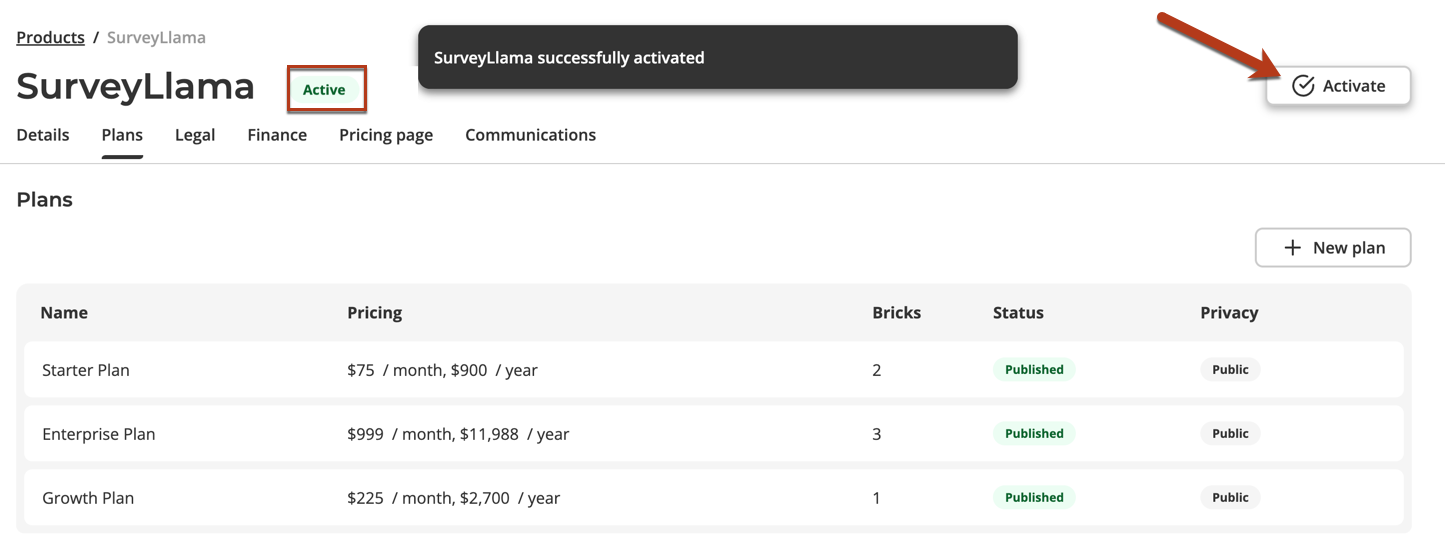
**One last important step!**
After publishing your Plan, don't forget to go back into your product and click **Activate**. This will turn your product live for the world (or, at least your team and customers).
Once you've added all the Bricks to your Plan and configured pricing for each, click **Done**.
Decide if the plan should be private, and click **Publish**.
Marking a Plan as private excludes it from any self-serve views and makes it available exclusively through your sales-led Orders.
**One last important step!**
After publishing your Plan, don't forget to go back into your product and click **Activate**. This will turn your product live for the world (or, at least your team and customers).
 Well done! You just did in minutes what would take weeks or months in a traditional CPQ tool.
For those crazy enough to try and scale with manual processes and spreadsheets, we just gave you back your nights, weekends, and holidays - not to mention saving you from getting a plethora grey hairs! 🧓🏼 👵🏼
You're welcome. 🙌 😁
## Pricing Structures
A **pricing structure** is a pre-defined discounting mechanism that is designed to incentivize customers as they purchase more of your Product.
There are 4 pricing structures that can easily be designed in Salesbricks:
### Flat-rate
Flat-rate structure is used when you want to **set the unit price equally**, regardless of how many units your customer is buying.
At the grocery store, each apple costs 50¢.
Frank wants to buy 3 apples: $$\$0.50 * 3 = \$1.50$$.
Rita wants to buy 100 apples: $$\$0.50 * 100 = \$50$$.
Under flat-rate pricing, the 1st apple costs as much as the 100th apple, with no discount for having purchased a larger quantity.
### Tiered
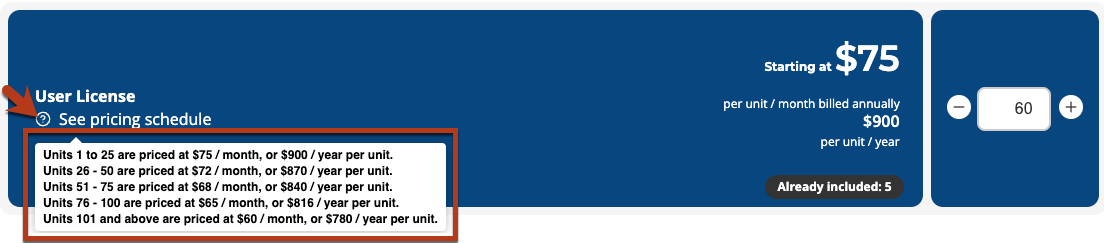
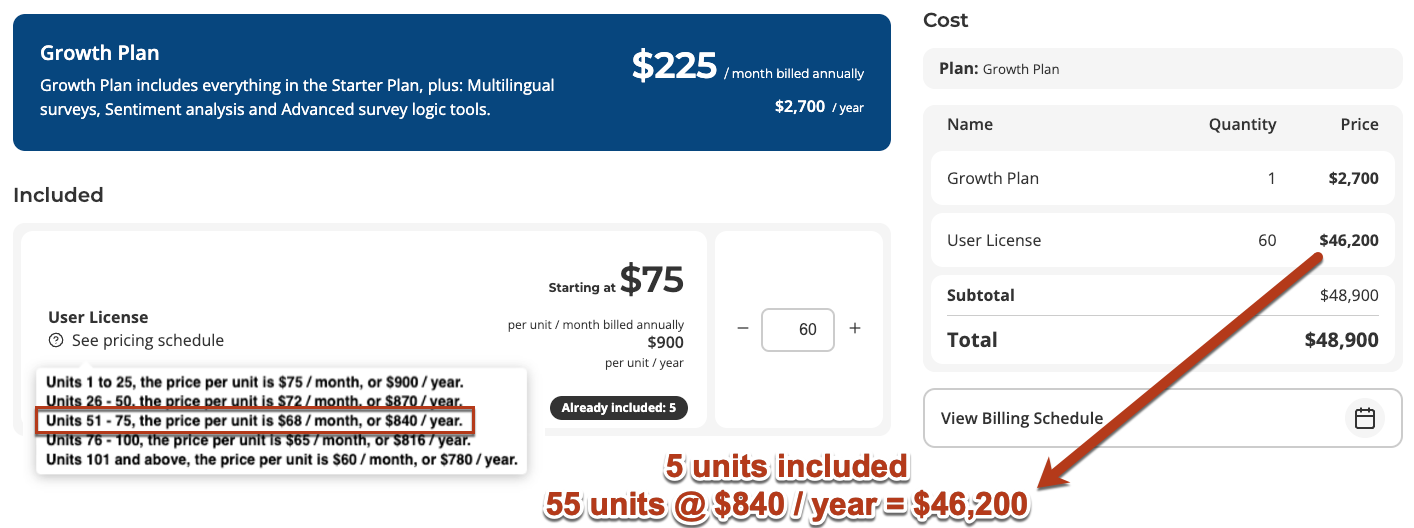
Tiered is a pricing structure where your customers are charged the **sum of each tier** as unit counts reach tier thresholds.
In the example below, there are several pricing tiers and the buyer passes fully through the first two tiers and partially into the third. There are also five licenses included at no additional charge, which are taken from the highest tier.
Well done! You just did in minutes what would take weeks or months in a traditional CPQ tool.
For those crazy enough to try and scale with manual processes and spreadsheets, we just gave you back your nights, weekends, and holidays - not to mention saving you from getting a plethora grey hairs! 🧓🏼 👵🏼
You're welcome. 🙌 😁
## Pricing Structures
A **pricing structure** is a pre-defined discounting mechanism that is designed to incentivize customers as they purchase more of your Product.
There are 4 pricing structures that can easily be designed in Salesbricks:
### Flat-rate
Flat-rate structure is used when you want to **set the unit price equally**, regardless of how many units your customer is buying.
At the grocery store, each apple costs 50¢.
Frank wants to buy 3 apples: $$\$0.50 * 3 = \$1.50$$.
Rita wants to buy 100 apples: $$\$0.50 * 100 = \$50$$.
Under flat-rate pricing, the 1st apple costs as much as the 100th apple, with no discount for having purchased a larger quantity.
### Tiered
Tiered is a pricing structure where your customers are charged the **sum of each tier** as unit counts reach tier thresholds.
In the example below, there are several pricing tiers and the buyer passes fully through the first two tiers and partially into the third. There are also five licenses included at no additional charge, which are taken from the highest tier.
 Tiana wants to book a room at a hotel:
* The first two nights are priced at \$100 per night.
* The next two nights are discounted at \$80 per night.
* Any night after that is \$50 per night.
Tiana plans to stay for 7 nights: $$(\$100 * 2) + (\$80 * 2) + (\$50 * 3) = \$510$$.
Under tiered pricing, the buyer's total cost is calculated according to the sum of each respective tier.
#### Tradeoff to consider when using tiered pricing
**Pro:** Tiered pricing allows your customers to enjoy a lower per-unit price point as they purchase additional units, while minimizing the overall discount for you as the seller.
**Con:** Tiered pricing adds complexity to the pricing for your buyers especially when trying to forecast growth and may require additional explanation and support.
### Volume
Volume pricing is used when you want to provide a quantity discount for volume purchases, but want the discounted unit cost to be the **same for all units** in the Order.
Tiana wants to book a room at a hotel:
* The first two nights are priced at \$100 per night.
* The next two nights are discounted at \$80 per night.
* Any night after that is \$50 per night.
Tiana plans to stay for 7 nights: $$(\$100 * 2) + (\$80 * 2) + (\$50 * 3) = \$510$$.
Under tiered pricing, the buyer's total cost is calculated according to the sum of each respective tier.
#### Tradeoff to consider when using tiered pricing
**Pro:** Tiered pricing allows your customers to enjoy a lower per-unit price point as they purchase additional units, while minimizing the overall discount for you as the seller.
**Con:** Tiered pricing adds complexity to the pricing for your buyers especially when trying to forecast growth and may require additional explanation and support.
### Volume
Volume pricing is used when you want to provide a quantity discount for volume purchases, but want the discounted unit cost to be the **same for all units** in the Order.
 Vernon wants to buy tickets to a baseball game:
* 1-5 tickets: \$50 per ticket
* 6-15 tickets: \$40 per ticket
* 16-30 tickets: \$25 per ticket
Vernon is buying a row of seats for himself and 9 of his friends: $$10 * \$40 = \$400$$.
Unlike tiered pricing, Vernon is getting the same discount for each of the 10 tickets under volume pricing. Each of his friends owes him the same amount.
### Block
Block structures are used when you want to **sell your units in blocks instead of individually**.
Similar to buying eggs where you must purchase by the dozen (12, 24, 36, etc.), you can package your units together and sell them in blocks.
This strategy can be useful if your buyer's unit needs to fluctuate within a billing period, eliminating the need for upgrades or overages, assuming they stay within the block.
Bob needs 16 eggs for his recipe.
At the farmer's market, eggs are sold by the dozen:
* 1 dozen: \$5
* 2 dozen: \$8
* 3 dozen: \$10
Although he only needs 16, Bob will need to purchase a full 2 dozen eggs at \$8.
Under block pricing, the seller defines how many units are included in each block.
The buyer pays for, and receives, the entire quantity of units for the block they purchased.
#### Pricing guide when building an order
When activating Tiered, Volume, or Block pricing, a help text icon appears on the order builder to guide both your sales teams and self-service users on the pricing structure (see below for example).
Vernon wants to buy tickets to a baseball game:
* 1-5 tickets: \$50 per ticket
* 6-15 tickets: \$40 per ticket
* 16-30 tickets: \$25 per ticket
Vernon is buying a row of seats for himself and 9 of his friends: $$10 * \$40 = \$400$$.
Unlike tiered pricing, Vernon is getting the same discount for each of the 10 tickets under volume pricing. Each of his friends owes him the same amount.
### Block
Block structures are used when you want to **sell your units in blocks instead of individually**.
Similar to buying eggs where you must purchase by the dozen (12, 24, 36, etc.), you can package your units together and sell them in blocks.
This strategy can be useful if your buyer's unit needs to fluctuate within a billing period, eliminating the need for upgrades or overages, assuming they stay within the block.
Bob needs 16 eggs for his recipe.
At the farmer's market, eggs are sold by the dozen:
* 1 dozen: \$5
* 2 dozen: \$8
* 3 dozen: \$10
Although he only needs 16, Bob will need to purchase a full 2 dozen eggs at \$8.
Under block pricing, the seller defines how many units are included in each block.
The buyer pays for, and receives, the entire quantity of units for the block they purchased.
#### Pricing guide when building an order
When activating Tiered, Volume, or Block pricing, a help text icon appears on the order builder to guide both your sales teams and self-service users on the pricing structure (see below for example).