Overview
One-off invoices let you bill customers for charges that aren’t part of a recurring subscription. Use them for consulting fees, implementation work, setup costs, or any other ad-hoc charge. Unlike subscription invoices, which are generated automatically from a billing cycle, one-off invoices are created manually and do not recur. They appear alongside subscription invoices in the Billing & Payments tab, but display a billing frequency of Non-recurring and a type of One-time so your customers know it’s a one-time charge.One-off invoices requires the feature to be enabled for your account. If you don’t see the option to create an invoice on your Billing page, please reach out to Salesbricks Support.
Creating a one-off invoice
You can create a one-off invoice from two places: the Billing page or the Customer page. Either entry point opens the same invoice creation form.Option 1 — Create an invoice from the Billing page
Go to Billing from the main navigation, then click the New invoice + button in the top-right corner. Select the customer you want to invoice (or create a new one).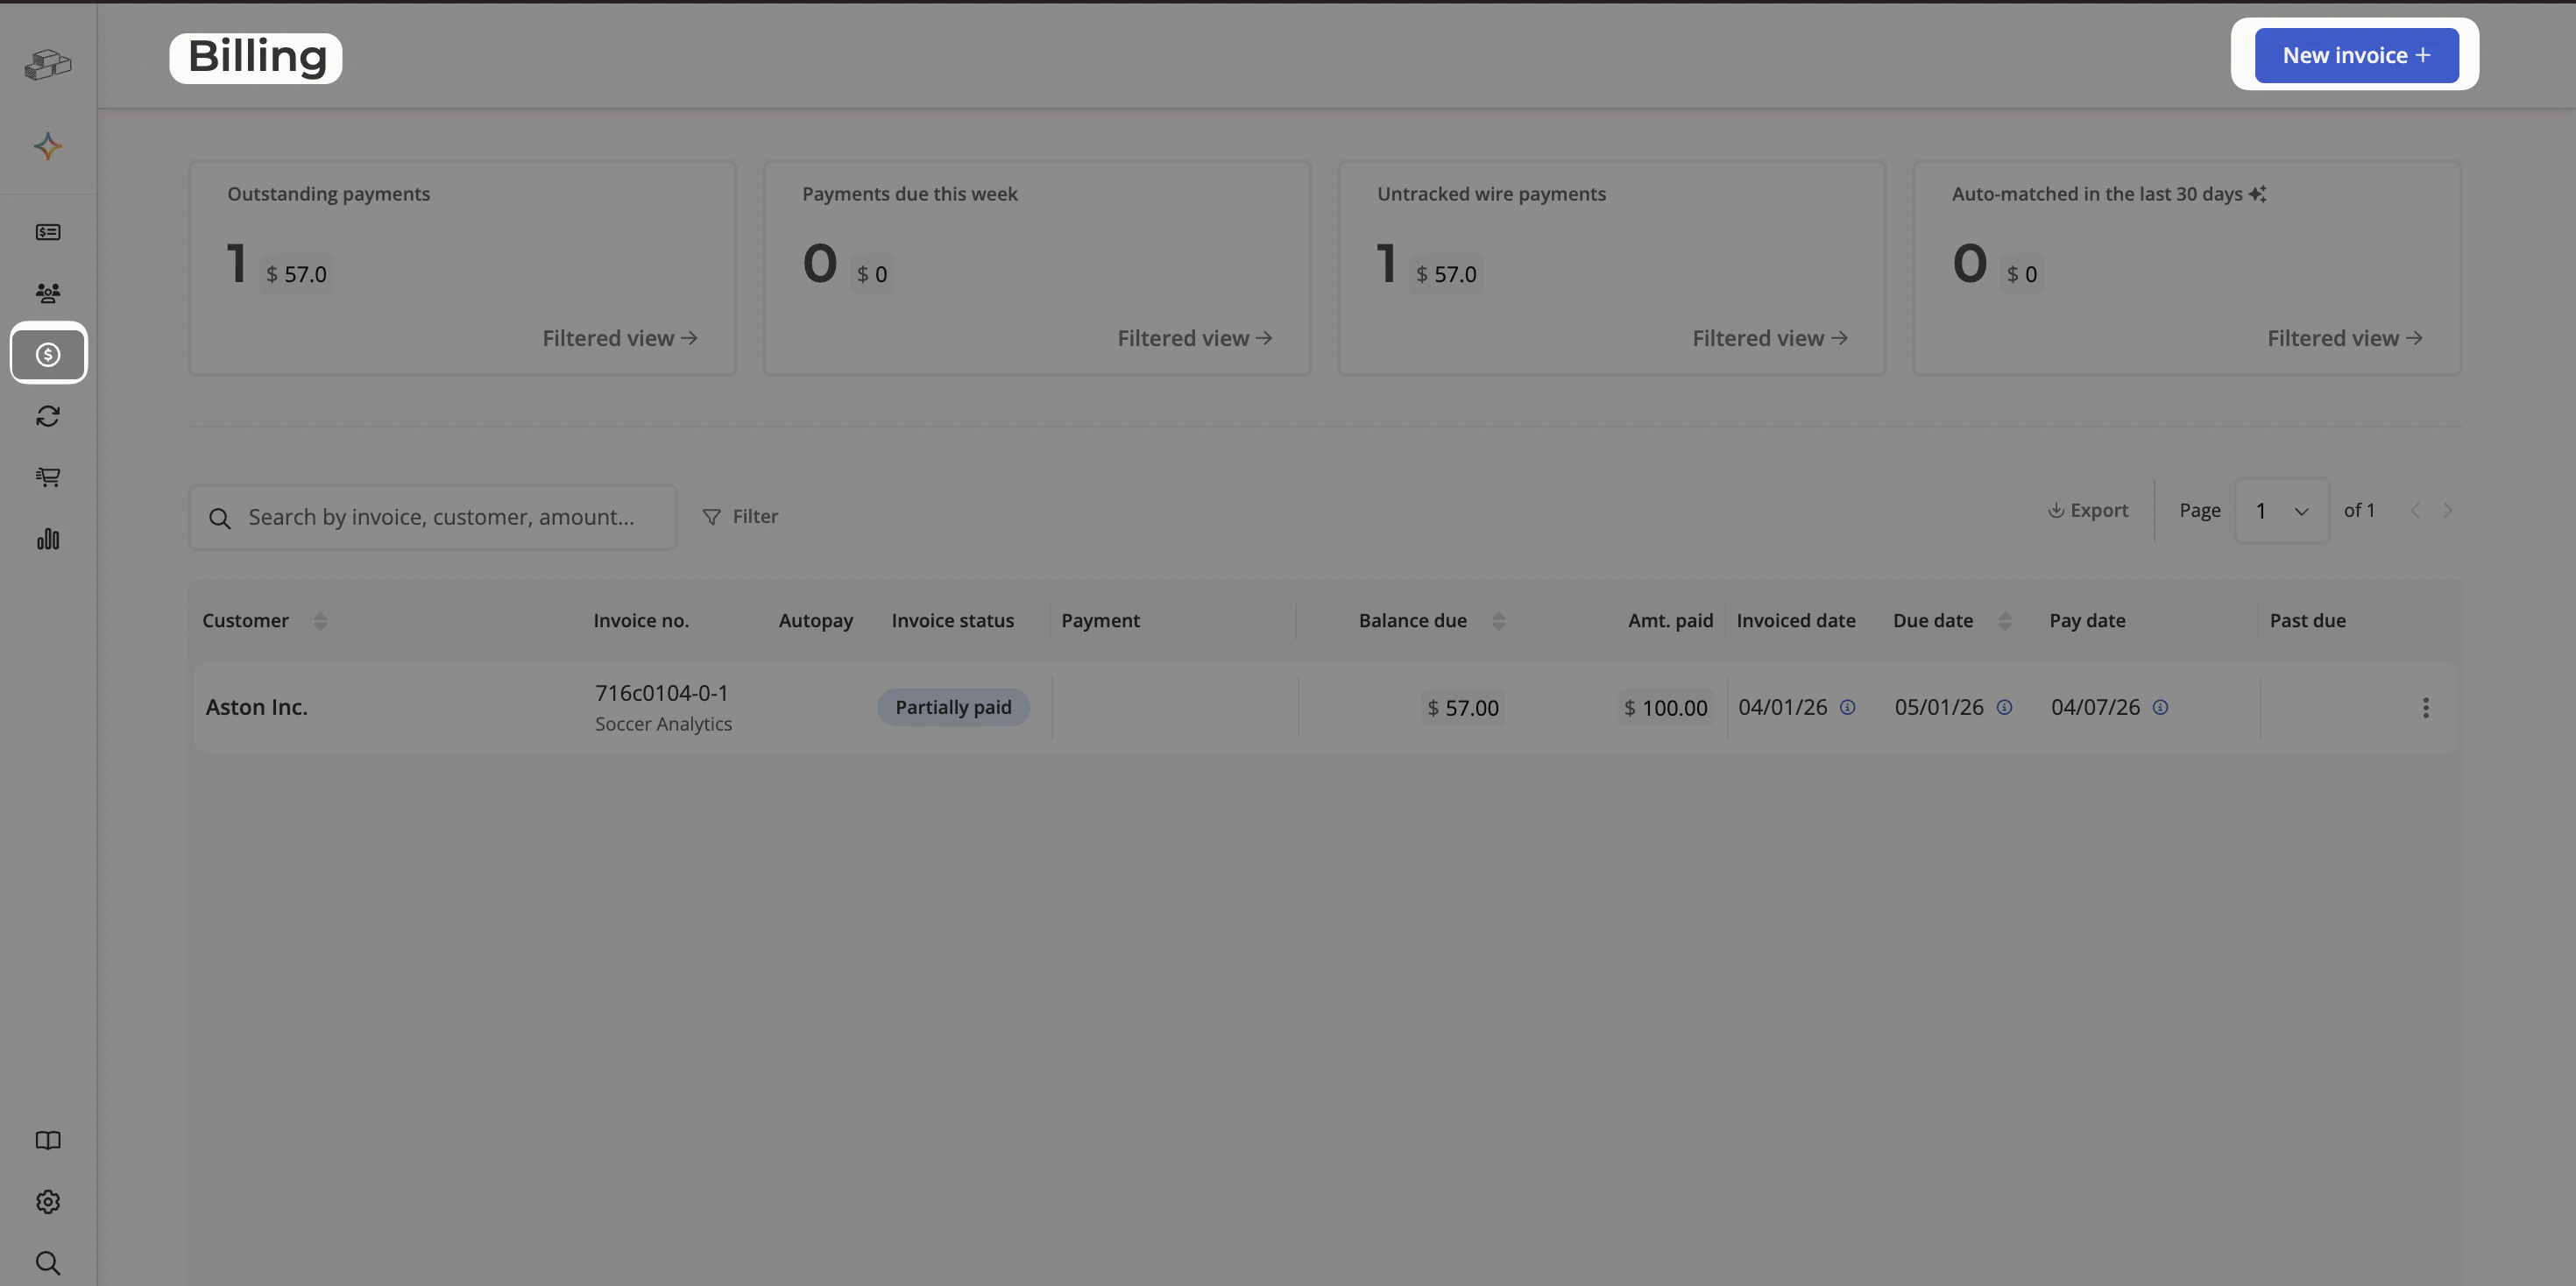
Option 2 — Create an invoice from the Customer tab
Go to Customers, select the customer you want to invoice, and click the Billing & Payments tab. Click the New invoice + button in the top-right corner to open the invoice creation form.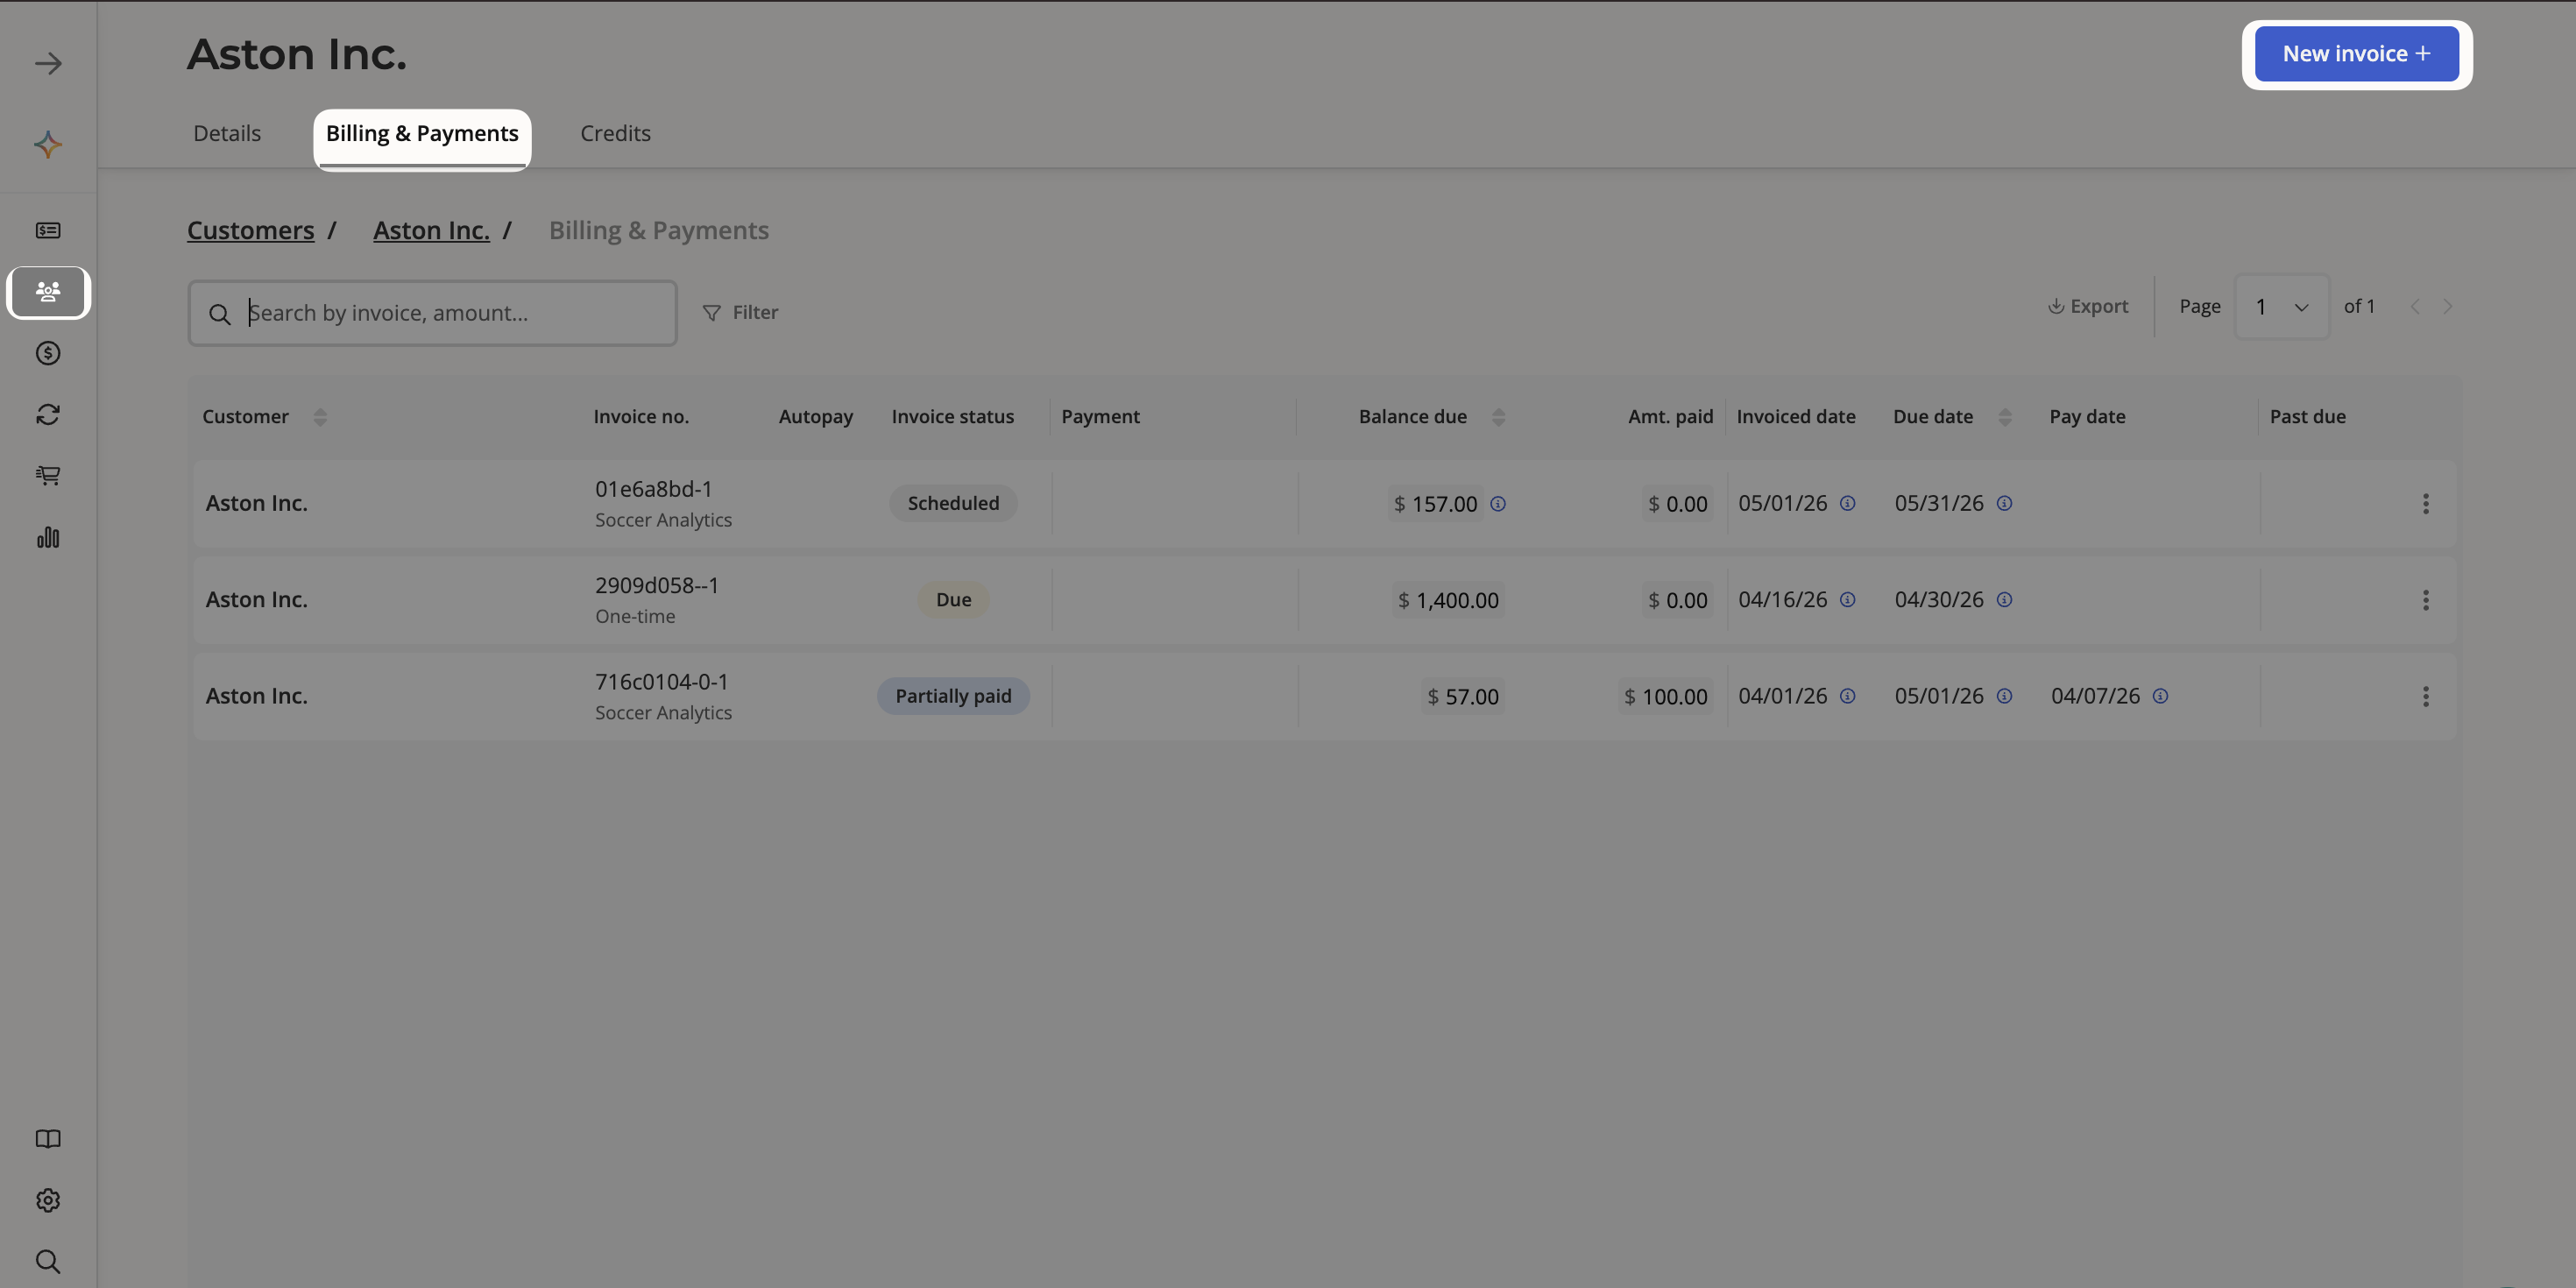
Complete the invoice form
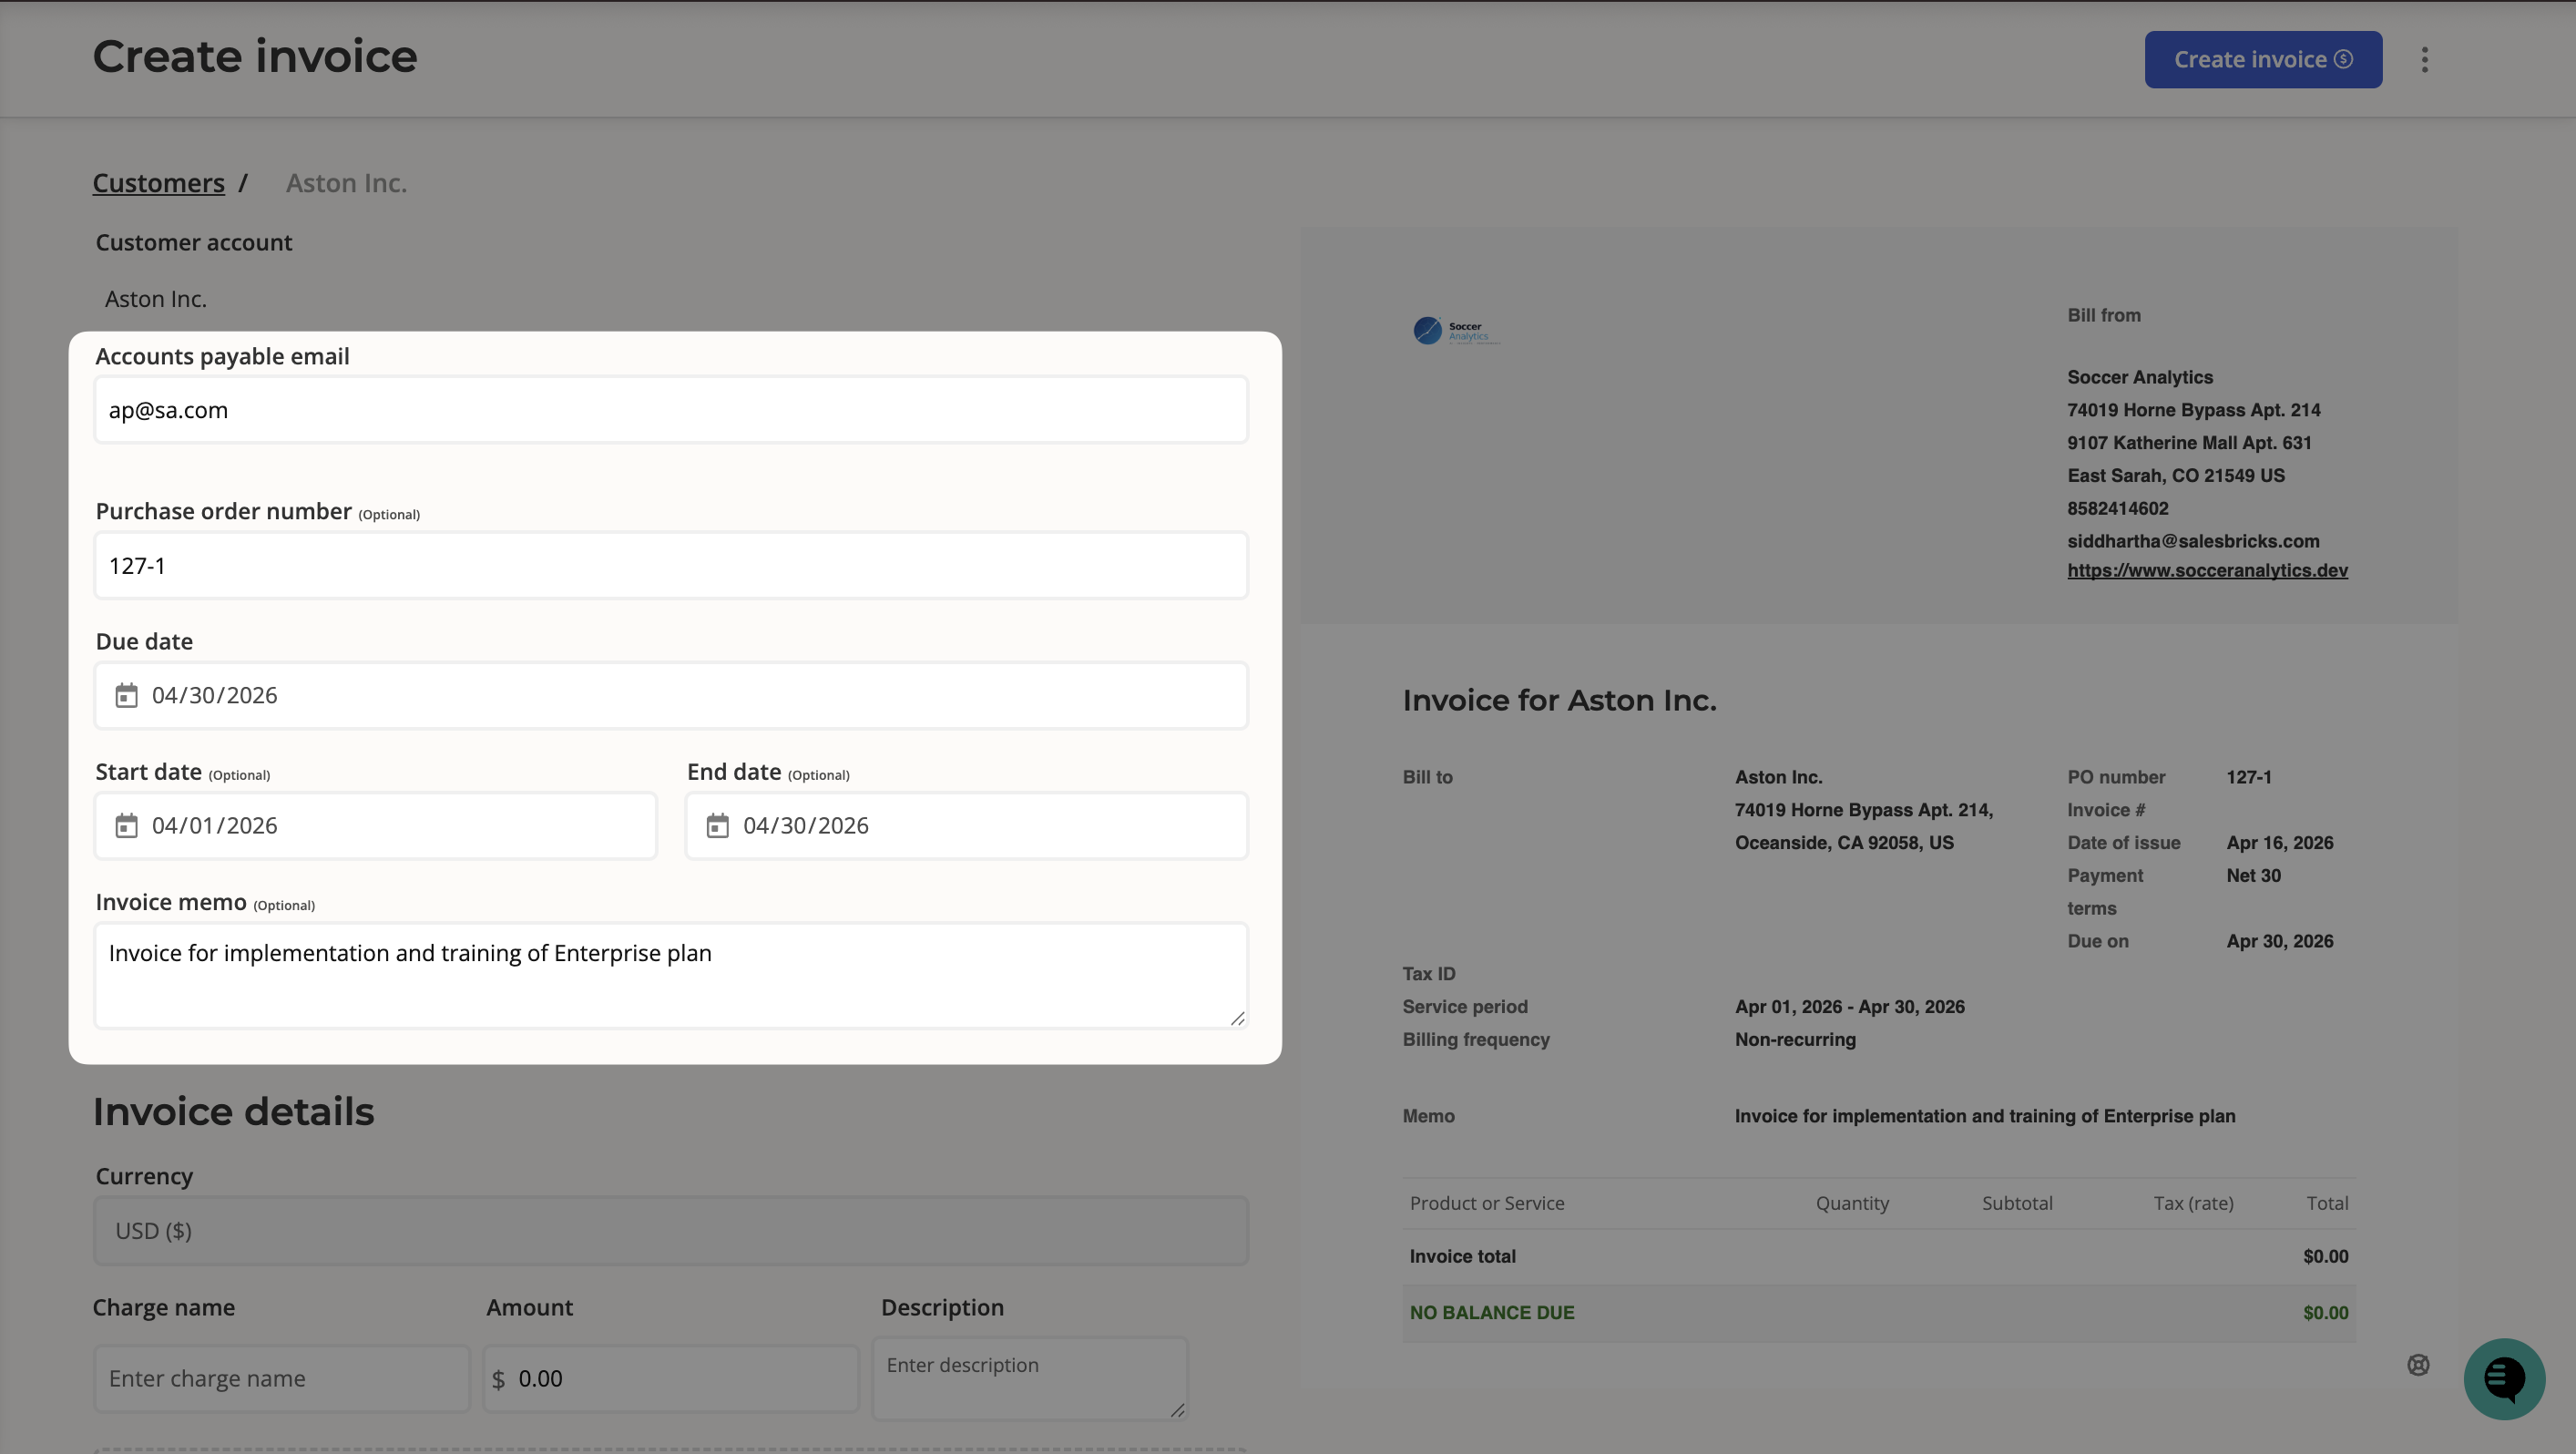
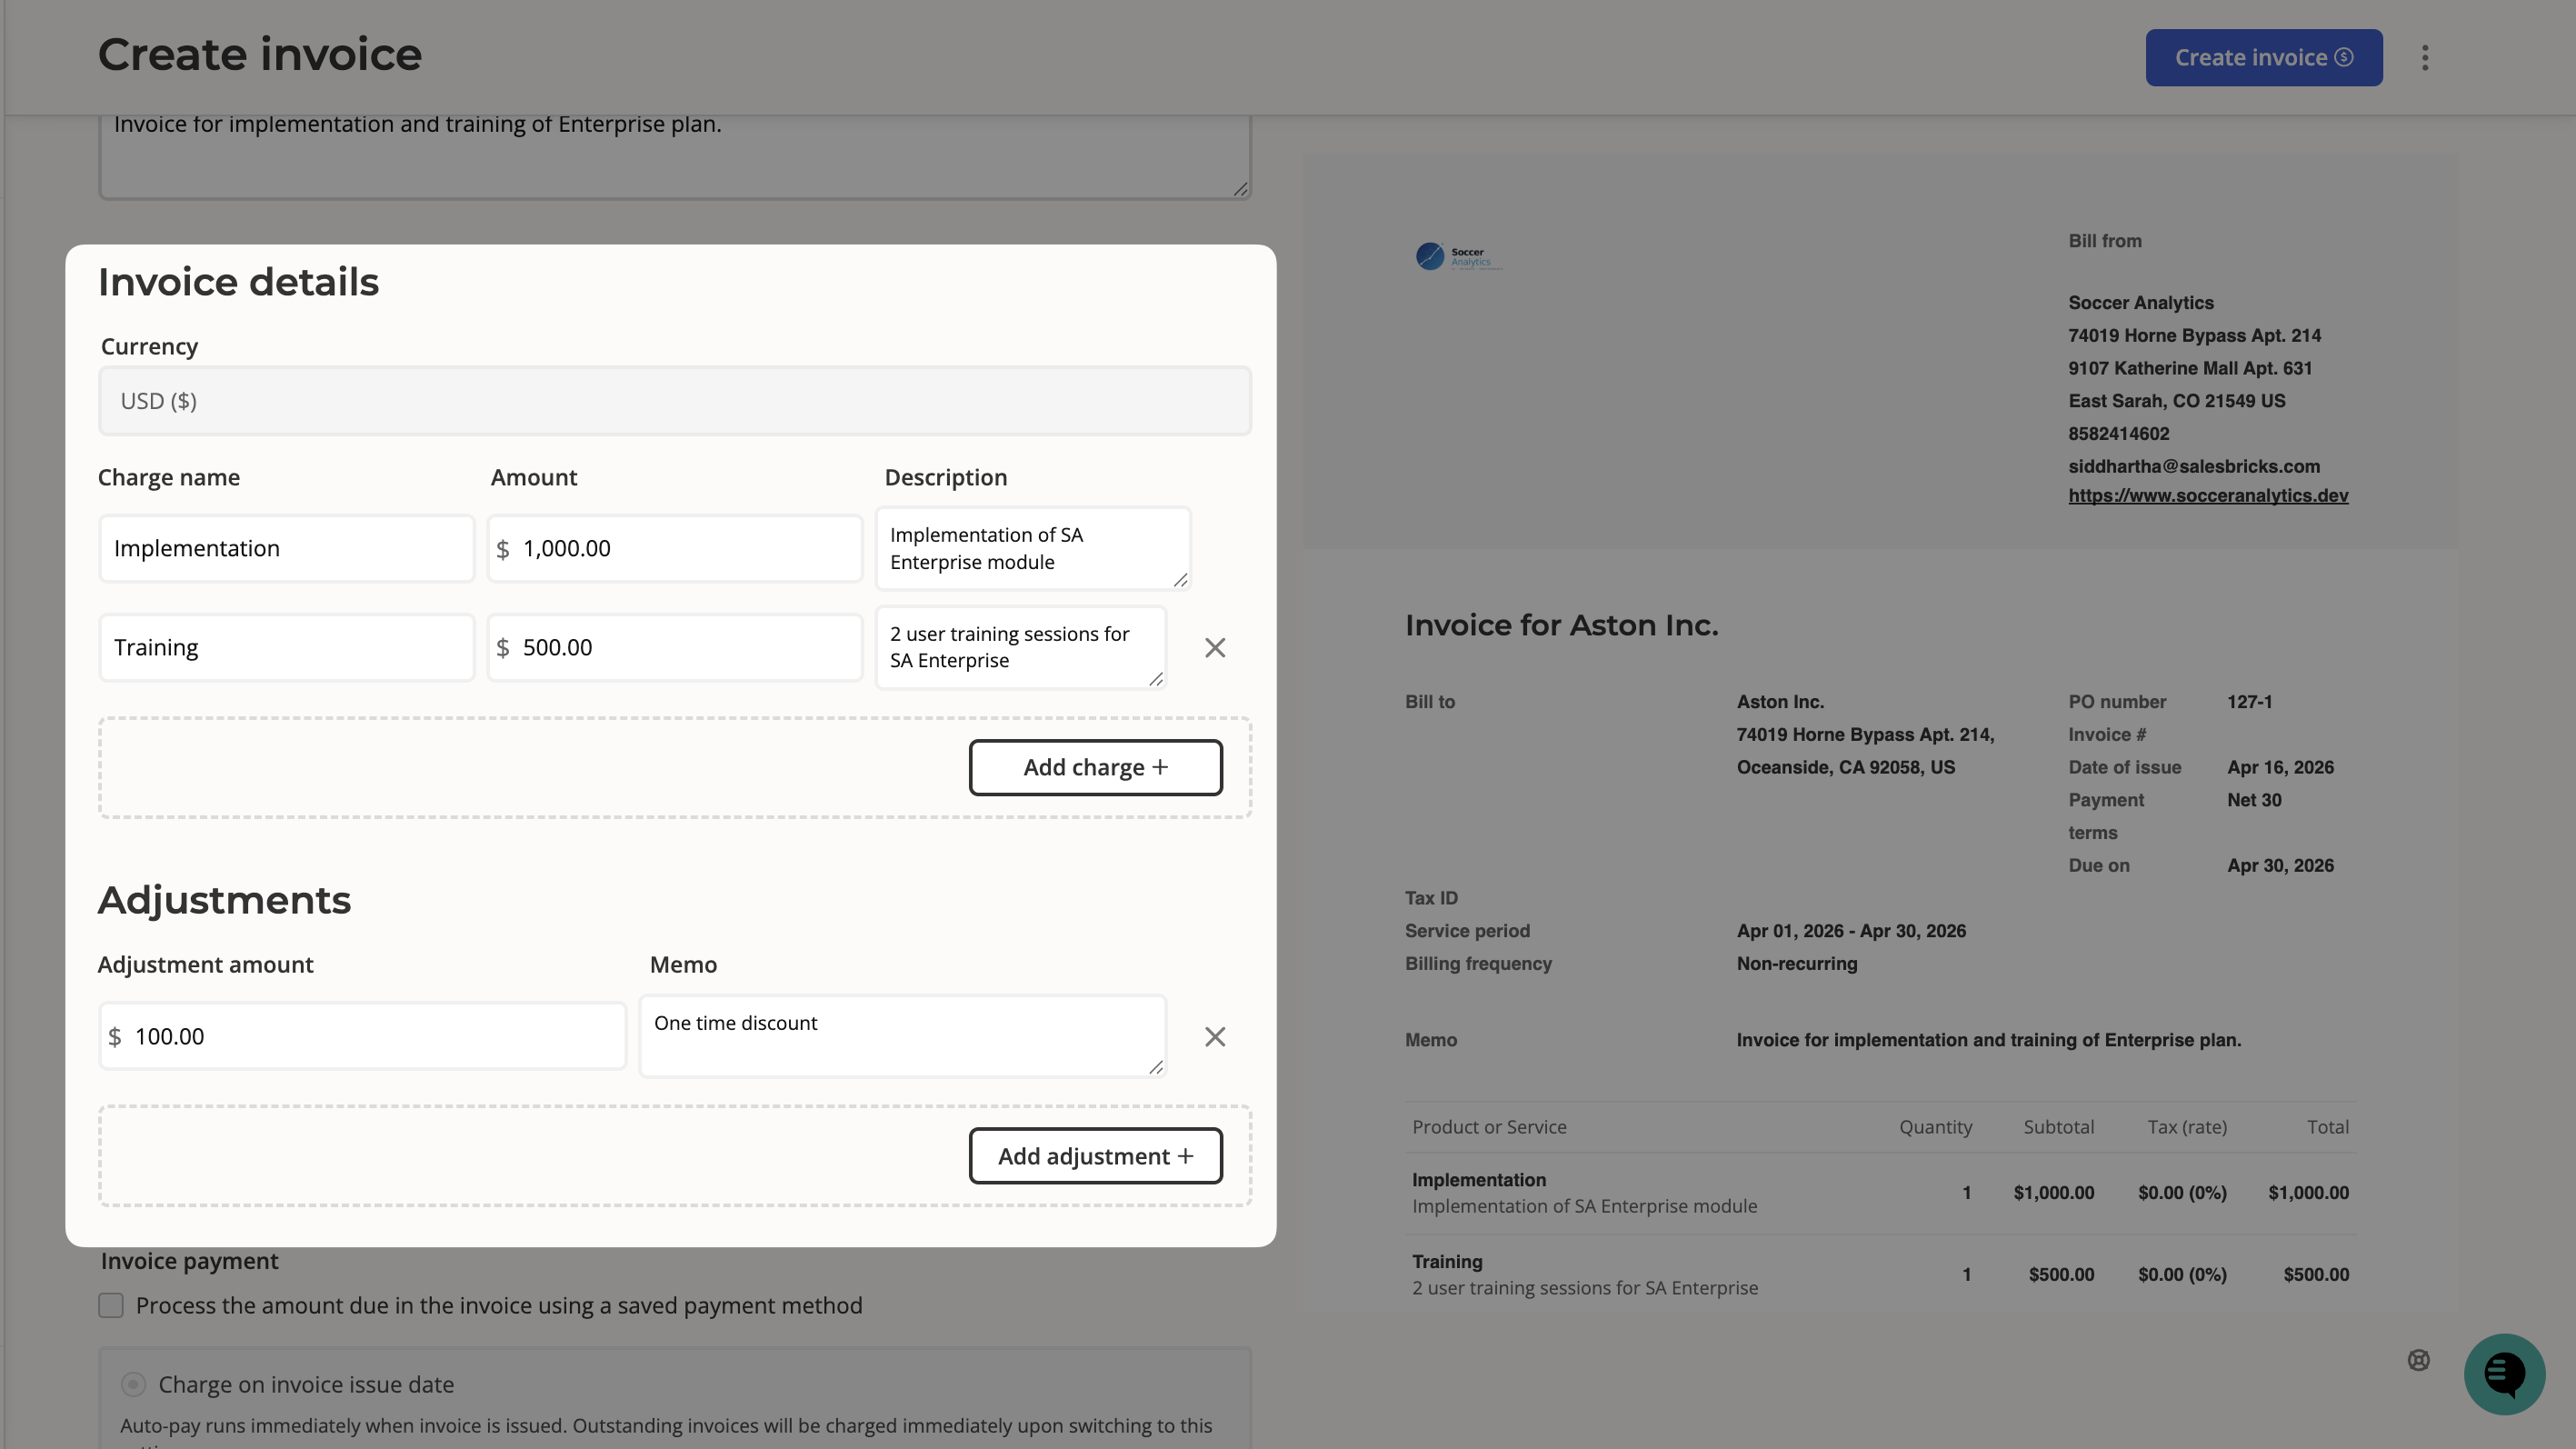
As you fill in the form on the left, a live PDF preview on the right updates in real time so you can see exactly what the customer will receive. 1. Fill in the invoice details- Accounts payable email — The email address where the invoice will be sent.
- Purchase order number (optional) — A PO number for the customer’s records.
- Due date — When payment is expected.
- Start date / End date (optional) — Define a service period for the charge.
- Invoice memo (optional) — A short note that appears on the invoice (e.g., “One-time invoice for implementation fees”).
- Charge name — The name of the product or service (e.g., “Implementation”).
- Amount — The dollar amount for the charge.
- Description — A description that appears on the invoice (e.g., “Implementation of premium plan”).
Use descriptive line items like “January consulting, 10 hours” rather than just “Consulting” so customers clearly understand what they’re being charged for.
| Option | Behavior |
|---|---|
| Charge on invoice issue date | Auto-pay runs immediately when the invoice is issued. Outstanding invoices will be charged immediately upon switching to this setting. |
| Charge on invoice due date | Auto-pay runs on the due date based on the set payment terms (e.g., Net 30). |
| Charge on invoice due date (order form only) | Auto-pay runs on the due date for order form orders only. Electronic payment orders are charged immediately. |
Attachments on one-off invoices are stored at the invoice level only — they are not inherited by subscriptions or other invoices.
- Create and send invoice now — The invoice is created and the customer is notified via email.
- Create only — The invoice is created but not sent. You can send it later from the bill statement page.
After the invoice is created
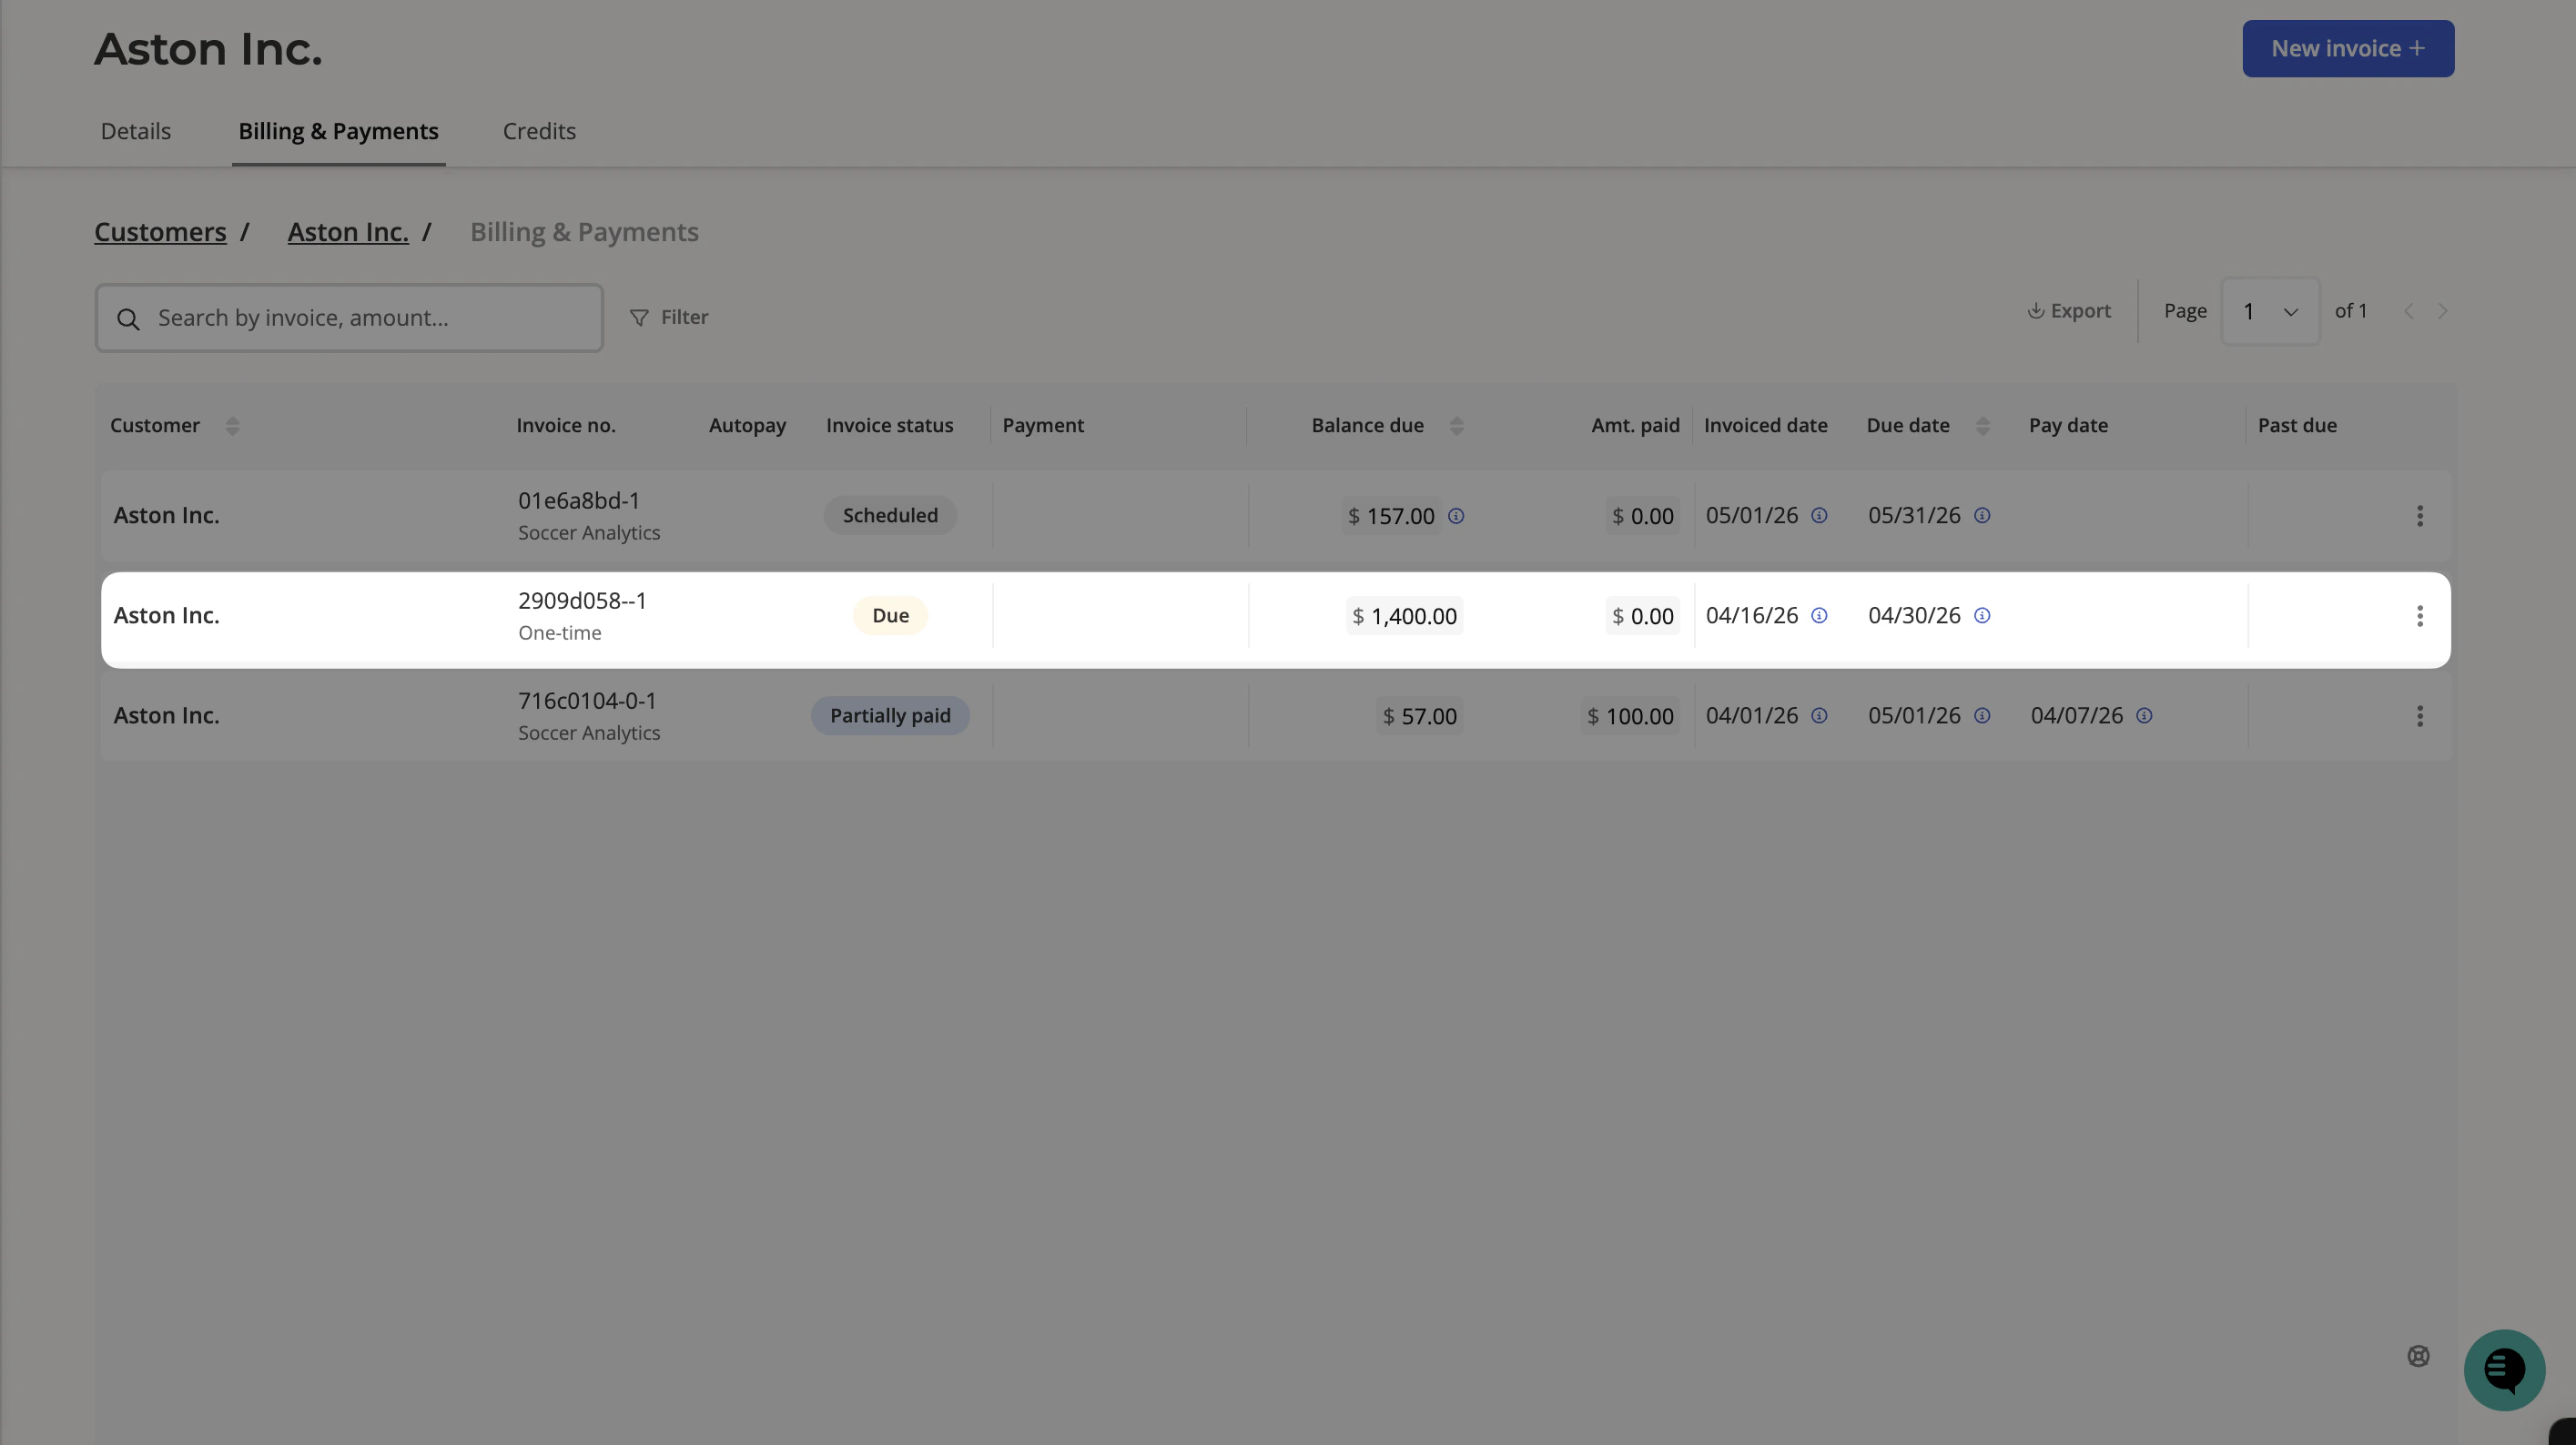
Once created, the one-off invoice appears in the customer’s Billing & Payments tab labeled as One-time to distinguish it from subscription invoices. You can click into it at any time to open the Bill statement page, where you can:- View the summary — See invoice totals, line items, service period, billing frequency, and payment terms in one place.
- Record a payment — Manually mark the invoice as paid if payment was collected outside of Salesbricks.
- Share the invoice — Send or resend the invoice to the customer.
- Adjust the invoice amount — Modify the total if needed.
- Edit details — Update fields like the memo, PO number, or attachments.
- Regenerate or download the PDF — Get a fresh copy of the invoice document.
Applying a one-off invoice as credit to a new subscription
If a customer has already paid a one-off invoice — for example, a deposit or prepayment — you can apply that invoice as a credit toward a new subscription order. The credit is deducted from the subscription’s total contract value at the time the order is created. To create an order with invoice credit:- Go to Orders and click New order +.
- Search for and select the customer.
- Select New subscription with invoice credit and click Create order.
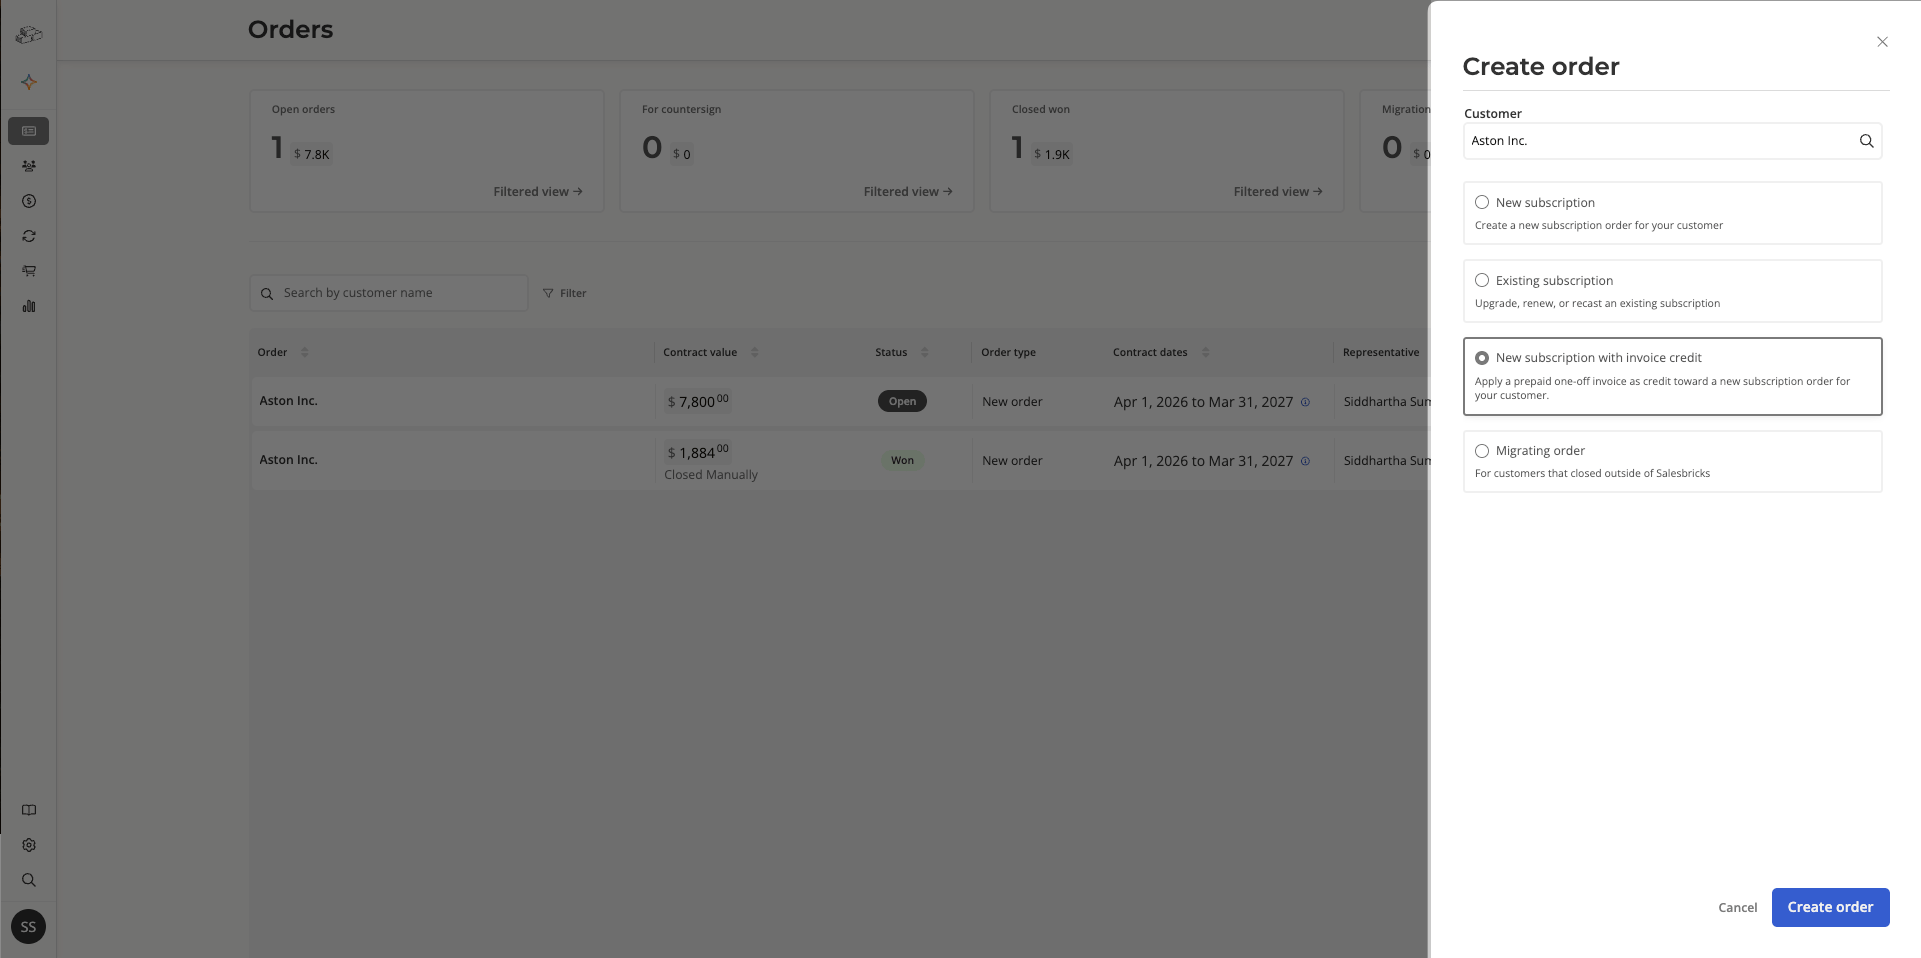
- Build the order as you normally would by selecting the product, plan, add-ons, deal structure, and contract terms.
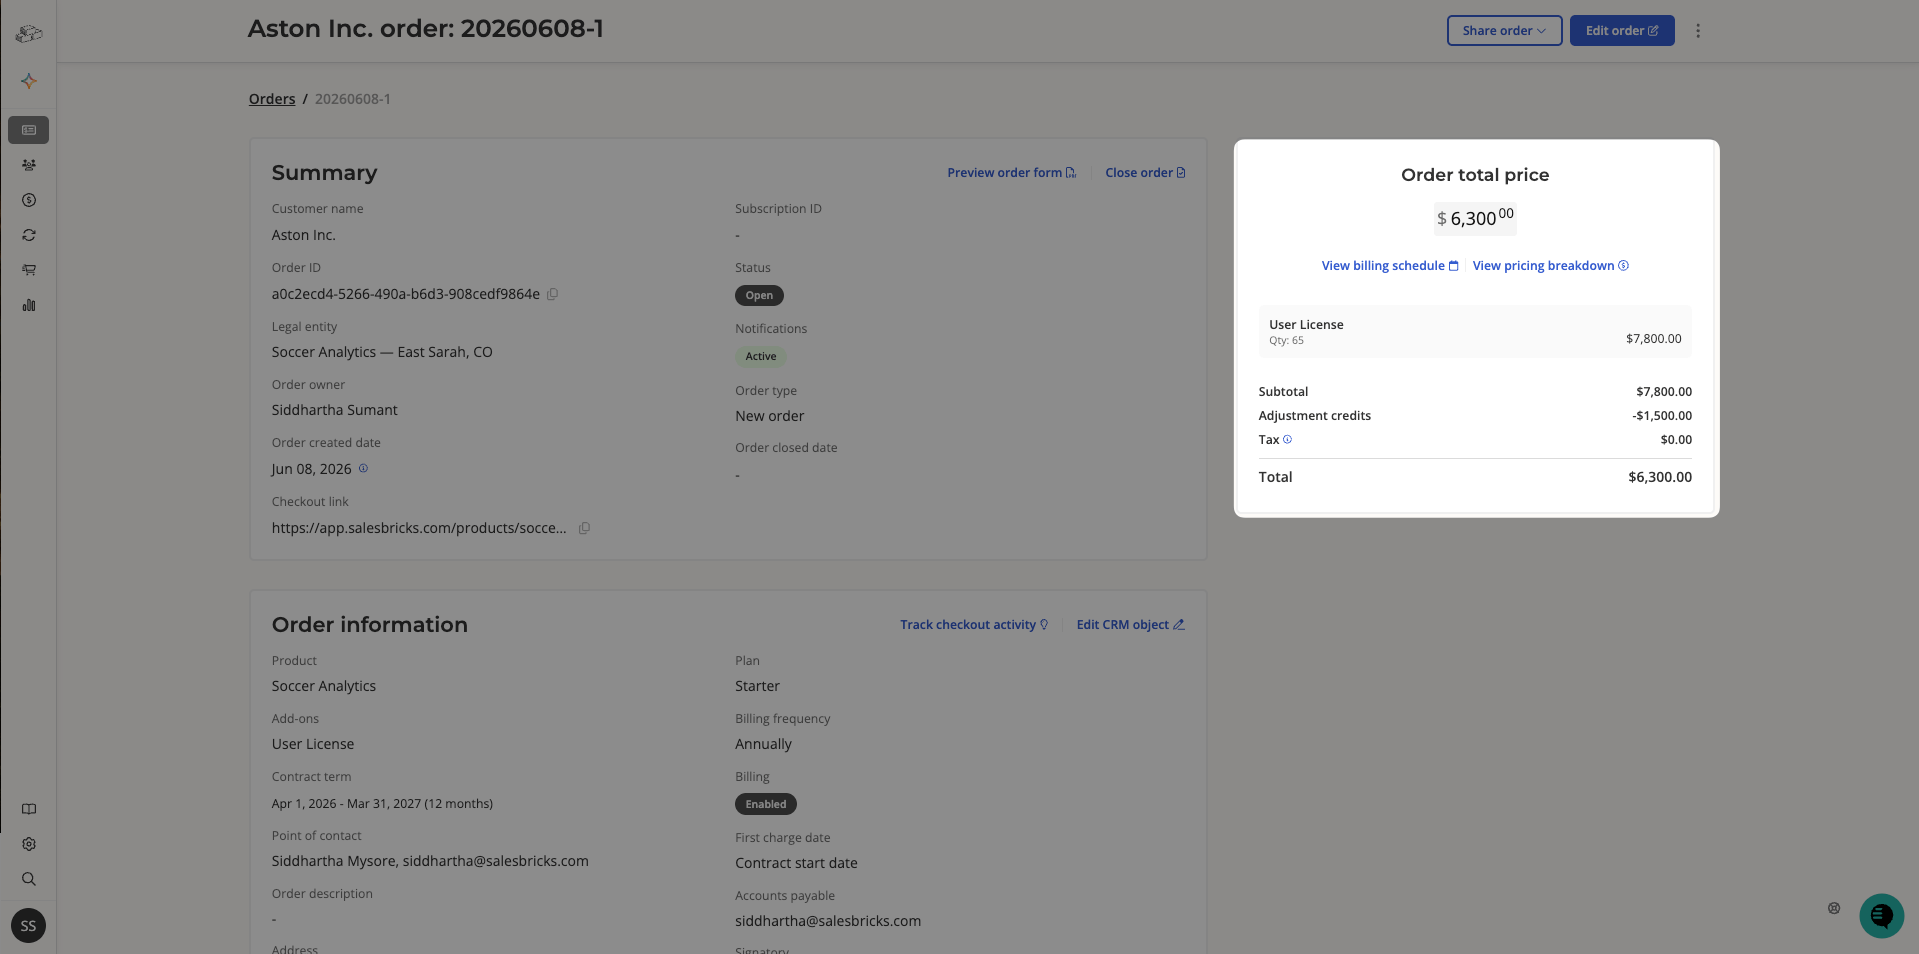
- The one-off invoice is automatically reflected as Adjustment credits in the pricing summary on the right, reducing the total amount due.